
This translation may not reflect the most recent updates from the source guide. Help update the translation or view the source guide.

更换Playstation 4的风扇

What you need

Video Overview

  1. 更换Playstation 4的风扇, 卸下硬盘盖子: step 1, image 1 of 3 更换Playstation 4的风扇, 卸下硬盘盖子: step 1, image 2 of 3 更换Playstation 4的风扇, 卸下硬盘盖子: step 1, image 3 of 3
    • 双手握紧PS4的中间空隙

    • 用拇指向外侧推开上盖。

    • 向上和向后提,这样就可以移除盖板。

  2. 更换Playstation 4的风扇, 卸下硬盘盒支架: step 2, image 1 of 2 更换Playstation 4的风扇, 卸下硬盘盒支架: step 2, image 2 of 2
    • 使用十字螺丝刀卸下将硬盘支架固定到外壳的 6.5 毫米螺丝。

  3. 更换Playstation 4的风扇, 取出硬盘盒: step 3, image 1 of 3 更换Playstation 4的风扇, 取出硬盘盒: step 3, image 2 of 3 更换Playstation 4的风扇, 取出硬盘盒: step 3, image 3 of 3
    • 拉出硬盘盒。

    • 注意不要跌落硬盘。突然的剧烈外力是有可能损坏硬盘。

  4. 更换Playstation 4的风扇, 翻转PS4: step 4, image 1 of 1
    • 翻转PS4,底部朝上,背部插口区向你

  5. 更换Playstation 4的风扇, 移除保修贴纸: step 5, image 1 of 3 更换Playstation 4的风扇, 移除保修贴纸: step 5, image 2 of 3 更换Playstation 4的风扇, 移除保修贴纸: step 5, image 3 of 3
    • 移除后部中间的两个保修贴纸,可以看见两颗螺丝

  6. 更换Playstation 4的风扇, 移除螺丝的塑料盖子: step 6, image 1 of 2 更换Playstation 4的风扇, 移除螺丝的塑料盖子: step 6, image 2 of 2
    • 移除每个边角的塑料盖子,可以看见螺丝

  7. 更换Playstation 4的风扇, 拧下后盖螺丝: step 7, image 1 of 2 更换Playstation 4的风扇, 拧下后盖螺丝: step 7, image 2 of 2
    • 取下4个7.2毫米的内六角螺丝

  8. 更换Playstation 4的风扇, 拆下底壳: step 8, image 1 of 2 更换Playstation 4的风扇, 拆下底壳: step 8, image 2 of 2
    • 在此插入翻译用拇指向上顶起底壳并取下。

    • 此底壳为塑料卡扣结构,移除时需要一些巧劲。

  9. 更换Playstation 4的风扇: step 9, image 1 of 2 更换Playstation 4的风扇: step 9, image 2 of 2
    • 用镊子拔出电源供给接口,使之与主板断电。

    • 如果感觉电源连接器被卡住了,用撬棒轻轻地把连接器撬出来。

  10. 更换Playstation 4的风扇, 卸下电源装置: step 10, image 1 of 2 更换Playstation 4的风扇, 卸下电源装置: step 10, image 2 of 2
    • 卸下三个 9.7 mm Torx 安全螺丝。

    • 卸下两个 41 毫米十字螺丝和支架。

  11. 更换Playstation 4的风扇: step 11, image 1 of 3 更换Playstation 4的风扇: step 11, image 2 of 3 更换Playstation 4的风扇: step 11, image 3 of 3
    • 将电源直接向上提起并从 PS4 中取出。

    • 电源通过左侧的插脚牢固地固定到位。可能需要多次尝试才能将其移除。

    • 在重新组装期间,确保插脚对齐,然后将电源按入到位。

  12. 更换Playstation 4的风扇, 取下 Wi-Fi 天线: step 12, image 1 of 2 更换Playstation 4的风扇, 取下 Wi-Fi 天线: step 12, image 2 of 2
    • 使用撬棒的尖端从主板上断开天线电缆。

  13. 更换Playstation 4的风扇: step 13, image 1 of 3 更换Playstation 4的风扇: step 13, image 2 of 3 更换Playstation 4的风扇: step 13, image 3 of 3
    • 使用镊子或手指抓住天线电缆并将其从电缆导轨中取出。

  14. 更换Playstation 4的风扇: step 14, image 1 of 3 更换Playstation 4的风扇: step 14, image 2 of 3 更换Playstation 4的风扇: step 14, image 3 of 3
    • 使用镊子或手指将天线电缆从光驱电缆下方穿出。

  15. 更换Playstation 4的风扇: step 15, image 1 of 2 更换Playstation 4的风扇: step 15, image 2 of 2
    • 卸下固定天线的 9.7 毫米 Torx 安全螺丝。

  16. 更换Playstation 4的风扇: step 16, image 1 of 2 更换Playstation 4的风扇: step 16, image 2 of 2
    • 取下 Wi-Fi 天线。

  17. 更换Playstation 4的风扇, 断开光驱: step 17, image 1 of 3 更换Playstation 4的风扇, 断开光驱: step 17, image 2 of 3 更换Playstation 4的风扇, 断开光驱: step 17, image 3 of 3
    • 用指甲按下光驱顶部带状电缆的金属释放杆。

    • 用手指或镊子通过拉动黑色拉环断开带状电缆。

    • 重新插入带状电缆时,无需按下金属杆。完全插入后,你会听到咔嗒声。

  18. 更换Playstation 4的风扇: step 18, image 1 of 3 更换Playstation 4的风扇: step 18, image 2 of 3 更换Playstation 4的风扇: step 18, image 3 of 3
    • 用指甲按下连接到主板的带状电缆的金属释放杆。

    • 用手指或镊子通过拉动黑色拉环断开带状电缆。

    • 将带状电缆放在一边以便重新组装。

    • 重新插入带状电缆时,无需按下金属杆。完全插入后,你会听到咔嗒声。

  19. 更换Playstation 4的风扇: step 19, image 1 of 2 更换Playstation 4的风扇: step 19, image 2 of 2
    • 用手指或镊子从主板上断开光驱电缆。

  20. 更换Playstation 4的风扇: step 20, image 1 of 3 更换Playstation 4的风扇: step 20, image 2 of 3 更换Playstation 4的风扇: step 20, image 3 of 3
    • 用手指或镊子将光驱电缆从将其固定到位的电缆导轨上取下。

  21. 更换Playstation 4的风扇, 卸下光驱: step 21, image 1 of 2 更换Playstation 4的风扇, 卸下光驱: step 21, image 2 of 2
    • 卸下固定光驱的四颗螺丝。

    • 三颗 9.7 毫米 Torx 螺丝

    • 一颗 6.2 毫米十字螺丝

  22. 更换Playstation 4的风扇: step 22, image 1 of 2 更换Playstation 4的风扇: step 22, image 2 of 2
    • 将光驱垂直向上提起并从 PS4 中取出。

  23. 更换Playstation 4的风扇, 取下上壳: step 23, image 1 of 2 更换Playstation 4的风扇, 取下上壳: step 23, image 2 of 2
    • 卸下固定上壳的两颗 9.7 毫米 Torx 螺丝。

  24. 更换Playstation 4的风扇: step 24, image 1 of 3 更换Playstation 4的风扇: step 24, image 2 of 3 更换Playstation 4的风扇: step 24, image 3 of 3
    • 向上和向后提起上壳以将其从 PS4 上卸下。

    • 上壳由正面的塑料卡舌固定到位。将它们分开需要很大的力量。

  25. 更换Playstation 4的风扇, 取下上部 EMI 屏蔽: step 25, image 1 of 2 更换Playstation 4的风扇, 取下上部 EMI 屏蔽: step 25, image 2 of 2
    • 卸下用于固定上部 EMI 屏蔽的十二颗 9.7 毫米 Torx 螺丝。

  26. 更换Playstation 4的风扇: step 26, image 1 of 3 更换Playstation 4的风扇: step 26, image 2 of 3 更换Playstation 4的风扇: step 26, image 3 of 3
    • 此步骤将向你展示如何正确拧下压板。

    • 卸下两颗 15.6 毫米十字螺丝。

    • 一次将每个螺丝旋转半圈,逐渐拧下压板。

    • 在两个螺丝之间交替以保持压板上的压力均匀。

    • 在拧下另一侧之前不要完全拧下一侧,否则可能会损坏处理器。

  27. 更换Playstation 4的风扇: step 27, image 1 of 1
    • 取下压板。

  28. 更换Playstation 4的风扇: step 28, image 1 of 2 更换Playstation 4的风扇: step 28, image 2 of 2
    • 卸下上部 EMI 屏蔽罩。

  29. 更换Playstation 4的风扇, 卸下主板: step 29, image 1 of 2 更换Playstation 4的风扇, 卸下主板: step 29, image 2 of 2
    • 将撬棒的平端插入风扇电缆和主板之间。

    • 扭动撬棒,垂直向上提起接口,然后将其从主板上断开。

  30. 更换Playstation 4的风扇: step 30, image 1 of 2 更换Playstation 4的风扇: step 30, image 2 of 2
    • 抓住 PS4 正面的主板边缘。

    • 提起主板,直到 USB 端口脱离 PS4 外壳。

  31. 更换Playstation 4的风扇: step 31, image 1 of 3 更换Playstation 4的风扇: step 31, image 2 of 3 更换Playstation 4的风扇: step 31, image 3 of 3
    • 将主板从 PS4 中取出。

    • 在使用本指南安装主板之前,在处理器上涂抹一层新的导热膏。

    • 未能正确安装新的导热膏会导致你的 PS4 过热。

    • 首先插入主板的 I/O 侧,然后将另一侧放入。

  32. 更换Playstation 4的风扇, 拆下电磁屏蔽板: step 32, image 1 of 2 更换Playstation 4的风扇, 拆下电磁屏蔽板: step 32, image 2 of 2
    • 拧下3颗6.5毫米的螺丝。

  33. 更换Playstation 4的风扇: step 33, image 1 of 2 更换Playstation 4的风扇: step 33, image 2 of 2
    • 向上提起PS4的电磁屏蔽板和散热模块。

  34. 更换Playstation 4的风扇, 拆下风扇: step 34, image 1 of 2 更换Playstation 4的风扇, 拆下风扇: step 34, image 2 of 2
    • 拧下风扇上的2颗6.2毫米螺丝

  35. 更换Playstation 4的风扇: step 35, image 1 of 2 更换Playstation 4的风扇: step 35, image 2 of 2
    • 向上提起风扇

  36. 更换Playstation 4的风扇: step 36, image 1 of 3 更换Playstation 4的风扇: step 36, image 2 of 3 更换Playstation 4的风扇: step 36, image 3 of 3
    • 使用镊子小心移除缓冲泡棉

    • 然后重新粘在新风扇的相同位置

  37. 更换Playstation 4的风扇: step 37, image 1 of 3 更换Playstation 4的风扇: step 37, image 2 of 3 更换Playstation 4的风扇: step 37, image 3 of 3
    • 去下所有的缓冲泡棉块

    • 可以使用吹风机或热风枪软化背胶

    • 重新沾在新风扇的相同位置

  38. 更换Playstation 4的风扇: step 38, image 1 of 3 更换Playstation 4的风扇: step 38, image 2 of 3 更换Playstation 4的风扇: step 38, image 3 of 3
    • 去下固定风扇电源线的胶条

    • 放在新风扇的相同位置用以固定风扇电源线

Conclusion

参照下列步骤的相反顺序重新安装你的设备。

废旧电子元件回收 R2 or e-Stewards certified recycler.

维修不成功?请查看我们的帮助页面Answers community
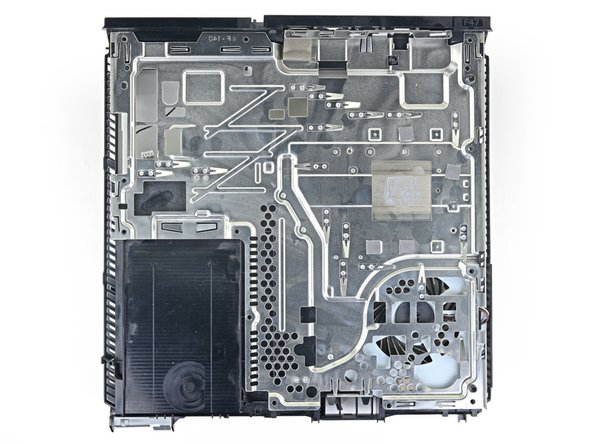
观察比较原装件和替换件。

安装之前需要去除背胶然后把其余部件重新安装回去

275 other people completed this guide.

Special thanks to these translators:

en zh

92%

These translators are helping us fix the world! Want to contribute?
Start translating ›

Sam Omiotek

Member since: 02/25/19

73,429 Reputation

288 Guides authored

35 Comments

Great guide, but where to buy a fan for the ps4?!

frankeinarhaugen - Reply

Look one ebay, that's where my store gets the majority of out parts from. considering we fix computers.

jonathon saygidia -

Will this guide work with the CUH-1200 model?

Jose Alvizo - Reply

excellent camarade !

Beaux travail !

Attention au principe de peter... Niveaux d'incom.......

je déconne !

P.S. Ne pas se ronger les ongles ca evite les pinces a épiler !

je déconne pas !

Inversement ce pas très esthétique...

Change rien !

Dall - Reply

My PS4 has been overheating so I decided to take it apart and clean it. I cleaned it well but it still over heats the fan will try to start up but cuts back off plz help

Tristen hudson - Reply

Add Comment

View Statistics:

Past 24 Hours: 92

Past 7 Days: 604

Past 30 Days: 2,893

All Time: 500,502