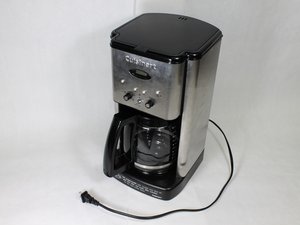
I also had this issue exactly as described. I'd run around 8 full cleaning cycles, including w/ vinegar, and turned the thing inside-out looking for stray grounds in the pumping process. It was pristine and I even stuck some wire down the lengths of the integrated tubes (the hard plastic ones) to pipe-clean them. All clear.
Hoses were completely clear. Heating element was fine (and the machine was indeed making a lot of steam). However, by the end of a cleaning cycle, there was never more than a centimeter of water in the carafe.
Here was my process for fixing it:
I ended up cutting open the old hoses to look for issues early on, and ordered 1m of silicone food-safe high-temp hosing in advance anticipating a replacement. You will likely need the same.
The issue it turned out, was that the one-way valve inside the in-going hose was stuck virtually closed, likely because of oily residue leeched out of the grounds. I cleaned it and the little plastic ball inside it, pushed it back inside my new hose, and ran a regular cycle. Immediately a huge improvement. Like new again.
Here are some tips for replacing the hosing:
- I opted for 13mm exterior 9mm interior because I was worried it would be too difficult to get a new hose over the heating element. This ended up being a good idea, as it was still difficult to do. Total bill from Amazon was $14 CAD, and I have extra in case I need to replace again. No leakage yet.
- I needed to cut the hoses to get them off the heating element. As others have noted, it seems that extended use tends to solidify the grasp of the hosing onto the heating element. Don’t anticipate being able to pull the hoses off.
- Slicing into the input tube, you’ll find the problem valve. Extract it by cutting the hosing around the rigid-feeling part of the tube. Careful, it’s in two parts (cage and a little plastic ball which moves).
- Wash the valve in a bowl, not the sink, as it’s easy to lose track of the plastic ball and accidentally flush it down the drain.
- After extracting and cleaning the one-way valve, put it into your new input hose. Don’t push it in too far yet… rather, give it a blow from the opposite end to make sure it’s facing the right direction. It should make a kind of bubbly noise, and air should pass nearly freely through it. If it instead locks up and your breath is unable to move through, you’ve put it in the wrong way, or more cleaning is needed. Once you’re sure, push it inside far enough to give room for the connection to the heating element.
- For integrating your new hosing, on the heating element side of the hosing, I needed to snip 2-3mm down the length of the hosing to aid with fitting over the diameter of the heating element.
- I used the rigidity of my new hose, and a head-on light, to push the hosing over the plastic attachment points. These were much easier than the heating element, but still snug with the 9mm interior hosing. This was fortunate because I had no appropriate tools, and my hands were too big to really get in there.
- If you can get the wire clamps back onto the hosing, that’s ideal. I only managed to get the clamps back onto the heating element side (which I felt was more necessary since I snipped into those sides)
Hope this helps!

 1
1 

1 Comment
I have the same issue. Started after the coffee maker over flowed when carafe wasn’t seated correctly. There was no filter in the reservoir. I tried detaching the hoses and blowing them out in case there were grounds clogging. This didn’t solve the issue.
by David Owen