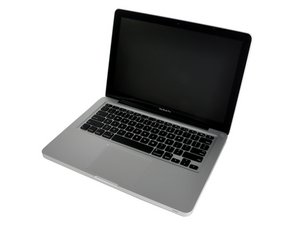
Your system only has a SATA II (3.0 Gb/s) SATA port so the SSD you use must be able to run at this I/O speed. Many of the current generation SSD’s are Fixed SATA III (6.0 Gb/s) speed. Some offer Auto sense technology so it will work within older SATA I (1.5 Gb/s) or SATA II (3.0 Gb/s) or SATA III (6.0 Gb/s) based systems in some cases only SATA II and SATA III.
- Your Samsung 860 EVO is an auto sense drive so it should not be an issue here!
A common issue in the older Unibody MacBook Pro systems is the HD SATA cable either breaks down or can’t support the higher data rate a SSD can offer over a HDD. Whenever I upgrade a system with a SSD I always replace the cable! And I’m very careful on what cable I put in as you often need to newer version Vs the original one that was used. Here I would use MacBook Pro 13" Unibody (Mid 2009-Mid 2010) Hard Drive Cable Apple P/N 922-9062. I also place a strip of electricians tape on the uppercase where the cable crosses over. I’m also careful not to crease the cable around the corners, instead I made sure they are nice even arcs as the sharp bends damage the cable!
You also have one more issue! While not a killer like the other two above your system may not support internet recovery depending on what your systems firmware is running. In addition you maybe facing a second issue if the drive was setup on another Mac. This is related to the new APFS format SSD drives not have. If your system was not running High Sierra before hand it won’t have the needed firmware update to support APFS boot drives.
OK, We’ve gone over all of the issues you face here. Here’s what I would do:
Get a cable like this one: SATA to USB Adapter Cable So you can have a way you can setup your new SSD drive while you have the HDD still in your system.
Download Sierra (not High Sierra!) from the Apps Store if you don’t have a copy presently on your system. This is the last HFS+ version before APFS was introduced. I prefer it to APFS on SATA based systems as APFS has queuing issues across SATA drives. If you had a PCIe based system (retina) I would have recommended going to Mojave.
Create a USB thumb drive OS installer following this guide: How to create a bootable macOS Sierra installer drive Think about a skydiver he doesn’t jump without a backup chute! This is our backup just in case!
Now lets open the system and replace that HD SATA cable and put back in the HD. Still working right?
OK, lets hookup the SSD using the SATA to USB cable connection (you could also install the SSD at this point and put the HD on the cable connection)
Now lets run the OS installer to prep the SSD! Run Disk Utility to prep the SSD and then run the OS installer. Your system will reboot a few times so don’t panic if it appears the system shut down on you and you’ll also hear a long tone as well.
At the end of the installer it will ask you if you want to transfer your user accounts, Apps and stuff. Be careful here as you don’t want to over load your SSD! Unlike HDD’s which can run with very little free space. Here SSD’s need space! Depending on the size the smaller drives 256 GB or smaller need 1/3 left unused! 512 GB and 1TB need 1/4 free and 2 and 4 only need 1/8 free. This allows the OS and your Apps enough work space and prevent excessive wear leveling activities which will shorten your SSD’s lifespan!
At least migrate your user accounts and Apps to the SSD.


 1
1 
 54
54  291
291 

2 Comments
What system are you running?
by mayer
The "erase" option in the Disk Utility did the job. And as performance goes, I can def feel a difference in startup and so on. So no, the default hard drive cable probably doesn't get the full potential of the Evo 860 SSD, but it def improves.
by Mickel Wurr