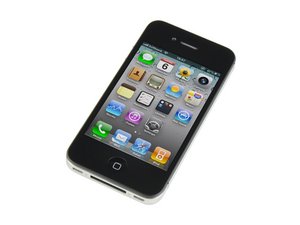
Fourth generation iPhone. Repair is straightforward, but the front glass and LCD must be replaced as a unit. GSM / 8, 16, or 32 GB capacity / Model A1332 / Black and White. This page aims to help users troubleshoot, fix, and seek help for the iPhone 4.

2375 Questions View all

How do I attach the LCD to the Screen?

I have fixed 30 to 35 iPhone 2G, 3G, and 3GS. I have fixed just about anything that is wrong with an iPhone. But I am having trouble with the iPhone 4. I have taken one apart, and now I cant not seem to figure out how to attach the digitizer to the rubber frame, and how to attach the LCD to the screen. In all the older models it was pretty strait forward, but this has gone beyond my ability to understand. I have bought two LCDs and two screens, but it looks like I should have bought just the entire assembely. Please can anyone help me with this problem. Is there a way to attach this, or should I spend 150 on the entire piece? There is no websites out there that show how to do this fix.

PLEASE HELP ME!!!!

Answered! View the answer I have this problem too

Is this a good question?

Score 1
Add a comment

2 Answers

Chosen Solution

Check this post out.

The pieces are not inseparable without causing serious damage to your phone. People will still try to sell you the parts separately but they are ripping you off. Sorry, but you are going to have to replace the entire assembly including the LCD and digitizer.

Was this answer helpful?

Score 4

1 Comment:

+ This is why we pay you the big bucks.

by

Add a comment

Not necessarly true!!, I have replaced the LCD only, but taking off the damaged LCD from the good digitiser is really hard!!!

1. Put a screen protector on the original Digitiser!!!!! ( can be a second hand one, just wash it with soap, shake off the excess water, the remainig water will squeegie out, you need this to protect the Digitiser!!!)

2. Use a Hair Dryer to heat up entier screen front side, this makes the glue soft.

3.You have a small window of time to pry off the LCD< you will have to break it, so don't try to worry, it will smash up into tiny pieces and statter, so this is why you the screen protector on the front side, use a guitar pick to slowly pry away the old LCD smashing it up as you go, keep the Digitiser FLAT or you will break it!! try to do 1/8 area at a time

4. re heat!!! do step 3 again , over and over till you have it off.

5. Clean up the digitiser with a broken pice of LCD sticky side, then finall claen with Alcohol.

6 install your Generic LCD to middle board and carefully place digitiser frame around it, and install the 7 screws.

7. make sure the LCD is dust & smudge Free, and place the Digitiser over, if it looks good and clean put the double side tape on Digitiser frame and final Fit the digitiser Glass.

Once it is all together only an Expert can tell the difference!!

People wont worry, as this repair is half the cost, just give them 2 options for repair, and 2 prices for fused or non fused repairs, hope this helps,!!

P.S> if you want a faster cheaper way just buy the Digitiser and LCD seperate and install to orginal Digitiser fram, carefull with home button Ribbon it breaks easy, so have a few spare just n case.
Was this answer helpful?

Score 2

2 Comments:

What's the performance difference between an LCD/digitizer combo that's glued together and that's double-sided taped together? I feel like that's a much larger gap than is intended to be there.

by

Plus then you have to make sure you are positioning the LCD correctly in relation to the digitizer or else you will have touch calibration issues. While it may be possible, it is not a repair for the average person.

by

Add a comment

Add your answer

martinjenn97 will be eternally grateful.
View Statistics:

Past 24 Hours: 0

Past 7 Days: 0

Past 30 Days: 2

All Time: 8,382