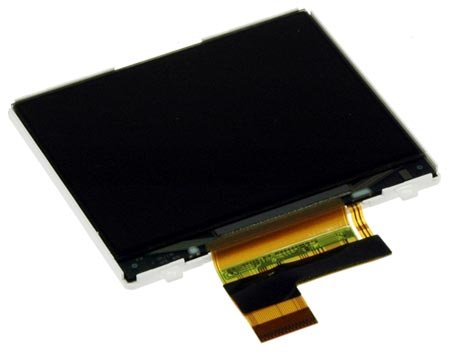
Click Image To Zoom
Installation Guide
iPod 5th Generation (Video)
Difficulty: Moderate
Required Tools
Add All Tools to Cart »Share this Product
Stories
My Problem
My colleague told me of his problem of a broken screen in his iPod video, and I volunteered to fix it for him.
My Fix
I took it apart before ordering a new one to see how it would go and if I had all the proper tools. The guide was spot on and made the tear down relatively simple. I have fixed iPod touches befor and this was WAY easier. The ribbons are not soldered but clipped instead. The guides from ifixit are great!
My Advice
I would advise anyone thinking of fixing an iPod video, to do it. You just need a little patience and ability to follow the instructions in the guide. It's pretty easy.
My Problem
My display was unreadible when the back light was on.
My Fix
The repair was easy, I did not have to unplug anything besides the screen. This is the second time I've repaired my IPod using parts from this site, once again it saved me from buying a new one.
My Advice
They don't send you tools, but besides prying the case apart you may not need them depending on the part.
My Problem
Wanted a high capacity ipod for music, and my brother had one. Problem was that it had a broken screen. So he gave it to me for free and left me to repair it.
My Fix
After my brother told me about this website, it was very easy. Bought the parts, and added a battery along with it, you know... just in case. It shipped quickly and installed it that day using the guide to make sure I didnt do anything asinine.
My Advice
My advice is to use this site, and also to make sure you buy the right tools. It makes it much faster and easier and more reliable to repair things.
My Problem
the battery exploded and broke the LCD screen
My Fix
repair went smoothly with the guide on ifixit worked 100%
My Advice
be careful when removing the ribbons from the board could be damaged very easy
My Problem
The battery, on my first gen. and already 8 y.o. Ipod 30Gb, wasn't holding is charge anymore (almost). I heard about Fixit in early 2012. I decided to give it a try and to give a second breath to this long time travel friend.
At the same time, I replaced the color display, because it had start to fade. Being there for the battery was the perfect timing to replace it.
My Fix
The repair went good. I took more time than it should, because I didn't want to make it worst than what it was. Removing the front panel was the "most" delicate operation. After that, it went really good.
I was a bit disappointed while replacing the color display. This operation went almost flawless. But not having a small replacement strip for the electrical tape, like the old one protecting the welding spots (print circuit) against the alu. frame. I had to delayed the installation to the mext day, after bying some special tape. The rest went also very good.
My Advice
Be patient with the front panel! Take your time to look at the things, TWICE, before you pull to hard...and read the very well done guide. It's almost idiot proof!!
My Problem
My 6-year-old iPod Video had started flaking out on me when the headphone jack started failing. The battery hadn't been holding a charge for more than half an hour, either, and the display had a few dead pixels from being dropped a couple of times. Yeah, it needed some work.
My Fix
The repairs went pretty well! I'm actually glad I cracked it open using the iFixit guides or I wouldn't have noticed the logic board needed replacing too. I got it from another seller because it was out of stock here, but followed the instructions here for every part (battery, display, headphone jack & logic board) and my iPod is back to life!
My Advice
My advice is be patient and follow the guides. If anything goes wrong, the guys on the phone line are real nice, too!
My Problem
The video display needed to be repaired
My Fix
Replacing the video display went smooth. However, along the way the hard drive was corrupted and I can't use my iPod video with the beautiful new display. It may have corrupted because the lock bar on my iPod video was not the same as the lock bar in your repair guide.
My Advice
No advice.
My Problem
My wife went to get her old iPod 30 GB out of the drawer and found that the battery had expanded and taken out the video display and the front panel at the same time. I decided I could fix it if I could get the parts, which I found on iFixit's website.
My Fix
Overall, the repair went good. I had already used the directions to open the device and determine what was damaged, so it was already apart when I got the parts. I forgot to check the directions initially when taking the parts out of the main support frame and had some problems getting them back together.
After I realized my error, the parts went together smoothly. The only gotcha was that I didn't plug it in to the charging cable before final assembly and the video display wasn't working initially. I didn't seat it properly. After a difficult time getting the case opened, I got the cable reseated and the device was working. Didn't need to reload the device.
My Advice
Carefully check that everything is working BEFORE reassembling the outer case. Save yourself the pain of taking it apart again.
My Problem
My iPod took an impact on the top edge of the casing which damaged the screen. Everything else was still fine, but the top half of the display was cracked and unreadable. For a long while afterwards I was still using it, trying to navigate the menus from memory. It was impossible to play any of the games or view photos so I ended up using it less often. Eventually I couldn't remember the menus and was getting frustrated at not being able to locate some of my favourite songs and playlists. Something had to be done to fix it.
My Fix
The repair was fairly easy, although getting into the device took a long time as I was hesitant to apply too much force to separate the plastic front from the back casing. The rest of the procedure was just a simple matter of following all the step-by-step instructions. The new display fitted in perfectly and reassembling the device took just a couple of minutes. The iPod works perfectly once again, so now I can take my entire music collection with me (only room for about a third of my collection on my iPhone).
My Advice
Don't think just because your device may be an older model that it is not worth repairing. It is definitely worth it to have it working properly again. What's the worst that can happen by attempting the repair yourself? - you break an already broken device. This is the third repair I have done using ifixit repair guides, and every time it has worked out brilliantly.
My Problem
ipod run over by car, just bought the display from ifixit and one two three fixed it in less than an hour. My daughter challenged me to do it since it was my fault the ipod was dead.
My Fix
The guide worked like a charm. only trouble was putting the rubber bumpers back on. but that was all. My third fix with ifixit, after a ps3 and a Macbook with a faulty fan and heat sink. The manuals are very well done, thanks.
My Advice
Make sure, before removing the rubber bumpers,that you'll remember where they go exactly. If they come off, glue them back.
To ifixit, the bumper issue should be specifically illustrated in the corresponding step of the manual.