First Steps
This shaking usually happens during the spin cycle. Front-load machines frequently try rearranging the load using partial rotations to try and redistribute the load. They have gravity to help, so they can often fix the problem well enough themselves. Top loaders don't have this advantage, so direct human intervention is more frequent.
If this shaking or vibration is an ongoing thing with almost every load you run, you can probably skip the Load Unbalanced section and start at Leveling Legs.
Note: We will be referring occasionally to "Traditional" washing machines. These are older top-load machines that usually have knobs that you pull out to start the cycle, once you set it.
Causes
You might think this is too easy, but a common user error is loads that are too large, or large single items, like a bedspread, that aren't distributed properly in the machine.
- Stop the machine, open it, and rearrange the load. You might even want to add an item like a towel if there's only one item so that you can better balance things.
- If the load is too large, the machine may not be able to spin at full speed, remove some of the wash items and try again.
- You may avoid this in the future by finding out from your owner's guide, how much your machine can handle.
- Start the machine again and see if it will spin properly. If so, the problem is solved.
- If the load is properly sized and fairly well distributed, go to the next item.
Your machine may be rocking because it isn't steady on its feet. This is very important with front-load machines. They have to be steady and level.
- Try to rock your machine in a couple of directions and see which way it wants to move if at all. if It doesn't want to move that's helpful, because leveling will be that much easier.
- You should put a small level on the top of the machine to check which way it is leaning. In case you aren't sure how to use a level, here's a link to some information
- You want to get it so it is level side to side and front to back. So shift the level to read each direction.
- Just because it doesn't rock doesn't mean it is level.
- Some machines will have "self-leveling" legs (usually in the rear).
- To get them to level, tip the machine forward and then gently let it back down on the rear legs. You will feel them engage and the machine won't rock side to side as easily.
- The mechanism can get rusted and sometimes a little oil or grease on the sliding bars and parts will help them to work. you can get to them by tipping your machine forward.
- Once you have leveled the machine, start it up again and check it. If it spins smoothly, you are done, if not, go to the next step. If you have a top loader, go to Suspension Rods.
Occasionally the shipping bolts on front load machines can be inadvertently left in place. This results in a machine that can't absorb any vibration internally (the suspension is locked by the bolts) and instead tries to, almost literally, shake itself apart.
Front-load machine shipping bolts go through the rear panel of the machine. Usually, you will see a number of hex head bolts (frequently 4) with plastic washers on the rear panel of your machine.
- Check for these and remove them if they are present. Often the machine will have to come with a wrench for doing this.
- Make sure to save them, as they are recommended to be reinstalled for moving the machine to a new location. (Not for just sliding it around in your home, though.)
- Here below is a short video about shipping bolts
Most front-load washers have shock absorbers to steady the washing drum. The drum is usually suspended by large springs from the machine frame and the shock absorbers provide additional support and steadying so the drum doesn't bounce around. When they fail the machine will often vibrate heavily.
A quick check involves giving the washer drum a downward shove and seeing if it bounces more than once. A more involved check requires removing the front and rear panels of the machine.
- Remove the front and rear panels of the washing machine. You will be able to see the shock absorbers. There are usually 4, sometimes only two, and occasionally three.
- Check to see if any of them are leaking oil.
- A good check for such leakage is to rub the shiny shaft of the shock absorber with a clean paper towel and note if any oil soaks into the towel.
- Any leakage is a sure sign of failure, and if you find any replace all of the shocks.
- A further test is to detach one end of the shock absorber from the base of the machine and push the plunger in and out by hand. There should be considerable resistance in both directions.
- Any failure of this test, replace all of the shocks
- If the shocks look good, go on to Springs, as front load units don't have suspension rods, only springs
These parts are found on top load machines they allow the washer tub to be suspended and "float" inside the cabinet. or case of the machine. They are found on newer top-load models.
As they wear, both their springs fatigue a small amount, but mainly the damping effect of the assembly goes down. This is especially true with Whirlpool family (Whirlpool, Maytag, Kenmore, Roper, Amana) machines that have damping rods that use a small foam rubber insert in the damping rod. As it wears, it grips the rod less and less and the vibrations grow.
The main test is the bounce test.
- Push down on the washer tub or basket and release it quickly
- When you release it, note if it bounces or just returns to its starting position. If it bounces more than once it's defective, replace all the rods and associated components.
- Sometimes you can improve the damping by applying a damping grease (one is called Nyogel 767A for example) to the rods where they pass through the plastic spring holder at the lower end of the assembly. If the plastic has begun to wear (the rod is floppy in it) just replace all the suspension rods. As mentioned, often the plastic isn't the damping device, it's inside the plastic housing.
Since there are a variety of suspension rods and they all look similar, we will just list a few things to keep in mind if you are replacing or inspecting them.
- Some rods have Damping Devices (springs or elastic bands) which help to restrain the washer tub from moving sideways. They are attached to the rod and the washer tub near the top. These can break or stretch and become loose. They should have some tension on them when in place. If they are defective (loose or broken), replace them as a set.
- Many (most) rods can be removed from the top of the machine but there are a few which require you to unhook them from the top, and then tip the machine to remove the rod from the bottom. On machines with rods that can be removed from the top, there will be slots in the brackets on the sides of the tub so the rod can go through the slot to be removed.
- When replacing the rods, do one rod at a time, otherwise, the weight of the tub and motor assembly can be difficult to lift in order to install the new rod in place.
- Some manufacturers will include rods that are designed to be installed in specific locations (front or rear) on the machine. Make sure you note this.
Here is a link to a guide for replacing these rods on a Whirlpool top loader.
Here is a link to a video with more explanation on Suspension Rods

- 20 - 40 minutesModerate
Almost every washer has springs attached to the washing drum or tub. It has to be able to move, but not too much. A trampoline spring tool can be very helpful if you have to replace any springs.
Front-loaders
On front-load machines, there are usually two springs that suspend the outer drum, one on each side. If one of these fails it will be pretty obvious, as they are easy to spot when the top of the machine is removed.
- To check the springs on front loaders you will need to remove the top cover of the machine.
- Make sure the springs are attached and not bent, broken, or corroded. If they are ok go on to Balance Ring
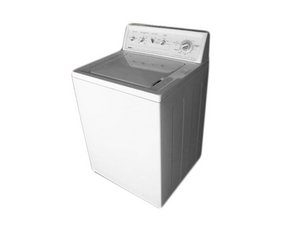
Top Loaders
Top load machines (especially of the traditional type) often have large numbers of springs, generally located underneath the washing machine tub. Because they are underneath the tub, they are more prone to rusting.
The springs are usually attached in symmetrical patterns around the outer tub. Some machines also have a spring to balance the weight of the motor, and it is usually. toward the back of the machine
- To check these springs you will need to remove the washer case or cabinet.
- Springs can be corroded, but usually the corrosion is a surface issue and doesn't affect the spring. You will want to examine springs that are heavily rusted, as this can cause the coils to stick together, and the spring won't function correctly.
- Check for broken or disconnected or loose springs.
- If you find one disconnected, check the attachment points to see if they have failed. Usually, the spring is stronger than the place it's hooked onto, so look closely. If the attachment point has failed, you may be able to
- If you find a loose spring, there may be one that was supposed to balance it that has fallen off or broken.
- Springs can wear over time and you may see thinning on the spring at places where the spring rubs at its attachment point. If you see a spring with more than 1/4 of its wire diameter worn off, replace all the springs.
- Check the attachment points carefully for wear and corrosion as well. Corrosion has a much greater effect on the strength of the usually thin metal that the springs attach to.
- Apply a small amount of grease at each of the points where the spring is metal to metal with its attachment point. it will help prevent future wear
- If the spring has a plastic part that it is connected to, make sure the plastic isn't cracked or worn.
- If the springs check out go on to the next step.
No, these aren't the suspenders you could wear on your trousers. They are found on top-load washing machines that don't use suspension rods.
They are small, but essential, parts of the top load machine's suspension that will cause major problems if they have failed. They are essential to smooth controlled movement of the internal parts to absorb vibration.
The repairs are a little more involved, but they often have a nearly miraculous result. A machine that was shaking, banging, and sliding across the floor, sounding like it was headed for recycling, suddenly becomes docile. These parts are a very likely cause if you have noticed the banging and shaking getting worse over time. You will have to do considerable disassembly of your unit to check them, but if you have it open when checking the springs, it isn't that much further to go. The parts include:
Snubber Ring
It can be a little tricky to determine if the snubber ring is worn without disassembling your machine substantially. The wear pads also require some disassembly to get a good look to see if they are worn. It's worth a go when you have reached this point because
There are several types of Snubber Rings, and there are online resources for performing the repair. Here are two examples of a common snubber ring
https://www.youtube.com/watch?v=ih0_ve1C...
https://www.youtube.com/watch?v=5CKHrxNB...
Wear Pads and Snubber Pads
Wear Pads are found on Whirlpool/Kenmore Traditional direct drive machines. Here's a video showing how to replace them. You can also use this video to see the rectangular Snubber Pads. They are mounted just like a wear pad. It is a good idea to do both when you have the machine open.
https://www.youtube.com/watch?v=Fg8xTKR9...
Damper Pads
Damper Pads are found on older Maytag units and are somewhat involved in replacement. The repair is not especially difficult but requires substantial disassembly and gluing of new pads in place. Here are two videos to show how.
https://www.youtube.com/watch?v=AJt5MrMK...
https://www.youtube.com/watch?v=uxp9cIPB...
Skate Plate
This part works in conjunction with Wear Pads and Snubber Pads. It glides on the wear pads and can become dislodged. When that happens the machine can sound like it is destroying itself internally. Here's a video to show the problem and the fix.
https://www.youtube.com/watch?v=w-o2JcdY...
If your suspension is looking OK then go on to the next item.
This applies to both front and top loaders with Direct Drive motors. You can check for this failure by rotating the drum by hand. If you hear a clicking noise, or you notice that the drum on a front loader seems to wobble as it rotates (you can move the door gasket aside temporarily to watch it is a sign that your drum support arm is damaged or broken. This is often a repair that is fairly involved, so depending on the age of your appliance, it might be uneconomical to repair it.
Balance Ring Failure
Often liquid is filled on many top-load machines, if the liquid leaks out, the machine will vibrate. Check to see that the liquid is still present. Some front-load machines use concrete weights that can crack and shed pieces. Check to see that they are intact and that there is no debris under or inside the machine.
Faulty Tub Bearings
Both top loaders and front loaders can suffer from vibration if the bearings that support the washing tub or drum are failing. This is more prevalent with ball bearings, as water intrusion or wear will create substantial vibration.
Direct Drive Motor Failure
Some Samsung units have experienced failure in the direct drive motor, where a magnet on the rotor comes loose. This can cause vibration.
Worn Drive Block
The drive block is a part that drives the agitator on top load machines. It is located inside the wash tub and can be accessed by removing the agitator. When it is worn, it can lead to vibration of the machine when spinning because the agitator will rattle.

8 common problems
View all