Introduction
We've got our hands on the new iPod nano 5G, now with a video camera! We got our nano early on the morning of September 10, 2009.
Want up-to-the-minute updates? Follow @ifixit on twitter.
What you need
-
-
Apple's got a routine going with the nano. Never fail, come September, we get a new one.
-
1G - September 7, 2005
-
2G - September 12, 2006
-
3G - September 5, 2007
-
4G - September 9, 2008
-
5G - September 9, 2009
-
This is the first time Apple's had a similar exterior design two releases in a row. The rear-mounted video camera is the only clear sign that we have a new device in our hands.
-
Notice the white wrapper around the packaging. Not even Apple employees got to sneak a peek at this one.
-
-
-
Shiny!
-
Many of the new features include a pedometer, voice recorder, voiceover, a genius mix feature, FM radio, a speaker, oh, and a little thing called a VIDEO CAMERA!
-
The one thing the nano didn't receive this release is a capacity upgrade. Like the 4th Gen, this nano comes in 8 and 16 GB capacities.
-
You can [www.twitter.com/ifixit|follow us on twitter] to get all the latest updates as we're doing the teardown!
-
-
-
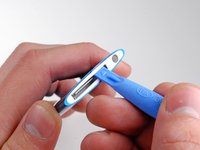
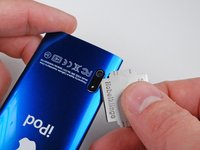
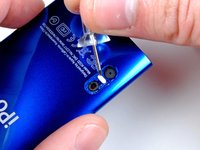
A Plastic Opening Tool makes quick work of the plastic bezel surrounding the dock connector.
-
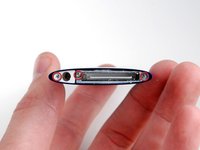
There's not much to see here yet. We're working on getting to the good stuff...
-
So far, there's a lot in common with the 4th Gen nano.
-
-
-
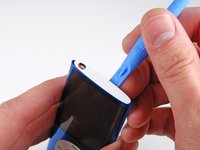
The camera bezel appears to be keeping the iPod's insides from coming out.
-
Eine Deutsche Rasierklinge should fix that...
-
The microphone by the camera ensures you get sound with your VGA moving pictures.
-
Use a pin to remove the small white retainer from between the camera and microphone holes. This keeps the components from sliding toward the bottom of the nano.
-
-
-
Tool used on this step:Spudger$3.99
-
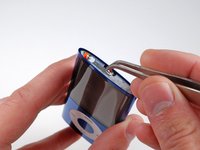
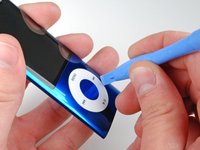
Apple has redesigned the click wheel on this nano. Instead of being (fairly permanently) affixed to the case, we were able to rotate and lift the click wheel.
-
You can use a spudger to completely remove the click wheel without taking the rest of the iPod apart.
-
-
-
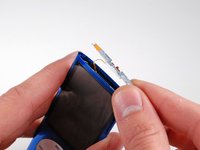
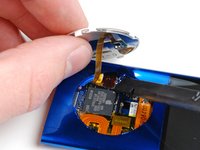
Removing the internals... It's a tight squeeze, but we got them out. Getting this iPod open wasn't easy. We don't recommend trying this at home. Take great care not to scratch the screen on the sharp recess for the click wheel, bend up slightly if necessary.
-
This iPod employs copious amounts of glue and adhesive to hold everything together. That makes it easy for Apple to put together, but hard to take apart.
-
-
-
The new nano features a larger display (2.2" and 240x376). This is the same width as the 4th Generation nano, but 56 pixels taller. On a pixel basis, that's 17.5% more screen real estate.
-
Apple keeps putting bigger screens in the same size devices. The footprint of the iPod nano has stayed the same over the last four years, but this display has four times the pixels of the original nano.
-
-
-
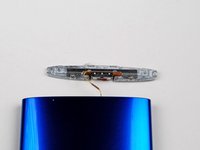
Here's the speaker. Like the Touch 2nd Gen, the audio simply comes out the bottom of the iPod.
-
For something only about a millimeter thick, it's not really fair to complain about audio quality.
-
-
-
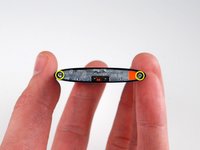
The camera, in all its VGA resolution glory. The camera itself is less than 3 mm thick.
-
Space may have been a factor in not including a better camera. Excluding its mount, the camera in the iPhone 3G is about 6 mm thick. The 5th Gen nano is 6.2 mm thick at its thickest point.
-
Unlike the nano, the touch, at 8.5 mm thick, could conceivably support an iPhone-sized camera, although it would certainly be an engineering challenge.
-
-
-
In our iPod, Toshiba is the source for the 8 GB of flash memory. On the chip:
-
TH58NVG6D2ELA49
-
ID8038
-
TAIWAN
-
09299AE
-
It looks like this was made in Taiwan in week 29 of 2009 (mid-July).
-
Also visible to the right of the Toshiba chip is the rubber mounting fixture for the camera, assumedly to dampen vibrations.
-


15 Guide Comments
Quote from stevev1:
where's the FM radio?
It uses the head phone wire because all u need is the right programming and a 2 foot wire to get radio