Introduction
Google announced the Nexus 7 at their I/O keynote on June 27, 2012. Five days later, we tore one down. Some are calling the Nexus 7 a 'Kindle Fire killer,' but can it stack up to the Fire's impressive 8 out of 10 repairability score? We just had to find out.
Want to be kept in the loop with the latest teardowns? Follow us on Twitter!
Want to natively view our repair manuals on your Android device? Download the iFixit app now!
What you need
Video Overview
-
-
The Nexus 7 is the latest challenger in the ever-expanding 7-inch tablet arena. Let's see what the folks at Google and Asus packed into this little package.
-
8, 16, or 32 GB storage
-
1 GB RAM
-
Quad-core Tegra 3 processor
-
7" 1280x800 (216 ppi) back-lit IPS display
-
1.2 megapixel front-facing camera
-
Android 4.1 "Jelly Bean"
-
-
-
When we first heard about the Nexus 7, we assumed it was the secret Pentagon program: "A controversial intelligence program…known as Nexus 7, previously undisclosed as a war-zone surveillance effort, it ties together everything from spy radars to fruit prices..."
-
Alas, this Nexus 7 is from the other intelligence agency: Google. Even though it's not a secret Pentagon initiative, it does feel pretty stealthy and versatile for $200.
-
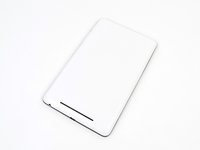
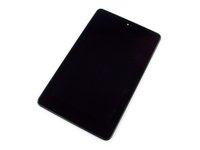
The white back of our Nexus proves it was an I/O original. And what's that? It's running an iFixit app? That's right folks; as of today, you can natively view our repair manuals on your Android device. Download now!
-
-
-
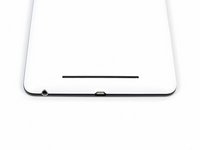
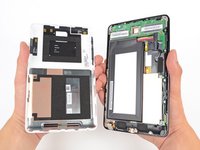
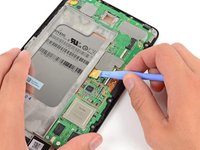
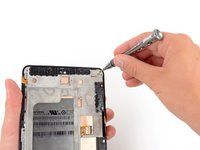
Plastic opening tools make cracking the Nexus shell like cutting through butter, thanks to its retaining clips around the perimeter of the device.
-
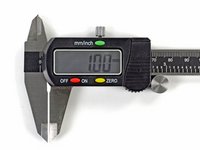
One millimeter.
-
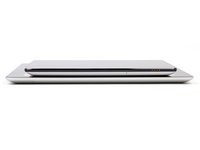
That's the difference in thickness between the 9.4 mm glued iPad and the 10.4 mm retaining-clipped Nexus.
-
That's the difference between being able to open a device and service all of its internals, and not.
-
That's the negligible difference between extending the life of your device through repair, as opposed to tossing it in a landfill.
-
And most of all, nobody will complain about that one millimeter difference in day-to-day use, but the user-serviceability it brings will make all the difference when the device breaks.
-
-
-
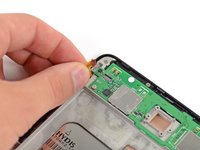
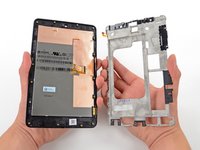
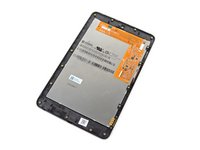
And so it opens.
-
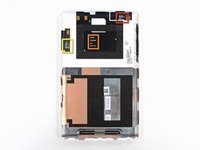
Though the back cover's dark and light layers remind us of something a Stormtrooper would have in his arsenal, we're more interested in the cryptic markings we found:
-
GPS ANT V2.0 2012/04/20
-
NFC ANT V2.0 2012/05/09
-
WIFI ANT V3.0 2012/05/25
-
We're purely speculating here, but we think these are antennas that were made somewhere between late April and late May.
-
-
-
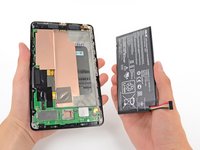
The front case assembly has exactly what we always expect inside a tablet: a big battery.
-
The Nexus 7 has a 4326 mAh, 16 Wh battery that can last 9:49 hours. The Kindle Fire, by comparison, has a 4400 mAh, 16.28 Wh battery -- but only lasts 7:42 hours. Go figure.
-
For further comparison, this time falls right in between the batteries found in the 2012 iPad models, which have 9:52 hours for HSPA and 9:37 hours for LTE. Except that the iPad 3 units are slightly larger at 42.5 Wh / 11500 mAh.
-
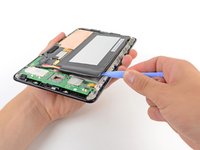
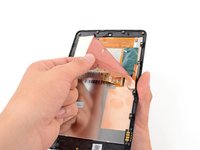
Unlike the iPad batteries, this battery was actually quite easy to remove; there was only a small amount of adhesive around the metal frame.
-
-
Tool used on this step:Spudger$3.99
-
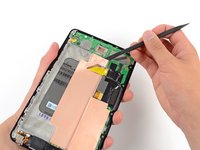
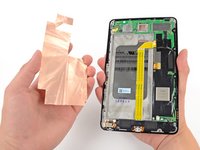
Our trusty spudger makes quick work of the copper film found beneath the battery.
-
This could be a heat sink since it seems to be made of a copper alloy, possibly copper-tungsten, or copper-molybdenum. However, it is more likely that it's just an EMI shield.
-
Engadget remarks that the Nexus 7 doesn't get "disconcertingly hot," rather "just a little toasty".
-
-
-
-
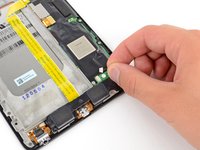
Next, we used our driver to remove the Phillips screws holding the speaker assembly in place.
-
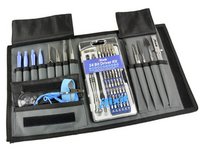
Full disclosure: we don't just make awesome teardowns—we sell parts. And tools! Lots and lots of tools.
-
Like this handy-dandy electronics tool kit that we use to take apart the newest gadgets. We assembled the most-used iFixit tools and put them all in one kit for your convenience.
-
We sell Mac parts & upgrades, parts for iPhone screen repair, kits for fixing the infamous Xbox Red Ring of Death, and even a product called the Monster Battery Pack 9000.
-
We need your support to continue building the free repair manual for everything in the world.
-
-
-
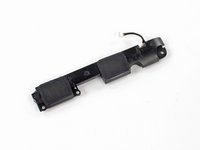
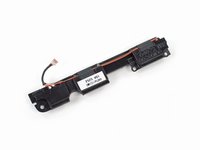
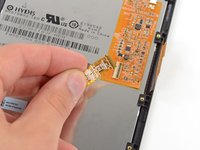
Pop! Off comes a connector, and the speaker assembly is free.
-
The Nexus 7's speakers might not be quite the caliber of the Q, but there is already talk of speaker docks to come.
-
Although the official Nexus page says there's a speaker in the back, we clearly see a pair of drivers.
-
-
-
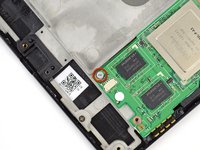
The Nexus 7 comes stacked with 1 GB of Hynix H5TC2G83CFR DDR3 RAM, the same model found in the MacBook Pro with Retina Display.
-
This isn't the "in case of emergency" kind of seal to break, but we broke it anyway to get the motherboard out.
-
-
-
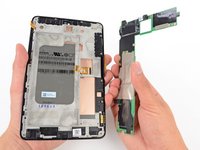
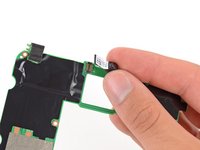
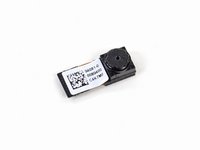
Out comes the 1.2 MP front-facing camera.
-
Much like the Kindle Fire, the Nexus 7 contains no rear-facing camera. It does, however, contain a front-facing one for video chatting.
-
Is the absence of a rear-facing camera that big of a deal for a tablet? That depends. Do you want to look silly taking pictures with it?
-
-
-
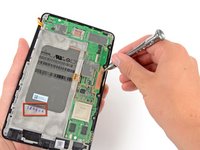
We are eager to get to that motherboard, but it seems we have another goodie to pull off it first.
-
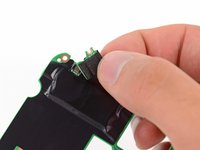
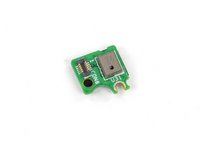
Seated on the top left of the motherboard is one of the two microphones.
-
One of the new features in Jelly Bean is improved voice recognition. Is it as good as Siri? Will it remind you to put the gazpacho on ice? We would tell you the answers to these questions, but the microphone probably doesn't do us much good in its current state.
-
-
-
By the way: we also make software for teaching people to do things. Dozuki makes it easy to create vibrant how-to manuals.
-
Dozuki is great for:
-
Standardized work instructions: improve quality by documenting how to get things done, one step at a time.
-
Building product support sites: make your customers love you by teaching them how to do amazing things.
-
Training and e-learning software: we've used Dozuki to teach over ten million people to repair electronics.
-
Online community platform: build a knowledge base of expert knowledge with Answers, the Q&A engine that drives the popular iFixit Answers.
-
-
-
On the flipside:
-
Kingston KE44B-26BN/8GB 8GB flash
-
Realtek ALC5642
-
ELAN eKTF36248WS EKTF3624 series 16-bit touch panel signal processor MCU
-
ELAN eKTH10368WS EKTH1036 series touch panel controller
-
Texas Instruments SN75LVDS83B LVDS LCD display driver
-
Hynix HTC2G83CFR DDR3 RAM
-
-
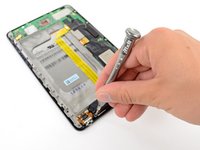
Tool used on this step:Phillips #00 Screwdriver$5.49
-
The frame comes off with the turn of a screwdriver, revealing another copper alloy shielding the LCD.
-
-
-
Here we have the 7-inch, 1280x800 HD display, manufactured by Hydis and designated model HV070WX2.
-
As is becoming a trend, the LCD is fused to the Corning glass. We have not heard if this glass is Gorilla Glass or Gorilla Glass 2, and we have broken far too many displays recently to dig any further.
-
Sadly, this fusion makes the cost of repairing shattered glass much higher, as it will require replacing the whole display assembly—LCD included.
-
-
-
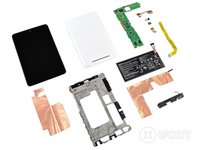
Nexus 7 Repairability Score: 7 out of 10 (10 is easiest to repair)
-
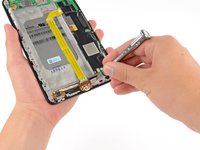
The rear case is very easy to open, and requires minimal prying effort with a plastic opening tool to remove.
-
All fasteners inside are Phillips #00 screws—no security or proprietary screws here.
-
Battery replacement can be accomplished without soldering—or even a screwdriver.
-
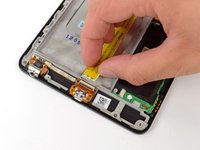
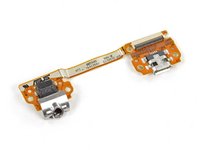
Many components, including the I/O ports, can be replaced independently of the motherboard.
-
Copper alloy sheets provide convenient shielding, but they could tear during disassembly.
-
The LCD does not separate from the display glass, increasing repair costs.
-


35 Guide Comments
Excellent write-up! You created a little bit of a buzz with your comment in step 2 that the Nexus 7 includes a usb to hdmi adapter. Could you possibly confirm that this cable is, in fact, included and functions? Every other write-up about the Nexus 7 makes no mention of this cable and actually states that there is no MHL capability.
Thank in advance.
Can you definitely confirm the HDMI cable issue - its the 1st time I have een it mentioned in any write up of the Nexus 7.
Directly comparing thicknesses between this and the iPad and attributing it to the retaining system alone is probably one of the silliest things I've read on iFixit.
Maybe the result wouldn't help with your agenda so much, but surely an honest analysis would to consider the extra battery (iPad's battery being over 2.6x larger) and display thickness (iPad's display needing a much stronger backlight).
Please figure it out correctly and rewrite Step 4. As it stands it's about as honest as a politician, which I hope is not where you guys are going with this.
Silly perhaps in style... Apple often dismisses the lack of serviceability by claiming that certain assembly methods are necessary to provide the thinnest and lightest package at an feasible cost. Given the spirit of the ifixit’s “Repairability Score”, the rhetoric employed by the author seems perfectly valid to me. I read this section as a challenge to Apple to do better. But I suspect the truth about why Apple does packaging the way the do is as follows: 1. Make it harder for users and competitors to see what's really inside, 2. Make it harder and more expensive to repair the devices, which leads to reason 3. Maximize profits- A very small part of which is reducing manufacturing costs, the major capitalization of this approach comes from encouraging users to upgrade every few years and skip all that DIY fixit stuff. Non-user replaceable batteries are a sure fire way to guarantee the finite lifecycle of any given device.
JdoubleH -
Agreed. Easily the most pathetic and biased tear down I've seen on iFixit. Can't we leave the fanboy wars at all the other sites?
Steve -