Introduction
It's a laptop! It's a tablet! It's a lablet! It's…it's…Microsoft's Surface Windows 8 Pro, and it's about to go down on the teardown table.
Want more super gadget gutting? Follow us on Twitter or like us on Facebook.
Maybe one day we could combine those, as well, to get Facer or Twitbook! But for now, we will settle for Microsoft's newest lablet.
What you need
-
-
Here lies the second version of Surface devices, the Microsoft Surface Pro.
-
Noteworthy specs:
-
Windows 8, the real deal
-
10.6" ClearType HD Display (resolution of 1920x1080 pixels) with 10 point multitouch
-
3rd Gen Intel Core i5 Processor with Intel HD Graphics 4000 (the same graphics found in current-generation MacBook Air laptops)
-
4 GB of DDR3-1600 RAM
-
64 GB or 128 GB flash storage
-
Wi-Fi (802.11a/b/g/n) and Bluetooth 4.0
-
-
-
Despite its name's implication, the Microsoft Surface Pro actually has multiple surfaces! This design may have been to confuse consumers, but more likely was necessary to suit our perception of three dimensions. Checking out the surfaces fitted with the ports we find:
-
Headset jack
-
Volume rocker
-
Full-size USB 3.0 port
-
On the flipside:
-
Mini DisplayPort
-
Magnetic charging port
-
MicroSDXC card slot
-
-
-
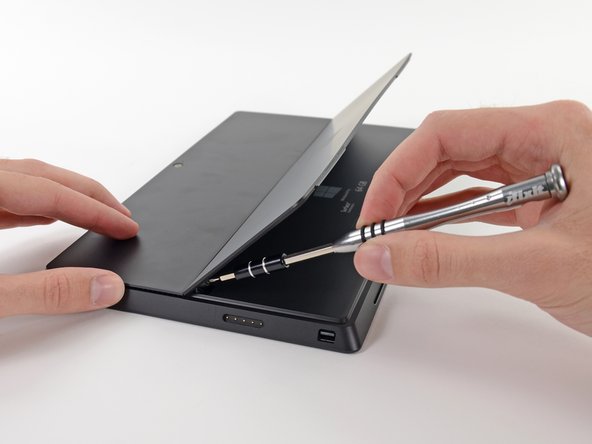
Just like last time, we lift the kickstand and let the Surface reveal its secrets.
-
What wisdom does this Pro have for us?
-
"Surface | 64 GB | Model 1514 | Made in China." Also, great news: this device complies with part 15 of the FCC Rules. Good to know.
-
64 GB of storage? Where we're going, we don't need storage.
-
…which is good, since the operating system takes up over half of those 64 gigs! (More on that later.)
-
We begin our trip back into the land of torn down devices; we first use our trusty T5 Torx screwdriver to pull out two screws securing the kickstand to its hinges.
-
-
-
We are starting to miss the old Surface, as we find a metric duckload of adhesive holding the screen in place.
-
We tried every method we could think of to free the screen, including cutting the adhesive, to no avail. This Pro requires a pro method. Thankfully, we have one: we call it the Heat-It-Up-and-Poke-It-Til-It-Does-What-We-Want method. Luckily, we have the required heat gun and guitar picks ready.
-
-
-
After a long process of heating and prying, we get our first glance inside.
-
No, that sticky black stuff is not tar, although it is unbelievably close in function, appearance, and smell.
-
There was no warranty voiding sticker this round, but you don't really need one to tell if this lablet has been opened—the adhesive is a dead giveaway.
-
-
-
Strapped to the back of the LCD is a small PCB housing a Wacom W9002 chip, that we assume is responsible for driving the Wacom Electro Magnetic Resonance (EMR) digitizer system.
-
In this system, developed by Wacom, a grid of wires embedded in the screen generate magnetic fields that induce current in a coil in the tip of the tablet pen, both powering it and indicating its position over the grid. The pen then wirelessly returns that location data, along with pressure and click information.
-
We also found the LCD display driver, a Samsung WiseView N52A2NE, similar to the driver found in the iPad 2.
-
Here's the ginormous version of the LCD display board so you can view it in all its glory.
-
-
-
Let's face it, there's really not much to see here. Eye can't think of anything clever, so if anyone nose something to say about the Surface Pro with its display removed, please mouth your opinion. I mustache you to keep thinking while eyebrows the interwebs.
-
Puns aside, we whip out our handy screwdriver and remove the 23 screws holding this plastic bezel in place.
-
-
-
-
Oh…That turned out to be a lot easier than we expected. Apparently our screwdriver is much better at listening to us than a rogue computer.
-
Although it's easier to remove screws than adhesive, there is no shortage of work. These two metal plates are held in with a total of 29 screws.
-
-
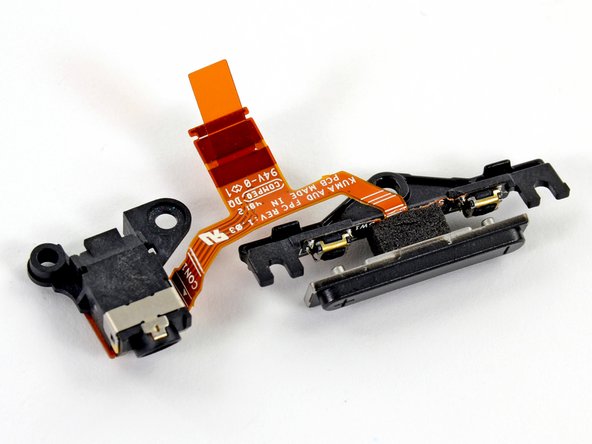
We use our ESD-safe tweezers to safely remove the volume buttons and headphone jack, which are tied together in a neat package by a ribbon cable.
-
So much for listening to the Pro's Grammy commercial.
-
-
-
The Micron RealSSD C400 packs 64 GB of storage capacity. It can read 500MB/s and write 95 MB/s — all in a tiny 1.8" form factor.
-
Digging a little deeper, we find that a Marvell 88SS9174 SSD processor is keeping all those Micron flash ICs running smoothly.
-
PSA: The Windows 8 operating system chows down a fair chunk of the 64 GB total storage. After negating 30+ GB for the operating system, the full MS Office suite that you may not have even activated, as well as the factory restore image, the Surface Pro provides users with around 29 GB of usable space.
-
128 GB-outfitted owners make do with 89 GB of free space. Ed Bott performed some tests comparing it to the 128 GB MacBook Air, which has 99.5 GB free space.
-
-
-
This Pro is all party in the front, business in the back—cooling business that is. Two small fans help this Pro keep its cool.
-
How small, you ask? Here's how the Surface Pro fan compares to a 2011 MacBook Pro fan and FDR's face.
-
-
-
Checking out the top surface of the motherboard:
-
8x Micron 2LEI2 D9PXV 4 Gb RAM for a total of 4 GB RAM
-
Integrated Technology Express IT8519G
-
Atmel UC256l3U 256KB Flash, 32-bit AVR Microcontroller
-
ON NCP6132A 3 Phase Controller
-
Atmel MXT1386E Touchscreen Controller
-
3x Atmel MXT154E Touchscreen Controllers (the same controllers we found in the Surface RT)
-
Realtek ALC3230 Audio Codec
-
-
-
A few more flicks of the spudger and out come the stereo speakers.
-
Next up is the keyboard dock connector. The same type of port is used in both the Pro and non-Pro versions of the Surface, allowing the Type Cover keyboard to be cross-compatible.
-
-
-
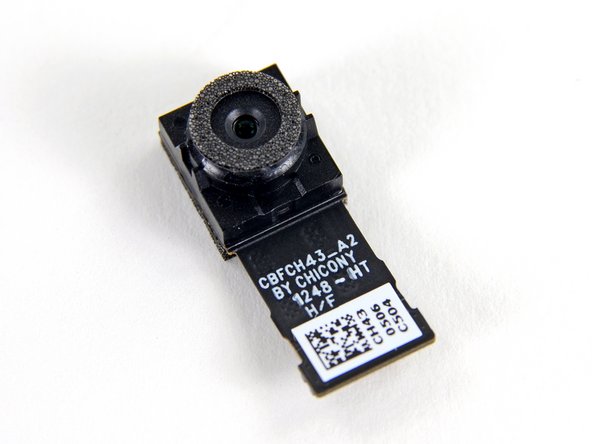
More parts fly out of the Pro including the power connector and rear-facing camera.
-
The rear camera resolution is the same 720P as the front, so the Surface Pro may not be the best replacement for your Nikon D600 SLR.
-
The power connector clearly labels each pin with G, 12V, and DET.
-
Also making an appearance is the top-mounted microphone and its soft rubber enclosure, good for
FaceTimeSkype video calls.
-
-
-
The plastic top-rear bezel also doubles as a vent for the Pro's laptop-worthy hardware.
-
Two ports through the bezel act as venting ducts for the fans, directing hot air out the top. It appears that the Pro's fans draw ambient air in through the many vent holes spaced around the perimeter, then force that air over the heat sink's two radiators and out of the device, cooling the CPU and GPU.
-
-
-
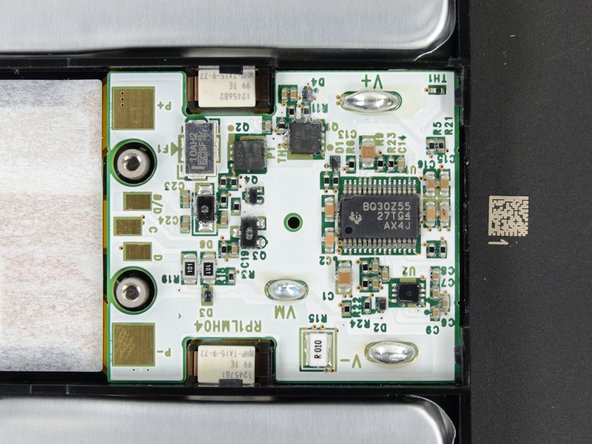
Microsoft spared no expense when it came to keeping the Surface Pro going. They sourced the Cadillac of batteries from LG: an Escalade 42 Wh unit. The battery is rated for 7.4 V and 5676 mAh.
-
Impressive specs? Note that the iPad 4 has a 43 Wh battery, albeit at 3.7 V.
-
And even with all this battery juice, the reported battery life of the Surface Pro is less than 5 hours.
-
-
-
Lesson learned about adhesive in this teardown—we go straight to the iOpener in order to get the battery out of its sticky cage.
-
As always, we are ignoring some kind of warning. This time, it tells us not to remove the battery from the back cover. Apparently, to safely replace your battery you will need a whole back cover assembly.
-
We don't understand the point of heavily-glued batteries. This kind of planned obsolescence is completely unnecessary.
-
-
-
Microsoft Surface Pro Repairability Score: 1 out of 10 (10 is easiest to repair)
-
The battery is not soldered to the motherboard, so at least no soldering is required to replace it.
-
The SSD is removable — but you risk killing your tablet by trying to open it.
-
There are over 90 screws inside this device. We're proponents of mechanical fasteners, but this number is a tad crazy.
-
The display assembly (comprising of a fused glass and LCD) is extremely difficult to remove/replace.
-
Tons of adhesive hold everything in place, including the display and battery.
-
Unless you perform the opening procedure 100% correctly, chances are you'll shear one of the four cables surrounding the display perimeter.
-


30 Comments
I wonder if you can upgrade the CPU to Haswell when it comes out...
Ah, nvm, looks like it will be LGA 1150 socket =(((((
Looks like this is going to be difficult to upgrade the 64GB SSD to a larger SSD. I can see that it is a standard size mSATA SSD card. But the hard part is the heating of the screen edges and prying the screen off in order to get access to the internals. Once it is taken apart, what kind of glue do you use to put the screen back on? The glue needs to be strong enough to be secure but also able to be removed again if needed.
You can test if the SSD works correctly without gluing it.Once it's okay,glue it.
I use B-7000 for phone and tablet repairs as it is a strong glue that gets soft when heated. If you are interested, here is the link for the glue: https://www.amazon.com/MMOBIEL-Multipurp...