What you need

This teardown is not a repair guide. To repair your Squier Strat Guitar, use our service manual.

  1. Squier Strat Guitar Teardown, Squier Strat Guitar Teardown: step 1, image 1 of 1
    • Pull off the three tone/volume caps.

  2. Squier Strat Guitar Teardown: step 2, image 1 of 1
    • Pull off the lever cap on the rotary switch.

    • Note: This is not how the switch should normally look. This one is bent slightly; the tip should be pointing straight up.

  3. Squier Strat Guitar Teardown: step 3, image 1 of 1
    • Unscrew the three bolts holding the tone/volume controls to the scratch plate.

  4. Squier Strat Guitar Teardown: step 4, image 1 of 1
    • Remove the 3 washers from the tone/volume controls.

  5. Squier Strat Guitar Teardown: step 5, image 1 of 1
    • Unscrew the eight screws which hold the scratch plate to the main body.

  6. Squier Strat Guitar Teardown: step 6, image 1 of 1
    • Unscrew the two screws holding the rotary switch in place.

  7. Squier Strat Guitar Teardown: step 7, image 1 of 1
    • unscrew the six screws holding the three pickups in place.

  8. Squier Strat Guitar Teardown: step 8, image 1 of 2 Squier Strat Guitar Teardown: step 8, image 2 of 2
    • Lift off the scratch plate, revealing the electronics inside the main body

  9. Squier Strat Guitar Teardown: step 9, image 1 of 1
    • Another method of dis-assembly: remove the pickguard screws (leaving pickup screws, pots and switch untouched).

    • Remove the jack plate, desolder or cut the output jack wires, flip over the guitar and desolder the ground wire on the tremolo. Remove the pickguard with all electronics attached.

    • This method gives easy access to do electronics repairs/mods, without having to readjust pickup heights and individual components won't move around when you're soldering.

  10. Squier Strat Guitar Teardown: step 10, image 1 of 1
    • Lift off the three pickup covers.

  11. Squier Strat Guitar Teardown: step 11, image 1 of 1
    • Remove the springs which were on the underside of the pickups.

  12. Squier Strat Guitar Teardown: step 12, image 1 of 1
    • Unscrew the two screws holding the lead input cover in place and lift off the cover.

  13. Squier Strat Guitar Teardown: step 13, image 1 of 1
    • Unscrew the input threaded bolt, which holds the connector and wiring in place.

  14. Squier Strat Guitar Teardown: step 14, image 1 of 2 Squier Strat Guitar Teardown: step 14, image 2 of 2
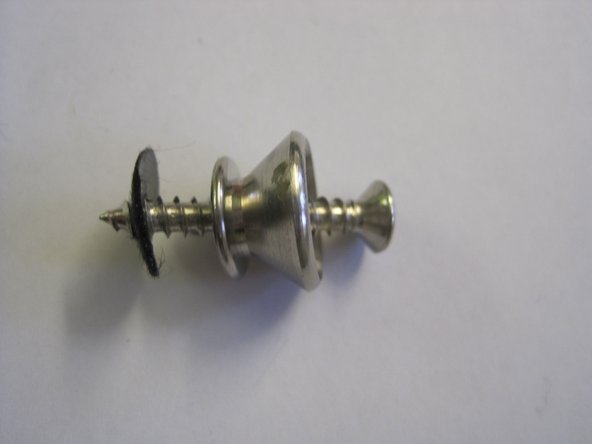
    • Unscrew the screw holding the bottom strap attachment in position.

  15. Squier Strat Guitar Teardown: step 15, image 1 of 1
    • Carry out the same process to remove the top strap attachment .

  16. Squier Strat Guitar Teardown: step 16, image 1 of 1
    • Remove the six screws holding the bridge in position.

  17. Squier Strat Guitar Teardown: step 17, image 1 of 1
    • Take out the six screws holding the white back plate in place.

  18. Squier Strat Guitar Teardown: step 18, image 1 of 1
    • Remove the three large vibration springs connecting the bridge to the vibration plate.

  19. Squier Strat Guitar Teardown: step 19, image 1 of 1
    • Unscrew the two screws holding the metal vibration plate in place.

  20. Squier Strat Guitar Teardown: step 20, image 1 of 1
    • Remove Bridge from main body.

  21. Squier Strat Guitar Teardown: step 21, image 1 of 1
    • Unscrew chrome parts.

  22. Squier Strat Guitar Teardown: step 22, image 1 of 3 Squier Strat Guitar Teardown: step 22, image 2 of 3 Squier Strat Guitar Teardown: step 22, image 3 of 3
    • Undo the 6 screws holding the string adjustments to the chrome plate. Then remove the spring and unscrew the 12 threaded bars.

  23. Squier Strat Guitar Teardown: step 23, image 1 of 1
    • Unscrew chrome plate from bridge mount.

  24. Squier Strat Guitar Teardown: step 24, image 1 of 1
    • Remove the four screws holding the neck to the body of the guitar.

  25. Squier Strat Guitar Teardown: step 25, image 1 of 1
    • Pull neck away from main body.

  26. Squier Strat Guitar Teardown: step 26, image 1 of 1
    • Unscrew the two small screws which keep the string aligners in position.

  27. Squier Strat Guitar Teardown: step 27, image 1 of 1
    • Unscrew the bolts which keep the tuner posts held in place.

  28. Squier Strat Guitar Teardown: step 28, image 1 of 1
    • Pull tuner peg away from headstock.

  29. Squier Strat Guitar Teardown: step 29, image 1 of 1
    • Unscrew tuner head from tuner posts.

Guitar group

Member since: 02/17/10

259 Reputation

1 Guide authored

View Statistics:

Past 24 Hours: 2

Past 7 Days: 26

Past 30 Days: 131

All Time: 60,338