Introduction
This year's GoPro release had a surprise: An all-new camera shape.
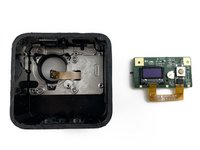
While the HERO11 Black looks virtually identical to last year's HERO10 Black, GoPro also released the HERO11 Black Mini. Sporting almost the same hardware features as its bigger brother, providing the same video modes with up to 5.3k 60fps and built-in HyperSmooth video stabilization.
Despite its modern features, the HERO11 Black's Mini-Me gives off a "back to the roots" vibe—no display for live preview whatsoever. Just a rugged little camera, ready to take a beating.
Now let's take a look at its inner workings to uncover the secrets that make this new form factor possible!
What you need
-
-
While The HERO11 Black Mini does have some shortcomings compared to its bigger brother, such as the lack of a GPS or a photo mode, here's what it does offer:
-
GoPro's GP2 processor to enable their most up-to-date image processing and stabilization
-
27.6MP 8:7 1/1.9" sensor with 10-bit colors and an ultra-wide angle lens (ƒ/2.5)
-
High-resolution video with up to 5.3k @60fps and up to 2.7k @240fps for slow motion
-
0.5" 72x32px OLED status display
-
Waterproof up to 10m
-
133g, thus 21g lighter than the bigger and more expensive HERO11 Black
-
A beefy aluminum heatsink, covering the entire back
-
-
-
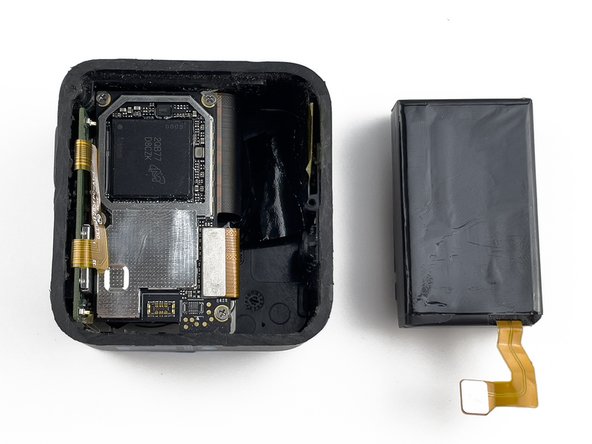
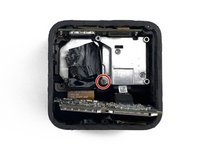
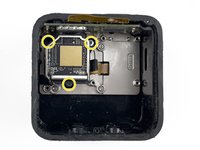
A first look under the hood reveals: This GoPro has an internal battery. All we get is a USB-C port to charge it and a microSD slot.
-
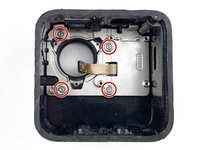
Hiding under the lens cover are four T4 Torx screws. Removing these does not provide a way into the camera, though.
-
-
-
Flipping up the Folding Fingers uncovers a total of eight T5 Torx screws, enabling quick and easy replacement in case of a defect or some additional weight savings for those who aren't using them.
-
Underneath the folding fingers at the back are two more T5 Torx screws, but just like the screws under the lens cover, they turn out to be a red herring and do not provide access to the GoPro's insides. Sigh.
-
-
-
All screws are out but nothing moves, so there must be glue. No real surprise here—the last camera from GoPro that wasn't glued shut was the HERO4, all the way back in 2014.
-
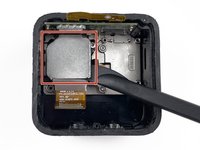
Heat usually works, but if your opponent is a literal heatsink, things get difficult. The trusty iOpener quickly reached its limits and had to request help from
an adulta heat gun. -
Facing the impending doom of an overheated battery, accepting defeat was the only sensible step. 1:0 for the heatsink.
-
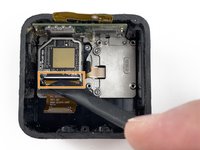
Losing the battle does not mean losing the war, though. It was time to confront the GoPro with the Bagger 288 of electronics: A Dremel.
-
A few minutes and some careful cuts later, the heatsink lifts off like it was never meant to be attached in the first place. At last: Victory!
-
-
-
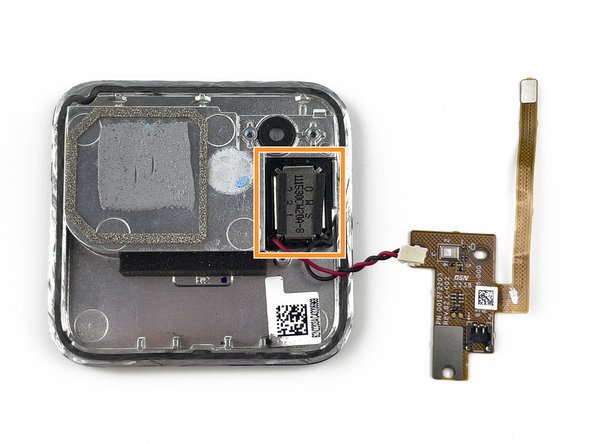
Three Phillips #000 screws to remove the flexible circuit board (FPC) from the heatsink.
-
Underneath the FPC sits the speaker for the camera's lovely beeping sounds that let us know what it is up to.
-
Inconspicuously located between two mounting holes, there's also the GoPro's rear-facing MEMS microphone.
-
-
-
Now on to the real adventure, but safety first:
-
With the heatsink removed, the battery can finally be unplugged.
-
After that, it takes just one T4 Torx screw to loosen the battery tray and carefully pull the 1500mAh Li-Ion cell out of the case.
-
An internal battery for a camera that is virtually impossible to open non-destructively? Not nice, GoPro.
-
-
-
-
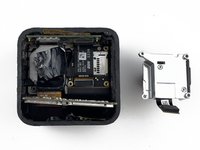
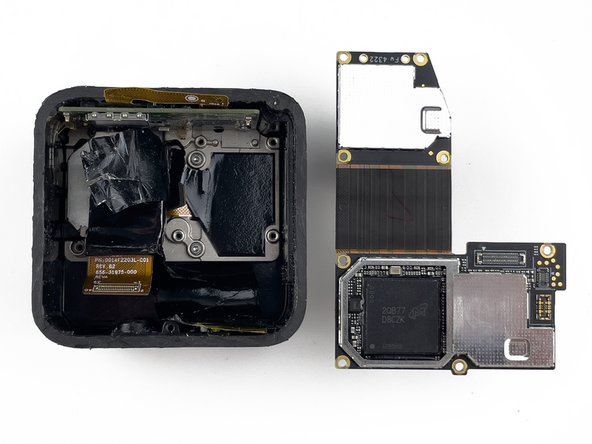
We're getting closer! The mainboard is in plain sight and almost free.
-
All it takes is to unplug the connector for the sensor...
-
And remove the four Phillips #000 screws...
-
To find out that it is a rigid-flex PCB and realize that the other part is buried even deeper.
-
Looks like the initial celebration was a bit premature. Whoops.
-
-
-
After peeling back some tape, there's one more Phillips #000 screw and the USB port assembly can be pulled out of the camera body.
-
The view onto the rest of the mainboard is almost unobstructed now and reveals that the microSD slot is actually soldered directly to the second part of the mainboard. A rather unusual choice, as that's often one of the first components to get "outsourced" from a mainboard when space is tight.
-
-
-
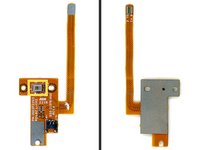
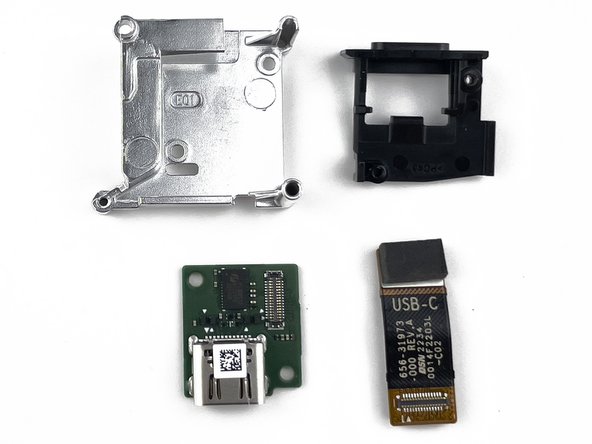
Before we dig deeper into this camera, let's take a closer look at the pieces we just removed.
-
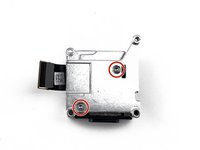
Removing two T4 Torx screws is all it takes. The assembly then just effortlessly falls apart and reveals this teardown's first IC:
-
Pericom (Diodes Inc.) PI3DBS12612ZTFE
-
-
-
This might seem like a déjà vu, but: We're getting closer!
-
Two connectors to unclip and they pop off like they have already accepted their fate.
-
Removing the black FPC uncovers one more Phillips #000 screw and then...
-
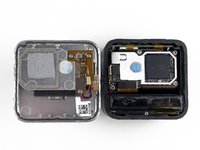
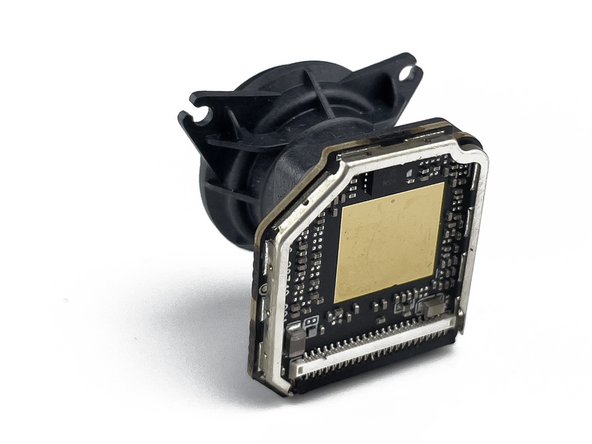
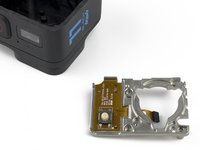
It is done! The floppy mainboard has been freed from its shackles and presents itself in its full glory.
-
-
-
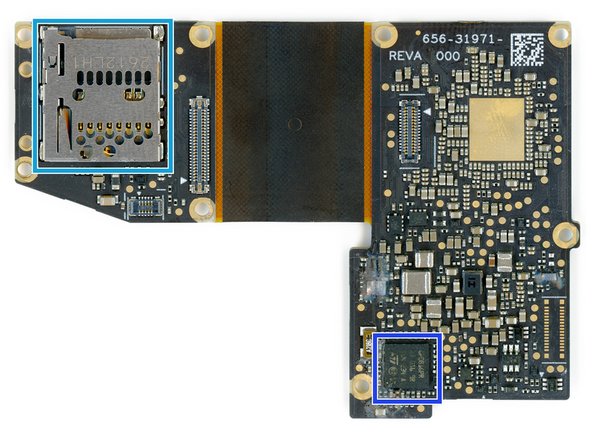
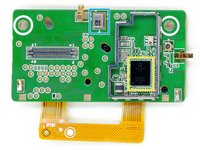
All that was left to do was to unclip the EMI shields and remove some thermal paste to finally uncover all the chips that make the magic happen:
-
GoPro GP2, GoPro's custom processor that was first introduced in the HERO10 Black
-
Samsung KLM8G1GETF-B041 8GB eMMC memory
-
"9150VD106" power management IC (potentially from Qorvo)
-
Qorvo ACT88760 power management IC
-
JAE ST11-H microSD connector
-
STM "GP081GPR" microcontroller (appears to be a custom version)
-
-
-
We've seen the mainboard, but this mission is not over yet. Next up:
-
Unclipping the sensor's EMI shield.
-
Removing some tape and lifting the latch that keeps the FPC in place.
-
Removing three 1.3mm hex screws that secure the lens.
-
-
-
As promised by GoPro: The exact same lens and sensor that they also put in the full-sized HERO11 Black.
-
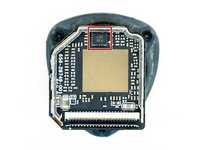
The PCB is rather unspectacular, featuring mostly a handful of passive components and a ground pad for cooling purposes, but at the very top we can spot a significant contributor to GoPro's HyperSmooth stabilization:
-
Bosch BMI260 intertial measurement unit
-
-
-
"Are we there yet?" Not quite. First there are two more Phillips #000 screws that need to be removed.
-
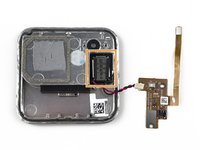
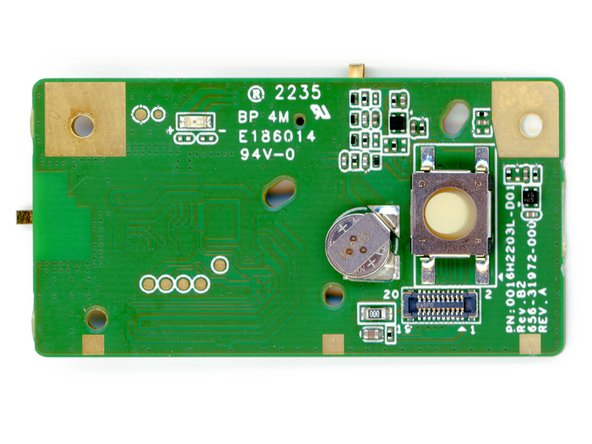
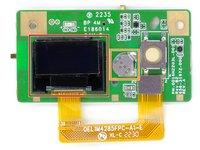
Now we get a glimpse of the Mini's secondary PCB, featuring its status display. Buckle up for a deep dive!
-
-
-
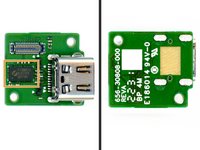
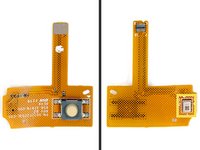
On the top side of this green beast, there's not just the GoPro's shutter button. Also part of the team:
-
0.5" 72x32px OLED display (labeled OEL9E3033A0)
-
Seiko ML414H back-up battery
-
Another EMI shield and a thermal pad later, the bottom side isn't less exciting:
-
Qualcomm QCA9377 WiFi and Bluetooth chipset
-
Top-facing MEMS microphone
-
-
-
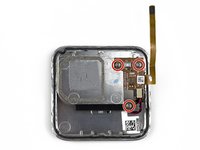
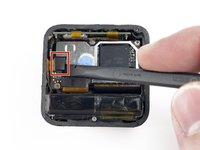
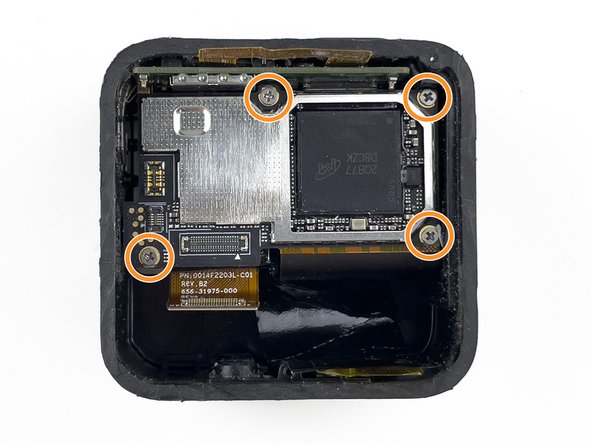
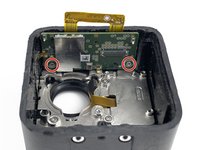
Four T4 Torx screws are left, holding the aluminum bracket in place to which all the circuit boards were once mounted.
-
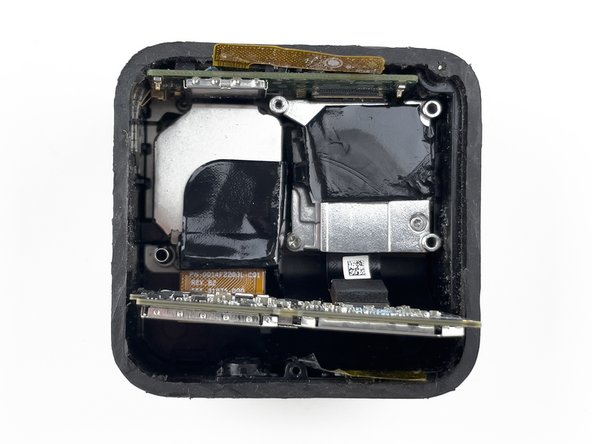
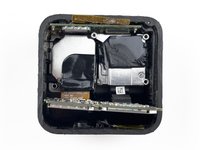
No more glue, no more screws. Lifting the metal frame out of the case leaves behind a lifeless, empty plastic shell and reveals the last electronic components:
-
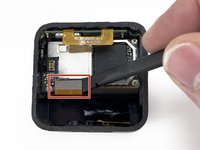
The power/pairing button and, hidden on the bottom side, the third member of the sound recording triplets:
-
Front-facing MEMS microphone
-
-
-
Time to wrap it up! After a thorough dissection, we can definitely conclude that the GoPro HERO11 Black Mini was not built to be repaired. Let's start with something positive:
-
The lens cover can be easily twisted off and replaced. No tools are required and it is compatible with lens covers for GoPro's other cameras.
-
The Folding Fingers are secured with standard Torx screws and are almost as easy to replace as the lens cover. However...
-
The Folding Fingers at the bottom are only screwed to metal thread inserts in the GoPro's plastic shell and those thread inserts might give out easier than the Folding Fingers themselves.
-
Less exciting and surely a deal breaker for some:
-
The elephant in the room: It has a non-removable battery. Not only does this limit usability due to battery life constraints, it also limits the camera's life expectancy as a whole. We have seen similar things before—remember the GoPro SESSION?
-
All components on the inside are very easy to replace once the camera is open, but opening it non-destructively is virtually impossible.
-
Repairability score: 2/10. Looks like that's the price we have to pay for a modern action camera.
-


39 Guide Comments
What is the weight of the battery?
Does the mini work with just the USBC attached for power and without the battery connected?
The battery weighs 29g.
With nothing but USB power, the power/mode switch will not work. The bare minimum to get full functionality without the battery is 5V on the USB input and ~4V on the battery input.
Thank you Jonah!
Someone found a way to buy replacement batteries? This is a big no (in my case) for buying this camera since the battery will need a change after some years of use. It's a shame it doesn't turn on with only usb power, since getting the battery out for less weight on FPV would be awesome.
The battery is proprietary and not user-replaceable, so the batteries will never be available separately—at least not officially from GoPro. There might be some spare parts from dismantled cameras on AliExpress in the future, but that's about it. In that regard, the Hero11 Mini is very much like the older GoPro Session models.