What you need

This teardown is not a repair guide. To repair your Galaxy S23 Plus, use our service manual.

  1. Galaxy S23+ Teardown, Remove the SIM Tray: step 1, image 1 of 2 Galaxy S23+ Teardown, Remove the SIM Tray: step 1, image 2 of 2
    • Using a SIM card eject tool remove the SIM holder and the SIM if present.

  2. Galaxy S23+ Teardown, Remove the rear glass: step 2, image 1 of 2 Galaxy S23+ Teardown, Remove the rear glass: step 2, image 2 of 2
    • Using an opening pick and a suction handle, cut the underlying adhesive and remove the rear glass.

  3. Galaxy S23+ Teardown: step 3, image 1 of 1
    • Remove the 20 #00 Phillips screws.

  4. Galaxy S23+ Teardown, Remove wireless charging: step 4, image 1 of 1
    • Unplug the two connectors connecting the wireless charging to the motherboard and remove it.

  5. Galaxy S23+ Teardown, Remove the speaker: step 5, image 1 of 1
    • Disconnect the 5 connectors.

    • Remove the speaker.

  6. Galaxy S23+ Teardown, Unplug the front camera.: step 6, image 1 of 1
    • Unplug the connector of the front camera.

    • REMOVE THE FRONT CAMERA ONLY IF NEEDED BECAUSE IT'S GLUED TO THE SCREEN!

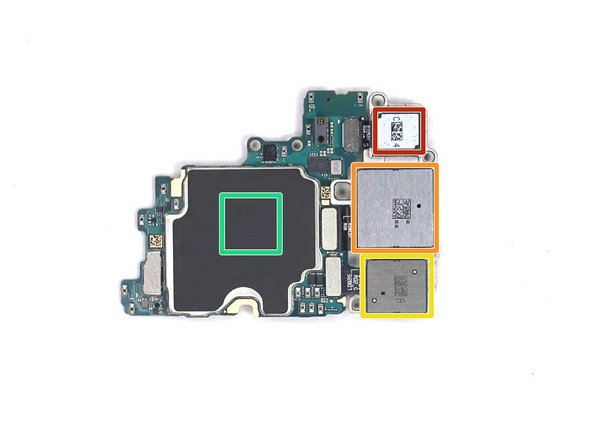
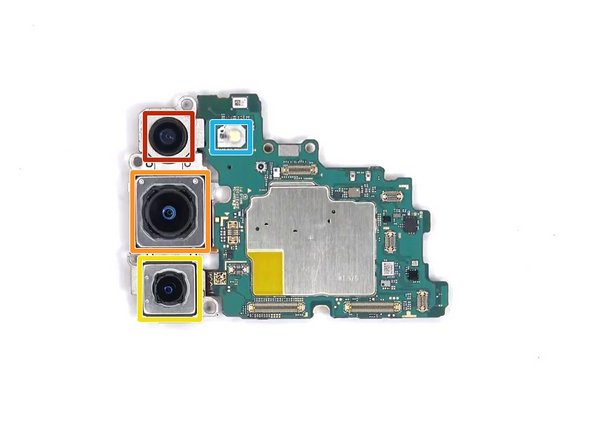
  7. Galaxy S23+ Teardown, Remove the Motherboard: step 7, image 1 of 3 Galaxy S23+ Teardown, Remove the Motherboard: step 7, image 2 of 3 Galaxy S23+ Teardown, Remove the Motherboard: step 7, image 3 of 3
    • Using an opening pick pull up the motherboard.

    • 12 MP Ultrawide camera.

    • 50 MP wide camera with OIS.

    • 10 MP telephoto lens camera with OIS.

    • Under this there's the RAM with the CPU.

    • A secondary microphone and the flash light.

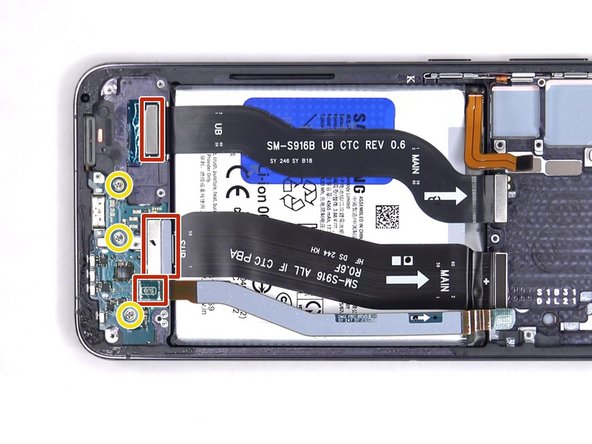
  8. Galaxy S23+ Teardown, Remove the Charging Board: step 8, image 1 of 2 Galaxy S23+ Teardown, Remove the Charging Board: step 8, image 2 of 2
    • Use an opening pick to remove the speaker assembly.

    • Unplug the three connectors.

    • Unscrew the three Phillips #00 screws that secure the charging board and remove it.

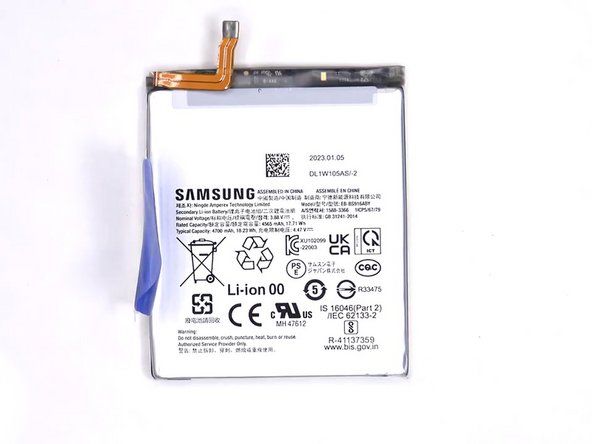
  9. Galaxy S23+ Teardown, Remove the battery: step 9, image 1 of 2 Galaxy S23+ Teardown, Remove the battery: step 9, image 2 of 2
    • Using the tab provided, remove the battery.

Andrea Alfani

Member since: 04/20/22

8,383 Reputation

5 Guides authored

Team

SussyFixers Member of SussyFixers

Community

3 Members

14 Guides authored

3 Guide Comments

My S23+ has a defect from the factory. The bezel isn't symmetrical. Is there a public forum where I could upload a file?

Brother Marquis - Reply

Please add the charging circuit board to your store.

Đặng Gia - Reply

Please add the Galaxy S23+ charging board to your store.

Đặng Gia - Reply

Add Comment

View Statistics:

Past 24 Hours: 2

Past 7 Days: 24

Past 30 Days: 81

All Time: 4,522