Framed Teardown

What you need

  1. Framed Teardown, Preparasion: step 1, image 1 of 1
    • Products: Beats Headphone

    • Tools: Screws, Knife

  2. Framed Teardown, Front View of the product: step 2, image 1 of 1
    • Beats Headphone (Front view)

  3. Framed Teardown, Disassembly of the headphone sponge part: step 3, image 1 of 1
    • Fixing method: Adhesive

    • Tear apart the adhesive section by hand

  4. Framed Teardown, Disassembly of the leather on the sponge: step 4, image 1 of 1
    • Fixing method: Adhesive

    • Take it off by hand

  5. Framed Teardown, Disassembly of the plastic layer: step 5, image 1 of 2 Framed Teardown, Disassembly of the plastic layer: step 5, image 2 of 2
    • Fixing method: Adhesive

    • Disassemble it by hand

    • If it is hard to take it off, you can use a knife cutting into the parting line to help

  6. Framed Teardown, Disassembly of the inner sponge: step 6, image 1 of 1
    • Fixing Method: Adhesive

    • Disassemble it by hand

  7. Framed Teardown, Disassembly of black cover: step 7, image 1 of 1
    • Fixing method: Adhesive

    • Peel it off by hand

  8. Framed Teardown, Disassembly of the plastic shell: step 8, image 1 of 2 Framed Teardown, Disassembly of the plastic shell: step 8, image 2 of 2
    • Fixing method: Screw-fixed

    • After the last step, the screws appear

    • 5 screws in total

    • 2 kinds of screw

    • Rotate the screwdriver counterclockwise

  9. Framed Teardown, Disassembly of the outer case: step 9, image 1 of 2 Framed Teardown, Disassembly of the outer case: step 9, image 2 of 2
    • Use a knife or a "-" head screwdriver to cut into the parting line

    • It is a snap structure so it may require a bit of force to disassemble

  10. Framed Teardown, Disassembly of the earpiece: step 10, image 1 of 2 Framed Teardown, Disassembly of the earpiece: step 10, image 2 of 2
    • This is also a snap structure. It requires more force to disassemble by hand

  11. Framed Teardown, Disassembly of PCB: step 11, image 1 of 3 Framed Teardown, Disassembly of PCB: step 11, image 2 of 3 Framed Teardown, Disassembly of PCB: step 11, image 3 of 3
    • Fixing method: Screw-fixed

    • 4 screws in total

    • Rotate the screwdriver counterclockwise

  12. Framed Teardown, Disassembly of the connecting piece: step 12, image 1 of 1
    • It is an inclined plane, so just pull it slightly to take it off

  13. Framed Teardown, Disassembly of the rubber piece: step 13, image 1 of 1
    • Fix method: Snap structure

    • Peel it off by hand

    • This is the last disassembly step of the left earpiece. Most of the steps for the right earpiece are the same.

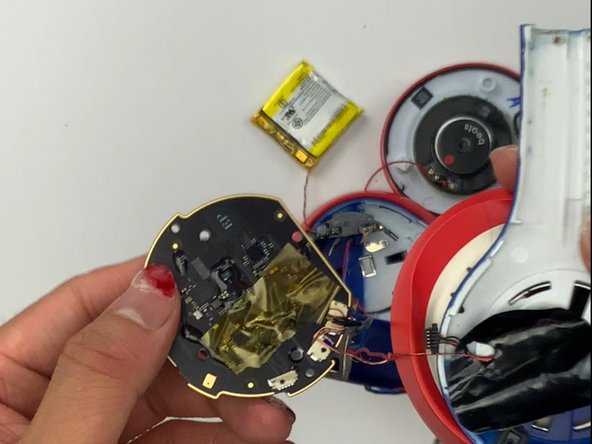
  14. Framed Teardown, Disassembly of the battery in the right earpiece: step 14, image 1 of 2 Framed Teardown, Disassembly of the battery in the right earpiece: step 14, image 2 of 2
    • Fixing method: Adhesive

    • Peel it off slightly by hand

    • Be careful, this battery is soft

  15. Framed Teardown, Disassembly of the button: step 15, image 1 of 2 Framed Teardown, Disassembly of the button: step 15, image 2 of 2
    • Take if off by hand

    • Be careful, this piece of plastic is prone to breaking

  16. Framed Teardown, Disassembly of the headband: step 16, image 1 of 2 Framed Teardown, Disassembly of the headband: step 16, image 2 of 2
    • Fixing method: Adhesive

    • Peel off the rubber part

    • The screws and the sponge then appear

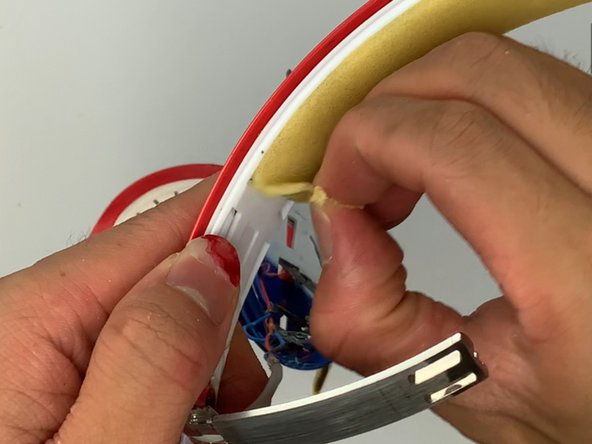
  17. Framed Teardown, Disassembly of the headband sponge: step 17, image 1 of 2 Framed Teardown, Disassembly of the headband sponge: step 17, image 2 of 2
    • Fixing method: Adhesive

    • Peel it off slightly

    • The sponge is very thin, be careful not to break it

  18. Framed Teardown, Disassembly of the plastic part of the headband: step 18, image 1 of 2 Framed Teardown, Disassembly of the plastic part of the headband: step 18, image 2 of 2
    • Fixing method: Screw-fixed

    • 2 on each side

    • 4 in total

    • Rotate the screwdriver counterclockwise

  19. Framed Teardown, Disassembly of the inner structure of the headband: step 19, image 1 of 2 Framed Teardown, Disassembly of the inner structure of the headband: step 19, image 2 of 2
    • Fixing method: Snap structure

    • Disassemble it by hand

  20. Framed Teardown, Disassembly of the folding structure: step 20, image 1 of 3 Framed Teardown, Disassembly of the folding structure: step 20, image 2 of 3 Framed Teardown, Disassembly of the folding structure: step 20, image 3 of 3
    • Bend it and then push it out by hand

  21. Framed Teardown, Disassembly of the metal piece: step 21, image 1 of 1
    • After the last step, turn it over and the metal piece will drop out

  22. Framed Teardown, Disassembly of the metal ring: step 22, image 1 of 2 Framed Teardown, Disassembly of the metal ring: step 22, image 2 of 2
    • Use a "-" head screwdriver to help.

  23. Framed Teardown, Display of all components: step 23, image 1 of 2 Framed Teardown, Display of all components: step 23, image 2 of 2
    • 8 categories are included

    • Sponge, Leather, Rubber, Screws, Metal, Plastic, adhesive components, electronic components

Conclusion

当重新组装你的设备时,请按照说明的相反顺序进行操作。

Ryan Wang

Member since: 03/23/24

337 Reputation

1 Guide authored

0 Comments

Add Comment

View Statistics:

Past 24 Hours: 1

Past 7 Days: 1

Past 30 Days: 7

All Time: 11