What you need

This teardown is not a repair guide. To repair your Digital Caliper, use our service manual.

  1. Digital Caliper Teardown, Remove Battery: step 1, image 1 of 2 Digital Caliper Teardown, Remove Battery: step 1, image 2 of 2
    • Slide the battery compartment open.

    • Pull out the battery.

  2. Digital Caliper Teardown, Screw out the housing: step 2, image 1 of 2 Digital Caliper Teardown, Screw out the housing: step 2, image 2 of 2
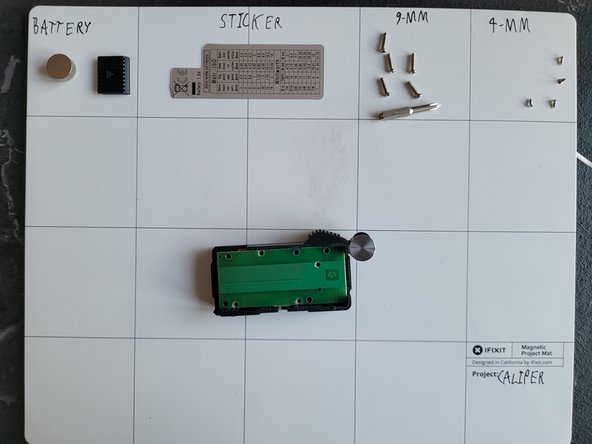
    • Remove the sticker and place it on a clean sticker-friendly surface.

    • Screw out the 9-mm screws using the J0 Bit.

  3. Digital Caliper Teardown, Housing dissasembly: step 3, image 1 of 3 Digital Caliper Teardown, Housing dissasembly: step 3, image 2 of 3 Digital Caliper Teardown, Housing dissasembly: step 3, image 3 of 3
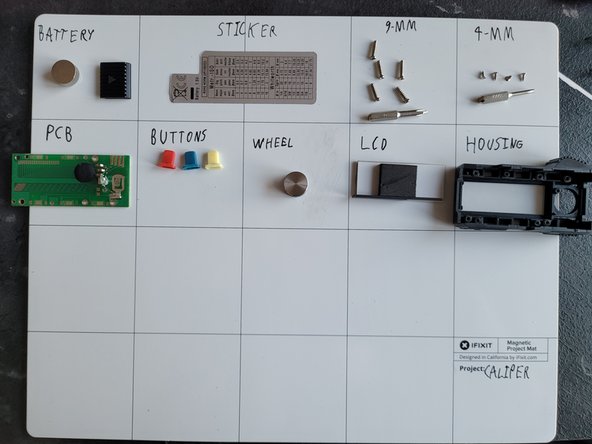
    • Screw out the 4-mm screws holding the PCB in place. Use the J000 bit.

    • Now take out all the parts from the housing.

  4. Digital Caliper Teardown, Body: step 4, image 1 of 2 Digital Caliper Teardown, Body: step 4, image 2 of 2
    • Remove the right/bottom 6mm screws.

    • Then the last 2 and the tightener screws. So you can pull it apart.

Sebastian

Member since: 12/02/21

532 Reputation

2 Guides authored

0 Comments

Add Comment

View Statistics:

Past 24 Hours: 4

Past 7 Days: 22

Past 30 Days: 106

All Time: 1,515