Free Shipping on Domestic Orders $75+

What you need

This teardown is not a repair guide. To repair your Arlo Pro 3 - 2K QHD Wire-Free Security Camera, use our service manual.

    1. Arlo Pro 3 - 2K QHD Wire-Free Security Camera Teardown, Arlo Pro 3 - 2K QHD Wire-Free Security Camera Teardown: step 1, image 1 of 3 Arlo Pro 3 - 2K QHD Wire-Free Security Camera Teardown, Arlo Pro 3 - 2K QHD Wire-Free Security Camera Teardown: step 1, image 2 of 3 Arlo Pro 3 - 2K QHD Wire-Free Security Camera Teardown, Arlo Pro 3 - 2K QHD Wire-Free Security Camera Teardown: step 1, image 3 of 3
      • Features:

      • 2K Video with HRD

      • Color Night Vision

      • Integrated Spotlight

      • 2-Way Audio

      • Weather Resistant

      • In the Box:

      • Camera, Battery Pack, USB Charging Cable, and Magnetic Mounting Base

      Ask FixBot

      Add Comment

    2. Arlo Pro 3 - 2K QHD Wire-Free Security Camera Teardown: step 2, image 1 of 3 Arlo Pro 3 - 2K QHD Wire-Free Security Camera Teardown: step 2, image 2 of 3 Arlo Pro 3 - 2K QHD Wire-Free Security Camera Teardown: step 2, image 3 of 3
      • To open the Arlo Pro 3 Camera, press the Button on the bottom, and pull the Camera Face (Camera Body) away from the Camera Enclosure

      • Charging port for internal battery pack

      Ask FixBot

      Add Comment

    3. Arlo Pro 3 - 2K QHD Wire-Free Security Camera Teardown: step 3, image 1 of 2 Arlo Pro 3 - 2K QHD Wire-Free Security Camera Teardown: step 3, image 2 of 2
      • Remove the Battery from the Camera Body by gently pulling the Battery away from the Camera Body

      • The Battery Capacity is 4800mAh

      Ask FixBot

      Add Comment

    4. Arlo Pro 3 - 2K QHD Wire-Free Security Camera Teardown: step 4, image 1 of 3 Arlo Pro 3 - 2K QHD Wire-Free Security Camera Teardown: step 4, image 2 of 3 Arlo Pro 3 - 2K QHD Wire-Free Security Camera Teardown: step 4, image 3 of 3
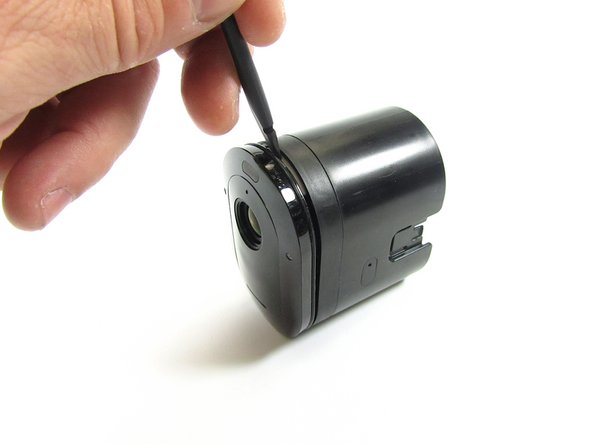
      • To remove the Camera Face Plate from the Camera Body, remove the four PH00 screws in the Battery Compartment area that secure the Camera Face Plate to the Camera Body

      • Use the Spudger Tool to pop off the Camera Faceplate

      Ask FixBot

      Add Comment

    5. Arlo Pro 3 - 2K QHD Wire-Free Security Camera Teardown: step 5, image 1 of 3 Arlo Pro 3 - 2K QHD Wire-Free Security Camera Teardown: step 5, image 2 of 3 Arlo Pro 3 - 2K QHD Wire-Free Security Camera Teardown: step 5, image 3 of 3
      Ask FixBot

      Add Comment

    6. Arlo Pro 3 - 2K QHD Wire-Free Security Camera Teardown: step 6, image 1 of 3 Arlo Pro 3 - 2K QHD Wire-Free Security Camera Teardown: step 6, image 2 of 3 Arlo Pro 3 - 2K QHD Wire-Free Security Camera Teardown: step 6, image 3 of 3
      • The small PCB behind the camera face plate contains Sensors, LED lighting components, and Infrared Lighting LEDs. This PCB is held in place with three PH00 screws

      • Remove these screws to remove the PCB

      • Use a Spudger Tool to pry the PCB loose

      Ask FixBot

      Add Comment

    7. Arlo Pro 3 - 2K QHD Wire-Free Security Camera Teardown: step 7, image 1 of 3 Arlo Pro 3 - 2K QHD Wire-Free Security Camera Teardown: step 7, image 2 of 3 Arlo Pro 3 - 2K QHD Wire-Free Security Camera Teardown: step 7, image 3 of 3
      • The microphone on the PCB is held in place with a rubber gasket, and connected via flex cable

      • To remove the Microphone, use a Spudger Tool to flip up the retention clip that holds the flex cable in place, and gently pop the microphone gasket from the PCB

      • The microphone rubber gasket can be separated from the Microphone

      • The Microphone is a Vesper VM1010 Wake-On-Sound MEMS Microphone

      Ask FixBot

      Add Comment

    8. Arlo Pro 3 - 2K QHD Wire-Free Security Camera Teardown: step 8, image 1 of 2 Arlo Pro 3 - 2K QHD Wire-Free Security Camera Teardown: step 8, image 2 of 2
      • With the PCB removed in the previous steps, use the Spudger Tool to pry the Camera face from the Camera Body

      • Pull the Camera face away from the Camera Body

      Ask FixBot

      Add Comment

    9. Arlo Pro 3 - 2K QHD Wire-Free Security Camera Teardown: step 9, image 1 of 2 Arlo Pro 3 - 2K QHD Wire-Free Security Camera Teardown: step 9, image 2 of 2
      • There are two more PCBs in the camera face assembly. The Top PCB is held in place via a zero force insertion connector.

      • A Spudger Tool can be used to remove the Top PCB by gently prying the Top PCB loose near the zero force insertion connector, and working around the outside of the Top PCB prying it loose further with the Spudger Tool

      • The Siren/Speaker is also connected to the Top PCB and can be unplugged.

      Ask FixBot

      Add Comment

    10. Arlo Pro 3 - 2K QHD Wire-Free Security Camera Teardown: step 10, image 1 of 2 Arlo Pro 3 - 2K QHD Wire-Free Security Camera Teardown: step 10, image 2 of 2
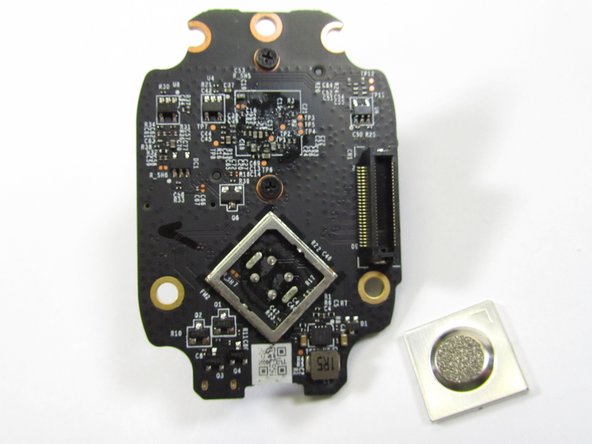
      • The Top PCB has a Heatsink on it that can be removed with a Spudger or Dental Pick Tool

      • The Heatsink is held in place with Thermally Conductive Adhesive Transfer Tape

      Ask FixBot

      Add Comment

    11. Arlo Pro 3 - 2K QHD Wire-Free Security Camera Teardown: step 11, image 1 of 3 Arlo Pro 3 - 2K QHD Wire-Free Security Camera Teardown: step 11, image 2 of 3 Arlo Pro 3 - 2K QHD Wire-Free Security Camera Teardown: step 11, image 3 of 3
      • Once the Heatsink has been removed, the Top PCB can be inspected. The Top PCB has RF Shielding on both sides

      • The RF Shielding can be removed using a Dental Pick Took

      • Pro-tip, if the RF shielding has a small circle indention on it, there is a good chance the shield was snapped in place, and not soldered to the PCB, which makes it easier to remove

      Ask FixBot

      Add Comment

    12. Arlo Pro 3 - 2K QHD Wire-Free Security Camera Teardown: step 12, image 1 of 3 Arlo Pro 3 - 2K QHD Wire-Free Security Camera Teardown: step 12, image 2 of 3 Arlo Pro 3 - 2K QHD Wire-Free Security Camera Teardown: step 12, image 3 of 3
      • One side of the Top PCB appears to be Power and Audio. Three components were crossed on this PCB. One Part was located up under the RF shielding Frame

      • BQ25898 - I2C Controlled Single Cell 4-A Fast Charger with MaxChargeTM for High Input

      • TAS2560 - 5.6W Class-D Mono Audio Amplifier with IV Sense

      • DSP Group D2A3X - Audio DSP

      Ask FixBot

      Add Comment

    13. Arlo Pro 3 - 2K QHD Wire-Free Security Camera Teardown: step 13, image 1 of 2 Arlo Pro 3 - 2K QHD Wire-Free Security Camera Teardown: step 13, image 2 of 2
      • The other side of the Top PCB has the Camera Video Image Processor, RAM, FLASH, and Wireless Communications

      • These components are covered in Thermally Conductive Adhesive Transfer Tape, which can be removed with a Dental Pick Tool

      Ask FixBot

      Add Comment

    14. Arlo Pro 3 - 2K QHD Wire-Free Security Camera Teardown: step 14, image 1 of 1
      Ask FixBot

      Add Comment

    15. Arlo Pro 3 - 2K QHD Wire-Free Security Camera Teardown: step 15, image 1 of 2 Arlo Pro 3 - 2K QHD Wire-Free Security Camera Teardown: step 15, image 2 of 2
      • Turning our attention to the other board in the Camera Face, we see that it is held in place with three PH00 Screws

      • To remove this PCB, remove the three PH00, remove the heatsink, and then pull out the PCB

      Ask FixBot

      Add Comment

    16. Arlo Pro 3 - 2K QHD Wire-Free Security Camera Teardown: step 16, image 1 of 2 Arlo Pro 3 - 2K QHD Wire-Free Security Camera Teardown: step 16, image 2 of 2
      • Looking at this PCB, we see one side has a heatsink, and the other side has the Camera Lens, Camera Image Sensor, and PIR Motion detector

      Ask FixBot

      Add Comment

    17. Arlo Pro 3 - 2K QHD Wire-Free Security Camera Teardown: step 17, image 1 of 2 Arlo Pro 3 - 2K QHD Wire-Free Security Camera Teardown: step 17, image 2 of 2
      • Using a Dental Pick Tool, remove the heatsink.

      • The heatsink is for the PYD1548/7660 Excelites Tech Low Power Motion PIR Sensor. PIR Sensors can be kept cool to improve sensing performance

      • Other components on this side of the board appear to be for power and control functions

      Ask FixBot

      Add Comment

    18. Arlo Pro 3 - 2K QHD Wire-Free Security Camera Teardown: step 18, image 1 of 3 Arlo Pro 3 - 2K QHD Wire-Free Security Camera Teardown: step 18, image 2 of 3 Arlo Pro 3 - 2K QHD Wire-Free Security Camera Teardown: step 18, image 3 of 3
      • On this side of the PCB, there are two PH00 screws that hold the Camera Lens in place. Remove these screws to release the Camera Lens

      • The Camera Lens is motorized. There is a control wire and connector for the Camera Lens. Remove the Camera Lens wire from the connector, and pull the Camera Lens free to reveal the 2K QHD Camera Sensor

      • Components:

      • 2K QHD Camera Sensor - Not marked

      • PYD1548/7660 Excelites Tech Low Power Motion PIR Sensor

      Ask FixBot

      Add Comment

    19. Arlo Pro 3 - 2K QHD Wire-Free Security Camera Teardown: step 19, image 1 of 1
      • Teardown Exploded View

      • Arlo Pro 3 2K QHD Wire-Free Security Camera

      Ask FixBot

      Add Comment

Robert Shuler

Member since: 03/12/19

3,559 Reputation

11 Guides authored

3 Guide Comments

Hi strange question but i have Alro pro 3 cameras that have 7 day rolling cloud space. I also have an arlo 4 bought not knowing that it did not include the cloud space. Was wondering how the 4 and the 3 compare and can one build a 3 from the 4?

Andrew - Reply Share

My camera fell like 15 feet onto concrete. Now it powers on and syncs, but will no longer actually connect. What most likely broke inside? Thanks

Luke Urice - Reply Share

Question regarding the internally accessible Micro-USB port: Does this have a documented or discovered purpose?

I have found that it does provide power to the device, though it appears to not be a active data connection by default (dmesg in Linux shows nothing connected.)

I was experimenting with a VMC4040P that I cannot seem to sync to my base station and found that the small pin-hole is a cover that exposes the usb port easily.

Ryan Brown - Reply Share

Add Comment

View Statistics:

Past 24 Hours: 1

Past 7 Days: 17

Past 30 Days: 87

All Time: 9,121