Introduction
If you're looking to replace the retaining clip that holds the iPod door in, you might be out of luck. It seemed to be more work than was worth it in my case, but I was able to clean the circuit board with electronic contact cleaner, and I also cleaned all the aluminum grills and dust from the plastic.
Edit: Well, I ordered a sample from the company that provides the clip for the door, and you simply have to pull the broken door latch out with some pliers, then push the new one in, and your door works just like it's new! The name of the company is Richco, a part of Essentra Components, and the part number is DL-1X. They shipped two of them to me for free. Awesome!
What you need
-
-
Remove the rubber surround from the outside of the carry handle.
-
Unscrew the two Phillips screws from the inside of the carry handle area.
-
-
-
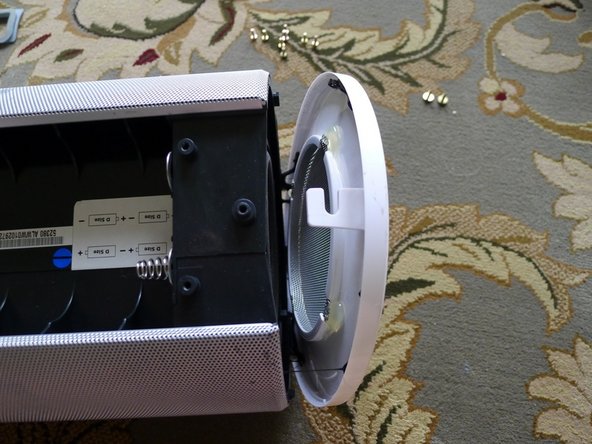
Twist the side subwoofer grill counter-clockwise to release it from the case.
-
You can then remove the grill by tugging a bit on it. There is adhesive keeping it stuck to the main body, so pull slowly.
-
You now have access to the side-firing subwoofer (and the passive driver on the other side). You can remove the four Phillips screws and replace these speakers, if you're stopping here.
-
-
-
-
The dock piece is connected to the circuit board via wires that you can see move while you pull it forward.
-
I chose to not remove the dock portion because I didn't want to disconnect any wires from the board, but if you're doing a repair, feel free to take this even further. You should have made it far enough through the teardown to get as far as you need from here.
-
To replace the door latch, you actually don't have to take the unit apart at all. Just request a sample of part DL-1X from Richco Components, and they'll send you two for free! Pull the old one out with pliers (little black clip), and push the new one in until it 'snaps' into place.
-


39 Comments
As i can see it's the same D class amps used in my Altec IMT-800.
These devices are very powerfull and the sound quality is present for D class.
If someone have some schematic i would be very happy to have a look!
Altec construction is quite complicated but the case (for my IMT800) is VERY resistant.
I don't regret my 240Euro spent on it at all
Thanks
Yeah I had to have a go at mine when I started having speakers go out one by one and it took forever but like nico said about his, ITS WORTH IT! I've never been more impressed by any stereo as much as this model particularly. And mine was not a living room fixture by any means at all, I dragged it from job site to job site beatin on it (and out it) day after day loud as it could go and it's STILL going! I'll be MOST grateful for ANY more info you come across, thx.
-BeniBacon
The only thing I don't like about mine is that sometimes when I turn it on, it emits an insanely loud whistle noise that feels like it's going to pierce my ear drums. I thought cleaning it with contact cleaner would fix that, but it didn't. I wish I knew what was causing it, because it makes me afraid to turn it on!
When it doesn't do that whistling noise though, man this is the best sounding iPod stereo I've ever heard!
SMD capacitor problem, somewhere on that board
Well, I haven't been able to figure out why I get the loud feedback noise when I turn this on occasionally, so I went ahead and upgraded to a Kicker iK501. Very similar to the iM7, and although I'll always have a soft spot in my heart for the iM7, the Kicker is a very, very nice 30-pin iPod dock.