Introduction
This is a simple teardown that will allow you to access and replace basic system components like the hard drive, RAM, disc drive, power supply, etc.
This does not includes instructions on removing/replacing core components such as the CPU or motherboard.
What you need
-
-
Lay the desktop down on it's right side.
-
Remove the 2 black screws holding the side panel on at the back of the case.
-
Pull the grip straight back and lift up to remove the side panel.
-
-
-
Remove the 4 Phillips screws holding in the hard drive mount.
-
Disconnect the power and data cable from the hard drive.
-
Lift up on the hard drive mount while pulling it backwards (towards the back of the case).
-
-
-
Simply remove the 4 screws that hold the hard drive to it's mount, then pull the two apart.
-
-
-
You must remove the disc drive before you can remove the case's front cover.
-
Disconnect the power and data cable from the back of the disc drive.
-
Push down on the black tab located on the back of the disc drive, then push it forward towards the front of the case.
-
Finish removing the drive by pulling it out from the front of the case.
-
-
-
-
Life up on the 3 plastic tabs pictured while pulling the front cover away from the case.
-
Gently pull the front cover down and away from the case to remove it.
-
-
-
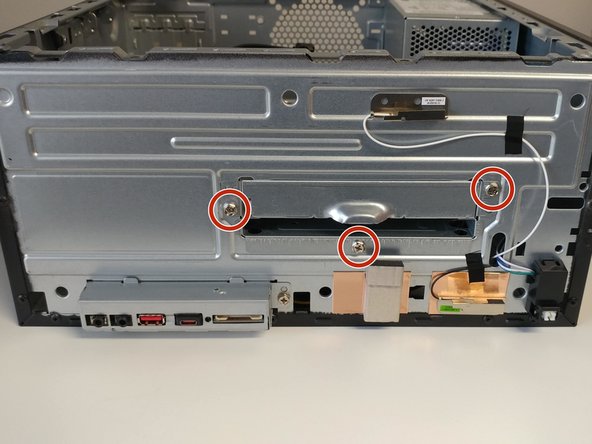
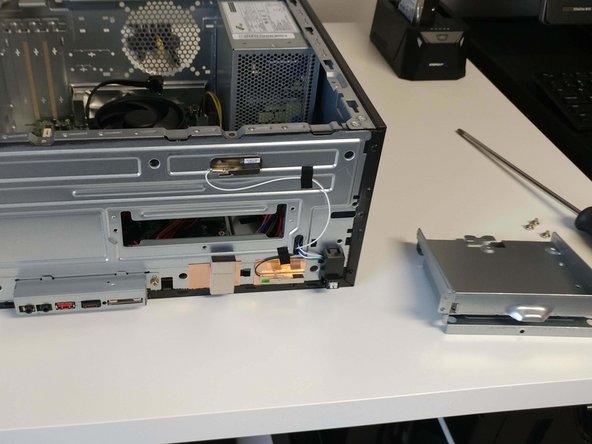
Remove the 3 screws on the front of the case holding in the drive cage.
-
Pull the drive cage straight out.
-
-
-
Only the top clip on the RAM slots opens. Pull it open, then "wiggle" the RAM module back and forth while pulling upward to remove it.
-
-
-
Removing the disc drive cage in step 6 will reveal the M.2 drive slot.
-
It is located on the motherboard next to the 24 pin power connector and the sata ports.
-
-
-
Disconnect the 24pin motherboard power connector and the 4 pin CPU power connector by pushing on their tabs and pulling them straight up.
-
Remove the 3 screws holding the power supply to the case.
-
-
-
There's a small "tab" inside the case that you have to push down to be able to remove the power supply. It's right behind where the bundle of power cords come out of the power supply.
-
This tab can be seen better in the second picture where the power supply has already been removed.
-
Push the tab down while pushing the power supply forward (towards the front of the case) and then the power supply should lift right out of the case.
-


Team

2 Comments
Thank you for posting, this will help me to upgrade the memory ram.
Could this computer support a full size video card if the hard drive mount was removed? I would use an ssd with velro tape instead.