This translation was generated by a machine and has not been reviewed by a person yet. Speak this language? Review it.
Introduction
This guide shows you how to replace the why! tablet's front camera, for example if it is malfunctioning during video calls or when taking selfies.
What you need
-
-
-
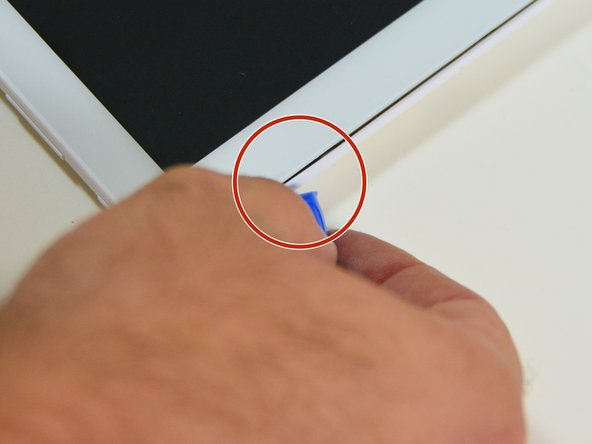
Using a plastic opening tool, insert the tip into the corner of the tablet, between the screen and the rear case.
-
Gently pry to start separating the rear case at this corner.
 Ask FixBot
-
-
-
Slide the opening tool along the edge of the tablet to release the rear case fasteners, reinserting the tool at other points along the perimeter as needed.
-
Once the perimeter is clear, lift and remove the rear case to access the internal components (motherboard, battery).
-
-
-
-
-
Locate the two connectors shown on the motherboard, near the camera module.
-
Using a screwdriver, remove the screw near the battery.
-
Remove the screw on the edge of the housing, next to the cable.
-
-
-
-
Remove the screw near the corner of the battery.
-
Using the opening tool, disconnect the connector located near the edge of the motherboard, next to the camera module.
-
Disconnect the connector on the left edge of the motherboard.
-
-
-
Disconnect the small white connector in the center of the motherboard.
-
Disconnect the connector on the left edge, near the battery label.
-
Disconnect the battery connector, in the upper right corner of the motherboard.
-
-
-
Disconnect the last connector on the edge of the motherboard.
-
Gently lift the battery to free it from its recess, then remove it from the tablet.
-
-
-
-
-
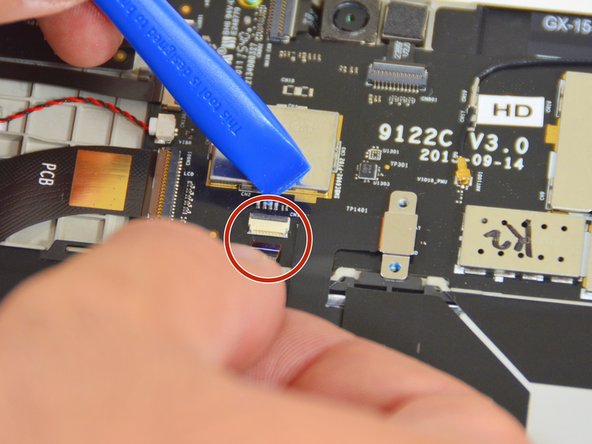
Locate the front camera module connector on the motherboard and disconnect it using the opening tool.
-
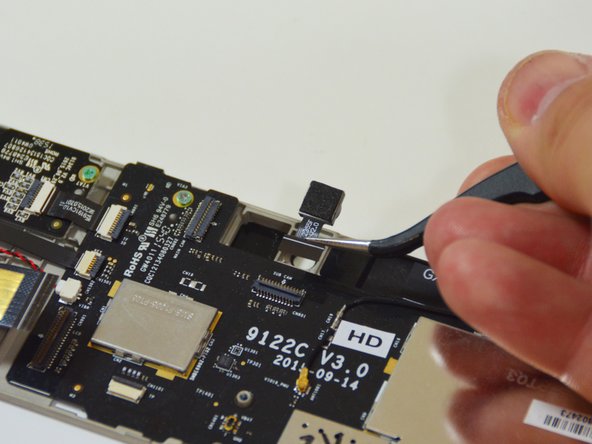
Gently remove the front camera module from its housing.
-
-








To reassemble your device, follow the instructions in reverse order.

