Free Shipping on Domestic Orders $75+

This translation may not reflect the most recent updates from the source guide. Help update the translation or view the source guide.

why! N650DU The LCD screen

What you need

    1. why! N650DU The LCD screen, The Batteries: step 1, image 1 of 3 why! N650DU The LCD screen, The Batteries: step 1, image 2 of 3 why! N650DU The LCD screen, The Batteries: step 1, image 3 of 3
      • Unlock the button without spring

      • Slide the battery up while unlocking the button with spring

      Ask FixBot

      Add Comment

    1. why! N650DU The LCD screen, LCD screen: step 2, image 1 of 3 why! N650DU The LCD screen, LCD screen: step 2, image 2 of 3 why! N650DU The LCD screen, LCD screen: step 2, image 3 of 3
      • Remove the two stickers circled in red

      • Unscrew the two screws

      Ask FixBot

      Add Comment

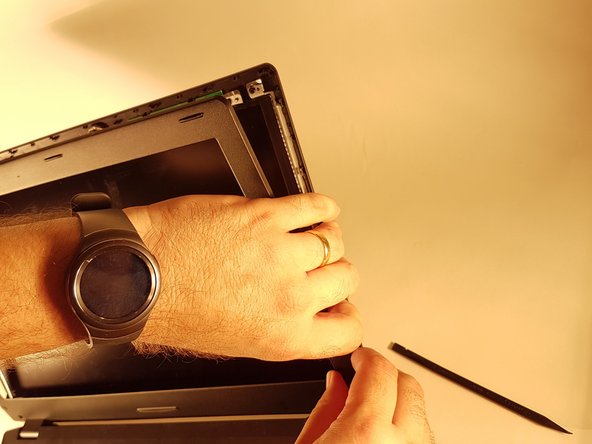
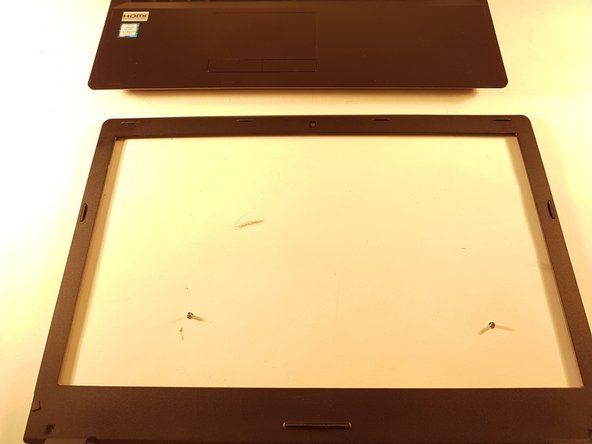
    2. why! N650DU The LCD screen: step 3, image 1 of 3 why! N650DU The LCD screen: step 3, image 2 of 3 why! N650DU The LCD screen: step 3, image 3 of 3
      • Tilt back the screen

      • Remove the frame from the screen

      Ask FixBot

      Add Comment

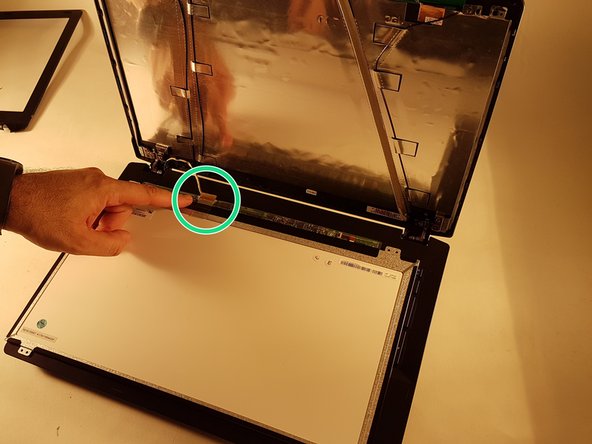
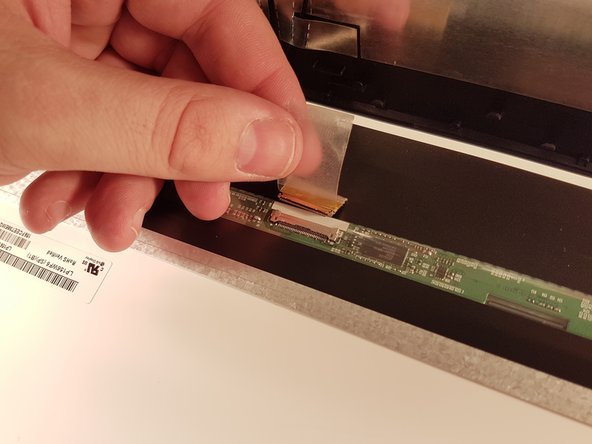
    3. why! N650DU The LCD screen: step 4, image 1 of 3 why! N650DU The LCD screen: step 4, image 2 of 3 why! N650DU The LCD screen: step 4, image 3 of 3
      • Unscrew the four screws circled in red

      • Put the screen gently on the keyboard

      • Remove the piece of tape then disconnect the connector surrounded in green

      Ask FixBot

      Add Comment

Conclusion

To reassemble your device, follow the instructions in reverse order.

Cancel: I did not complete this guide.

Special thanks to these translators:

fr en

50%

Israel is helping us fix the world! Want to contribute?
Start translating ›

Felice Suglia

Member since: 06/15/13

33,634 Reputation

283 Guides authored

0 Guide Comments

Add Comment

View Statistics:

Past 24 Hours: 1

Past 7 Days: 1

Past 30 Days: 21

All Time: 604