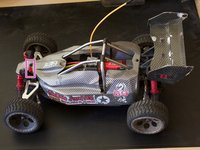
trim loss

  1. trim loss, trim loss: step 1, image 1 of 1
    • These two pins must be removed.

  2. trim loss: step 2, image 1 of 1
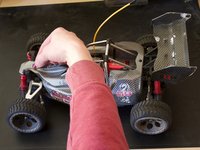
    • Here, a screwdriver or other stable thin object (in the picture: letter opener) can be helpful

  3. trim loss: step 3, image 1 of 2 trim loss: step 3, image 2 of 2
    • TIP: if you remove the cladding more often (for example, for thorough cleaning), it may be helpful to provide the splints with some insulating tape, so the use of tools is unnecessary

  4. trim loss: step 4, image 1 of 1
    • The panel is now dismantled

Conclusion

Repeat the steps in order to reassemble your device.

Special thanks to these translators:

de en

100%

irlanda is helping us fix the world! Want to contribute?
Start translating ›

Leonard Kesting

Member since: 08/14/16

1,229 Reputation

9 Guides authored

0 Comments

Add Comment

View Statistics:

Past 24 Hours: 0

Past 7 Days: 2

Past 30 Days: 2

All Time: 210