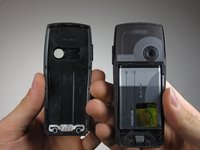
the Nokia 6230b Camera Replacement

What you need

  1. the Nokia 6230b Camera Replacement, Back Cover: step 1, image 1 of 1
    • Press down the button on the back panel.

  2. the Nokia 6230b Camera Replacement: step 2, image 1 of 2 the Nokia 6230b Camera Replacement: step 2, image 2 of 2
    • Push the back cover upwards.

  3. the Nokia 6230b Camera Replacement: step 3, image 1 of 2 the Nokia 6230b Camera Replacement: step 3, image 2 of 2
    • Remove the back cover from the phone.

  4. the Nokia 6230b Camera Replacement, Front Cover: step 4, image 1 of 1
    • Press the silver button on the top of the phone.

  5. the Nokia 6230b Camera Replacement: step 5, image 1 of 1
    • Slide your thumbnail down the case seam to separate the rest of the case.

  6. the Nokia 6230b Camera Replacement: step 6, image 1 of 1
    • Gently remove the case.

    • Careful! Do not bend the plastic tabs.

  7. the Nokia 6230b Camera Replacement, Motherboard: step 7, image 1 of 2 the Nokia 6230b Camera Replacement, Motherboard: step 7, image 2 of 2
    • Using a T6 Torx Screwdriver, unscrew and remove the six screws shown in the picture.

  8. the Nokia 6230b Camera Replacement: step 8, image 1 of 2 the Nokia 6230b Camera Replacement: step 8, image 2 of 2
    • Remove the panel that covers the motherboard.

    • If replacing the speaker, stop at this step and skip forward to the first step of the speaker guide.

  9. the Nokia 6230b Camera Replacement: step 9, image 1 of 1
    • Remove the LCD screen frame.

  10. the Nokia 6230b Camera Replacement: step 10, image 1 of 1
    • Remove the motherboard.

  11. the Nokia 6230b Camera Replacement, Camera: step 11, image 1 of 1
    • Locate the camera on the circuit board.

  12. the Nokia 6230b Camera Replacement: step 12, image 1 of 1
    • Place the circuit board on a firm, static free surface (no cloth/carpet).

    • NOTE: The circled alignment notch points to the left.

  13. the Nokia 6230b Camera Replacement: step 13, image 1 of 1
    • Pull the left holding tabs to the left.

  14. the Nokia 6230b Camera Replacement: step 14, image 1 of 1
    • Lift out the left side of the camera.

  15. the Nokia 6230b Camera Replacement: step 15, image 1 of 1
    • Pull the right holding tabs to the right.

  16. the Nokia 6230b Camera Replacement: step 16, image 1 of 1
    • Pull camera off of board.

Conclusion

To reassemble your device, follow these instructions in reverse order.

2 other people completed this guide.

Job Jao

Member since: 10/08/10

37 Reputation

2 Guides authored

Team

Cal Poly, Team 3-27, Regan Fall 2010 Member of Cal Poly, Team 3-27, Regan Fall 2010

CPSU-REGAN-F10S3G27

4 Members

9 Guides authored

0 Comments

Add Comment

View Statistics:

Past 24 Hours: 0

Past 7 Days: 0

Past 30 Days: 2

All Time: 1,872