Free Shipping on Domestic Orders $75+

iRobot Braava Jet 240 Back Shell Replacement

What you need

  1. iRobot Braava Jet 240 Back Shell Replacement, Battery: step 1, image 1 of 1
    • Turn the device off.

    Ask FixBot
    Add Comment

  2. iRobot Braava Jet 240 Back Shell Replacement: step 2, image 1 of 2 iRobot Braava Jet 240 Back Shell Replacement: step 2, image 2 of 2
    • Use your fingers to gently pop out the battery.

    Ask FixBot

    Add Comment

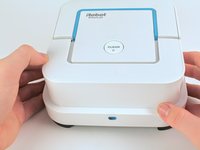
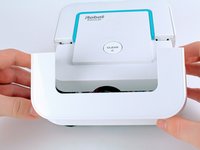
  3. iRobot Braava Jet 240 Back Shell Replacement, Mop Pad: step 3, image 1 of 2 iRobot Braava Jet 240 Back Shell Replacement, Mop Pad: step 3, image 2 of 2
    • Lift up the handle to reveal the eject button.

    Ask FixBot

    Add Comment

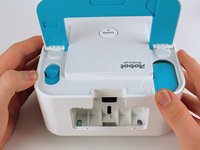
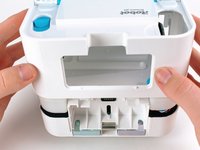
  4. iRobot Braava Jet 240 Back Shell Replacement: step 4, image 1 of 3 iRobot Braava Jet 240 Back Shell Replacement: step 4, image 2 of 3 iRobot Braava Jet 240 Back Shell Replacement: step 4, image 3 of 3
    • Use your finger to push the eject button forward.

    Ask FixBot
    Add Comment

  5. iRobot Braava Jet 240 Back Shell Replacement: step 5, image 1 of 1
    • Tilt the robot on its side and let the mop pad slide out.

    Ask FixBot
    Add Comment

  6. iRobot Braava Jet 240 Back Shell Replacement, Front Shell: step 6, image 1 of 2 iRobot Braava Jet 240 Back Shell Replacement, Front Shell: step 6, image 2 of 2
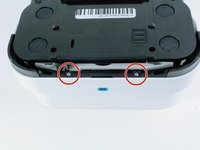
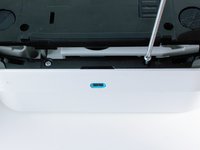
    • Remove the two 22.0 mm screws on the bottom-front of the robot using a Phillips #1 screwdriver.

    Ask FixBot

    Add Comment

  7. iRobot Braava Jet 240 Back Shell Replacement: step 7, image 1 of 2 iRobot Braava Jet 240 Back Shell Replacement: step 7, image 2 of 2
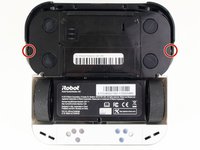
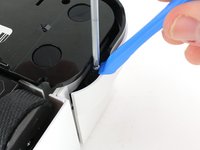
    • Use a Phillips #1 screwdriver and an iFixit opening tool to remove the two 15.0 mm screws on the front sides of the robot.

    Ask FixBot

    Add Comment

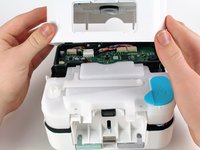
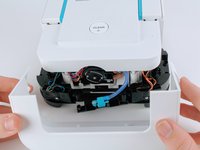
  8. iRobot Braava Jet 240 Back Shell Replacement: step 8, image 1 of 3 iRobot Braava Jet 240 Back Shell Replacement: step 8, image 2 of 3 iRobot Braava Jet 240 Back Shell Replacement: step 8, image 3 of 3
    • Carefully pull back on the front shell to remove it from the robot.

    Ask FixBot
    Add Comment

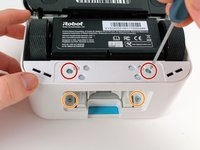
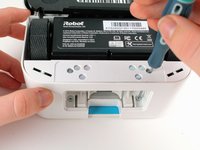
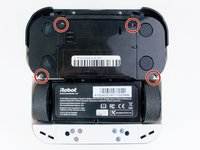
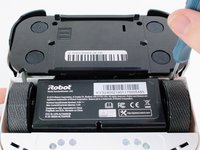
  9. iRobot Braava Jet 240 Back Shell Replacement, Back Shell: step 9, image 1 of 2 iRobot Braava Jet 240 Back Shell Replacement, Back Shell: step 9, image 2 of 2
    • Insert a Phillips #1 screwdriver through the screw holes.

    • Unscrew the two 9.7 mm screws.

    Ask FixBot
    Add Comment

  10. iRobot Braava Jet 240 Back Shell Replacement: step 10, image 1 of 2 iRobot Braava Jet 240 Back Shell Replacement: step 10, image 2 of 2
    • Unscrew the four 9.7 mm screws using a long neck #1 Phillips screwdriver.

    • If the screws are unscrewed but do not come out easily, turn the robot upside down and gently shake it.

    Ask FixBot

    Add Comment

  11. iRobot Braava Jet 240 Back Shell Replacement: step 11, image 1 of 3 iRobot Braava Jet 240 Back Shell Replacement: step 11, image 2 of 3 iRobot Braava Jet 240 Back Shell Replacement: step 11, image 3 of 3
    • Pull up on the back shell to remove it from the robot.

    • For reassembly, pop the mop pad release trigger back into place if it fell out during back shell removal.

    Ask FixBot

    Add Comment

Conclusion

To reassemble your device, follow these instructions in reverse order.

Cancel: I did not complete this guide.

Claire Franz

Member since: 02/10/20

2,805 Reputation

7 Guides authored

Team

Cal Poly, Team S22-G2, Regan Winter 2020 Member of Cal Poly, Team S22-G2, Regan Winter 2020

CPSU-REGAN-W20S22G2

5 Members

20 Guides authored

0 Guide Comments

Add Comment

View Statistics:

Past 24 Hours: 0

Past 7 Days: 5

Past 30 Days: 20

All Time: 1,681