Introduction
Although a cracked or broken body shell may not hinder the performance of your Braava, replacing it will help restore the cosmetic beauty of your device. It is a simple and straight forward replacement, requiring only four exposed screws to be removed.
What you need
-
-
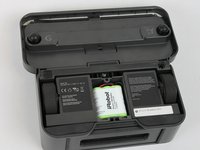
Using a Flathead #4 screwdriver, gently turn the 12mm screw that holds the battery cover in.
-
-
-
-
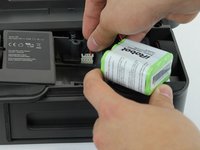
Gently remove the battery from the tray and disconnect the battery cable.
-
To remove the battery, pull it straight up. To disconnect the cable, gently pull it straight out of the connector.
-
-
-
With the battery removed, rotate your device so the front of it is facing you.
-
Remove the four 10mm Phillips #2 screws that attach the shell.
-
-
-
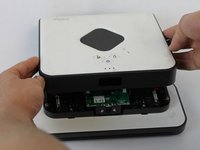
Using both hands, hold the device together while you flip it over.
-
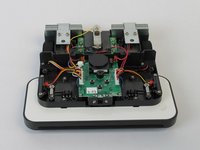
Starting from the front, gently lift up the shell and slowly tilt back until it is fully removed.
-


To reassemble your device, follow these instructions in reverse order.
Cancel: I did not complete this guide.
One other person completed this guide.
Team

USF Tampa, Team S1-G3, Nance Spring 2017 Member of USF Tampa, Team S1-G3, Nance Spring 2017
USFT-NANCE-S17S1G3
4 Members
10 Guides authored