Introduction
Replacing the battery requires a fine-tipped soldering iron.
What you need
-
-
Use a heat gun, hairdryer, iOpener, etc. to heat the back of the Shuffle until it's slightly too hot to the touch.
-
-
-
Use a combination of iPod opening tools and metal spudgers to pry the rear panel away from the Shuffle by the seam nearest the ON/OFF switch.
-
-
-
Remove the rear panel from the Shuffle.
-
There may be a piece of black rubber covering the logic board, or it may come out with the rear panel. This piece is part of a rubber seal that goes around the edges of the rear panel and covers the controls from the inside.
-
-
-
-
Remove the single 2.1 mm Phillips screw securing the logic board to the front case.
-
-
Tool used on this step:Tweezers$4.99
-
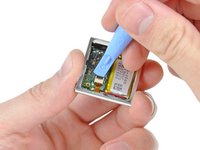
Use the edge of an iPod opening tool to flip up the retaining flap on the control button cable ZIF socket.
-
Use a pair of tweezers to gently pull the control button ribbon cable out of its socket.
-
-
-
Use an iPod opening tool to gently pry the battery off the adhesive securing it to the front case.
-
Lift the battery out of the front case, being sure not to strain its delicate leads.
-
-
-
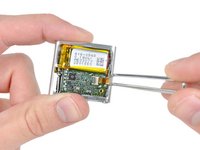
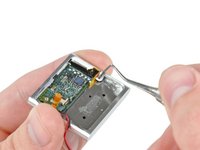
Insert the tip of a metal probe into the hole molded into the logic board retainer nearest the logic board.
-
Pry the retainer first away from the front of the front case, then pull it away from the side of the front case.
-
Remove the logic board retainer from the Shuffle.
-
-
-
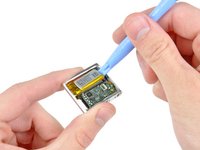
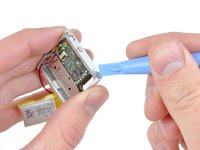
Use the edge of an iPod opening tool to push the headphone jack down toward the center of the Shuffle.
-
-
-
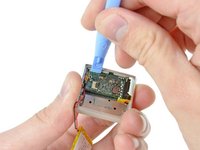
Continue pushing the logic board down away from the top edge of the Shuffle.
-
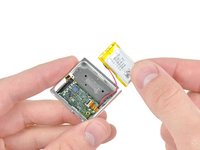
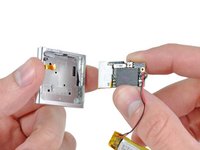
Pull the logic board out of the front case by the side nearest the ON/OFF button and gently maneuver the headphone jack out of its recess in the front case.
-
Remove the logic board assembly from the Shuffle.
-
-
-
Use a tip of a sharp metal probe to scrape off the glue covering the battery terminals near the control button ZIF socket.
-
-
Tool used on this step:FixHub Smart Soldering Iron$79.95
-
Use a fine-tipped soldering iron to heat up the battery connections boxed in red one at a time while you pull the corresponding lead away from the other side of the logic board.
-


To reassemble your device, follow these instructions in reverse order.
Cancel: I did not complete this guide.
57 other people completed this guide.

24 Guide Comments
I have a question. Why can't the leads to the old battery be cut without pulling the board, then just solder new battery leads to the old. Seems it might even be possible to add snap in connectors at this point to facilitate future changes.
I'm gonna try to remove the back cover with minimal prying to reduce cosmetic defects. The plan is to somehow remove the spring loaded clip by pushing out the lever pin, then drilling holes along the edge of the over wherre the 3 little hooks are (In this image, where the right thumb is touching. https://d3nevzfk7ii3be.cloudfront.net/ig...).
It would be great if someone could provide a closer look at where exactly the hooks are so I can position my 1.5mm drill bit better. Also, if you can to figure out how to remove the spring loaded clip mechanism without going through the 4 screws, that'd be awesome! I suspect the pin is held in place by just adhesive, but don't want to risk pushing too hard and causing defects. :(