Introduction
Replace the curved glass screen to make your iPod Nano look like new again.
What you need
-
-
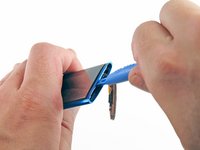
Insert an iPod opening tool between the outer case and top bezel near the screen.
-
Lifting up on the iPod opening tool, gently pry the top panel off of the device.
 Ask FixBot
-
-
-
Use an iPod opening tool to pry the hold switch button off of the hold switch plate.
-
-
-
-
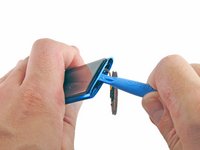
Insert an iPod opening tool between the outer case and the metal hold switch plate near the top of the screen .
-
While slightly lifting up on the iPod opening tool, pull the hold switch plate out of the iPod.
-
-
-
Insert an iPod opening tool between the display and the glass panel at the top of the device.
-
Rotate the iPod opening tool towards the rear of the device, slightly lifting the top of the glass out of the outer case.
-
-
-
While lifting the screen up with one iPod opening tool, insert a second iPod opening tool in between the outer case and the top left edge of the glass panel.
-
Remove the first iPod opening tool from between the glass and LCD in the top of the device.
-
-
-
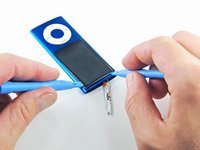
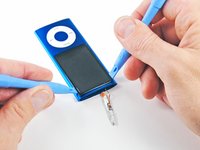
Prying up slightly on the iPod opening tool, insert a second iPod opening tool in between the front glass and the outer case, on the right side of the screen.
-
Slide the second iPod opening tool along the right edge of the panel to remove the adhesive.
-
-
-
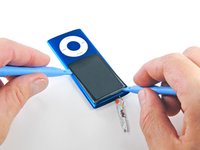
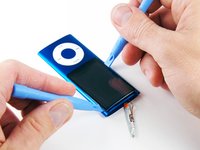
With one iPod opening tool still between the glass and outer case, insert a second iPod opening tool in between the front glass and outer case, on the left side.
-
Slide the second iPod opening tool toward the bottom of the device to remove the adhesive.
-
-
-
Lifting the glass from the side nearest the top of the iPod, remove the glass panel from the Nano.
-


To reassemble your device, follow these instructions in reverse order.
Cancel: I did not complete this guide.
36 other people completed this guide.

6 Guide Comments
This step by step guide is perfect for replacing the glass! There is no need to remove the click-wheel or the camera bezel - as seen in may other videos and guides. So stay away from the click wheel if you can - it's just glued in (there is no snap!) and it's really hard to put back in place again. And yes, ideally you can remove the glass without opening anything. It is just glued in and the new one will go in from the top. Good Luck!
I gave my homie my 8 gig when i bought my 16 gig. his girl dropped it and the glass screen cracked. took me no more then 5 minutes and i had it as good as new! Whoop Whoop, danke fo the instructions!
Dear Steven, To me exactly the same happened, although I was the person who got the Ipod and dropped it. So I do understand how to get the glass out, but how do I put a new one in? Just insert it and put everything back on? Should I use glue when I put the screen in? Or will it just stay there on its own? Thanks!
this was great and super easy! thanks so much