Free Shipping on Domestic Orders $75+

iPod 3rd Generation Front Panel Replacement

What you need

  1. iPod 3rd Generation Front Panel Replacement, Case: step 1, image 1 of 1
    • Before opening your iPod, ensure that the hold switch is in the locked position. The orange bar should be visible, indicating hold is active.

    Ask FixBot

    Add Comment

  2. iPod 3rd Generation Front Panel Replacement: step 2, image 1 of 3 iPod 3rd Generation Front Panel Replacement: step 2, image 2 of 3 iPod 3rd Generation Front Panel Replacement: step 2, image 3 of 3
    • Insert an opening pick as far as possible into the seam between the plastic front and the metal rear panel, on the right edge of the iPod.

    • You may need to rock the pick back and forth to slide it in farther.

    • Use the opening pick to pry up against the plastic front panel and release five retaining tabs (seen in the third photo).

    • Slide the pick along the edge of the iPod and continue prying to release the rest of the retaining tabs.

    • After all five tabs along the right side are free, the case should open easily.

    Ask FixBot

    Add Comment

  3. iPod 3rd Generation Front Panel Replacement: step 3, image 1 of 1
    • The iPod case is now open, but don't separate the two halves just yet. There is still an orange ribbon cable connecting the headphone jack to the logic board.

    • Open the case like a book with the dock connector at the top, and lay the rear panel next to the front half of the iPod.

    Ask FixBot

    Add Comment

  4. iPod 3rd Generation Front Panel Replacement: step 4, image 1 of 2 iPod 3rd Generation Front Panel Replacement: step 4, image 2 of 2
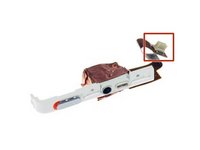
    • Use a plastic tool or your fingernails to carefully disconnect the orange headphone jack cable. Be sure to pull straight up on the connector, not the cable itself.

    • The headphone jack connector is unusually tall. When prying, be careful to not separate the lower, plastic part of the connector from the ribbon cable. Pry between the connector and the socket, not between the two halves of the connector.

    Ask FixBot

    Add Comment

  5. iPod 3rd Generation Front Panel Replacement, Logic Board: step 5, image 1 of 1
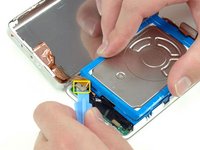
    • Lift up the hard drive with one hand and carefully disconnect the hard drive ribbon from the logic board.

    • Lift the hard drive out of the iPod.

    Ask FixBot

    Add Comment

  6. iPod 3rd Generation Front Panel Replacement: step 6, image 1 of 1
    • Carefully disconnect the white battery connector from the logic board. Be sure to pull only on the connector itself and not on the cables.

    Ask FixBot

    Add Comment

  7. iPod 3rd Generation Front Panel Replacement: step 7, image 1 of 1
    • Use a spudger to carefully disconnect the orange touch wheel cable from the logic board.

    Ask FixBot

    Add Comment

  8. iPod 3rd Generation Front Panel Replacement: step 8, image 1 of 1
    • Remove the 6 black T6 Torx screws securing the logic board to the front panel.

    Ask FixBot

    Add Comment

  9. iPod 3rd Generation Front Panel Replacement: step 9, image 1 of 1
    • Lift the logic board out of the iPod.

    • When reassembling your iPod, be sure that the plastic hold switch mechanism is synced with the hold switch on the logic board. The switch on the board is a small black nub that sits in a slot on the hold switch mechanism.

    Ask FixBot

    Add Comment

  10. iPod 3rd Generation Front Panel Replacement, Display: step 10, image 1 of 1
    • Use a spudger to carefully disconnect the orange display ribbon from the front panel.

    Ask FixBot

    Add Comment

  11. iPod 3rd Generation Front Panel Replacement: step 11, image 1 of 1
    • Lift the display panel out of the iPod.

    Ask FixBot

    Add Comment

  12. iPod 3rd Generation Front Panel Replacement, Front Panel: step 12, image 1 of 1
    • Lift the battery out of the iPod.

    Ask FixBot

    Add Comment

  13. iPod 3rd Generation Front Panel Replacement: step 13, image 1 of 1
    • Use a spudger to carefully disconnect the orange display ribbon from the front panel.

    Ask FixBot

    Add Comment

  14. iPod 3rd Generation Front Panel Replacement: step 14, image 1 of 1
    • Front panel remains.

    Ask FixBot

    Add Comment

Conclusion

To reassemble your device, follow these instructions in reverse order.

Cancel: I did not complete this guide.

10 other people completed this guide.

iRobot

Member since: 09/24/09

1 Reputation

636 Guides authored

2 Guide Comments

I have a new front housing without the click wheel board. How do I remove the board from the front panel and then re-attatch to the new front housing. Is it glued and what type of glue for the re-install. Do I have to use a rework station heat blower to soften the old glue, and if so what temperature do you recommend?

Thanks

Christopher South - Reply Share

I honestly think it would be easier to just get a whole new front case with the circuit board on it

Natalia Klynina - Reply Share

Add Comment

View Statistics:

Past 24 Hours: 4

Past 7 Days: 14

Past 30 Days: 96

All Time: 14,684