Free Shipping on Domestic Orders $75+

iPhone 15 Pro Battery Installation

Prerequisite Only
This is a prerequisite-only guide! This guide is part of another procedure and isn’t meant to be used alone.

What you need

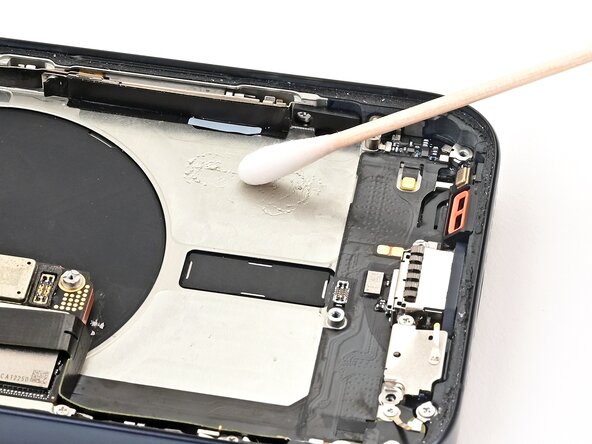
    1. iPhone 15 Pro Battery Installation, Clean the frame: step 1, image 1 of 3 iPhone 15 Pro Battery Installation, Clean the frame: step 1, image 2 of 3 iPhone 15 Pro Battery Installation, Clean the frame: step 1, image 3 of 3
      • Use cotton swabs or a lint‑free cloth and high‑concentration (>90%) isopropyl alcohol to wipe off any battery adhesive residue from the iPhone's frame.

      Ask FixBot

      Add Comment

    2. iPhone 15 Pro Battery Installation, Remove the adhesive liner: step 2, image 1 of 3 iPhone 15 Pro Battery Installation, Remove the adhesive liner: step 2, image 2 of 3 iPhone 15 Pro Battery Installation, Remove the adhesive liner: step 2, image 3 of 3
      • Peel the liner off the battery adhesive, pictured here in pink.

      • If the battery has a liner on the top of the battery, pictured here in blue, leave it in place for now.

      Ask FixBot

      Add Comment

    3. iPhone 15 Pro Battery Installation, Connect the battery: step 3, image 1 of 2 iPhone 15 Pro Battery Installation, Connect the battery: step 3, image 2 of 2
      • Hold the battery over its place in the iPhone, but don't lower it into place yet.

      • Use your finger or a spudger to connect the battery press connector.

      • This will ensure the battery is properly aligned.

      Ask FixBot

      Add Comment

    4. iPhone 15 Pro Battery Installation, Place the battery: step 4, image 1 of 3 iPhone 15 Pro Battery Installation, Place the battery: step 4, image 2 of 3 iPhone 15 Pro Battery Installation, Place the battery: step 4, image 3 of 3
      • The battery adhesive is very sticky! Be careful as you align the battery in its recess—once it sticks, you won't be able to realign it.

      • Push the battery towards the top of the iPhone so the battery cable is pressed against it, then lay it into its recess.

      Ask FixBot

      Add Comment

    5. iPhone 15 Pro Battery Installation, Press the battery: step 5, image 1 of 2 iPhone 15 Pro Battery Installation, Press the battery: step 5, image 2 of 2
      • Use your fingers to press the battery into place.

      Ask FixBot

      Add Comment

    6. iPhone 15 Pro Battery Installation, Remove the battery liner: step 6, image 1 of 3 iPhone 15 Pro Battery Installation, Remove the battery liner: step 6, image 2 of 3 iPhone 15 Pro Battery Installation, Remove the battery liner: step 6, image 3 of 3
      • Remove the protective cover off the top of the battery (if present).

      Ask FixBot

      Add Comment

    7. iPhone 15 Pro Battery Installation, Disconnect the battery: step 7, image 1 of 2 iPhone 15 Pro Battery Installation, Disconnect the battery: step 7, image 2 of 2
      • Use the point of a spudger or opening pick to pry up and disconnect the battery press connector.

      Ask FixBot

      Add Comment

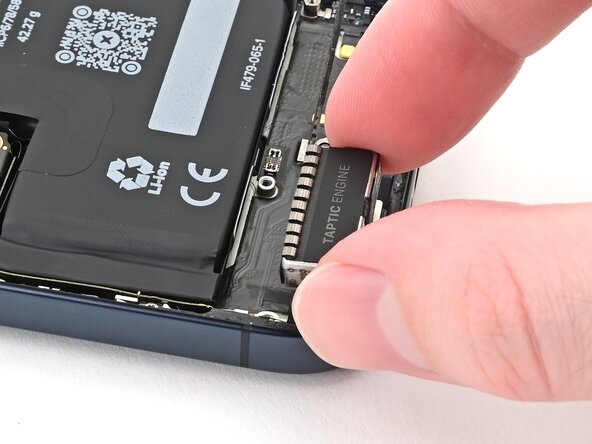
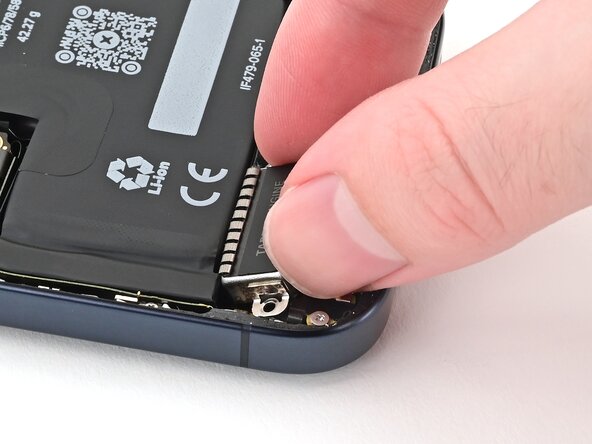
    8. iPhone 15 Pro Battery Installation, Install the Taptic Engine: step 8, image 1 of 3 iPhone 15 Pro Battery Installation, Install the Taptic Engine: step 8, image 2 of 3 iPhone 15 Pro Battery Installation, Install the Taptic Engine: step 8, image 3 of 3
      • Place the Taptic Engine into its recess in the frame.

      Ask FixBot

      Add Comment

    9. iPhone 15 Pro Battery Installation: step 9, image 1 of 1
      • Use a Phillips #000 screwdriver to install the two 2 mm‑long screws securing the Taptic Engine.

      Ask FixBot

      Add Comment

    10. iPhone 15 Pro Battery Installation, Connect the Taptic Engine: step 10, image 1 of 2 iPhone 15 Pro Battery Installation, Connect the Taptic Engine: step 10, image 2 of 2
      • Use the flat end of a spudger to connect the Taptic Engine press connector.

      Ask FixBot

      Add Comment

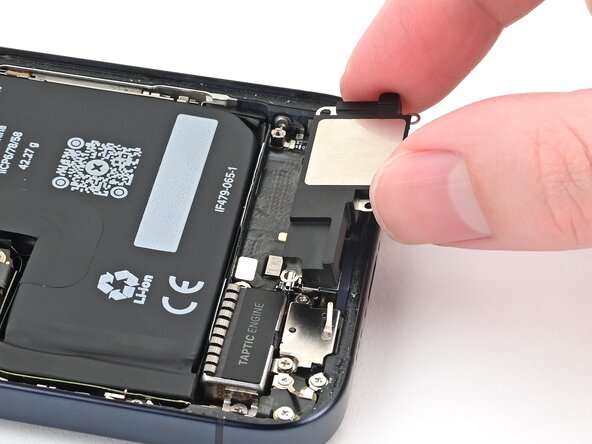
    11. iPhone 15 Pro Battery Installation, Install the loudspeaker: step 11, image 1 of 3 iPhone 15 Pro Battery Installation, Install the loudspeaker: step 11, image 2 of 3 iPhone 15 Pro Battery Installation, Install the loudspeaker: step 11, image 3 of 3
      • Place the loudspeaker into its recess in the frame.

      Ask FixBot

      Add Comment

    12. iPhone 15 Pro Battery Installation: step 12, image 1 of 1
      • Use a Phillips #000 screwdriver to install the four screws securing the loudspeaker:

      • One 2.7 mm‑long screw

      • Three 2 mm‑long screws

      Ask FixBot

      Add Comment

Finish Line

Cancel: I did not complete this guide.

Nick Schultz

Member since: 03/24/24

65,446 Reputation

343 Guides authored

0 Guide Comments

Add Comment

View Statistics:

Past 24 Hours: 0

Past 7 Days: 1

Past 30 Days: 6

All Time: 155