Free Shipping on Domestic Orders $75+

Microsoft Surface Pro 4 Left Speaker Replacement

Archived Guide
This guide is retained solely for historical purposes. Use the updated version of the guide to perform your repair.

What you need

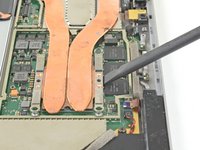
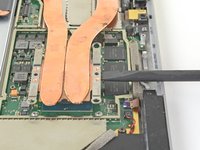
    1. Microsoft Surface Pro 4 Left Speaker Replacement, Remove the CPU shield: step 1, image 1 of 2 Microsoft Surface Pro 4 Left Speaker Replacement, Remove the CPU shield: step 1, image 2 of 2
      Tool used on this step:
      Tweezers
      $4.99
      Buy
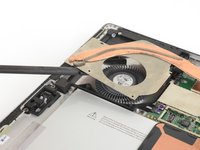
      • Insert one point of a pair of pointed tweezers into a gap in the corner of the EMI shield covering the heat sink.

      • Use the tweezers to pry the EMI shield away from the motherboard as much as you can without bending it. Do not remove it yet.

      • Take care not to puncture the battery with the tweezers while working on this shield.

      Ask FixBot

      Add Comment

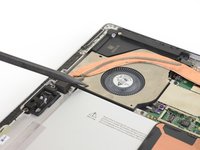
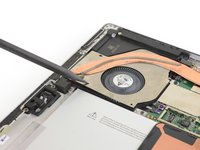
    2. Microsoft Surface Pro 4 Left Speaker Replacement: step 2, image 1 of 3 Microsoft Surface Pro 4 Left Speaker Replacement: step 2, image 2 of 3 Microsoft Surface Pro 4 Left Speaker Replacement: step 2, image 3 of 3
      • Repeat the last step at various locations around the perimeter of the EMI shield covering the heat sink.

      • Remove the CPU shield.

      Ask FixBot

      Add Comment

    3. Microsoft Surface Pro 4 Left Speaker Replacement, Unscrew the heat sink: step 3, image 1 of 1
      • Use a T3 Torx screwdriver to remove two screws from the heat sink:

      • One 2.4 mm screw along the top of the rectangular plate covering the battery.

      • Make sure you don't lose this bracket, as it might separate from the heatsink.

      • One 2.2 mm screw along the bottom of the rectangular plate covering the battery

      Ask FixBot

      Add Comment

    4. Microsoft Surface Pro 4 Left Speaker Replacement: step 4, image 1 of 1
      • The heat sink is firmly adhered to the fan.

      • Use a Phillips screwdriver to remove three 2.4 mm screws securing the fan.

      • Use a T5 Torx screwdriver to remove the final 4.4 mm screw securing in the fan cover.

      Ask FixBot

      Add Comment

    5. Microsoft Surface Pro 4 Left Speaker Replacement: step 5, image 1 of 1
      • Use a T5 Torx screwdriver to remove the heat sink screws surrounding the CPU in the following pattern, one turn at a time, until they're free.

      • Screw 1

      • Screw 2

      • Screw 3

      • Screw 4

      • During reassembly, use the same method to install these screws, tightening one turn at a time until each screw is snug.

      Ask FixBot

      Add Comment

    6. Microsoft Surface Pro 4 Left Speaker Replacement, Remove the heatsink: step 6, image 1 of 2 Microsoft Surface Pro 4 Left Speaker Replacement, Remove the heatsink: step 6, image 2 of 2
      • Use the flat end of a spudger to gently pry the heat sink straight up and off of the CPU.

      • Take care not to dent or crease the heat sink pipes during removal.

      Ask FixBot

      Add Comment

    7. Microsoft Surface Pro 4 Left Speaker Replacement: step 7, image 1 of 3 Microsoft Surface Pro 4 Left Speaker Replacement: step 7, image 2 of 3 Microsoft Surface Pro 4 Left Speaker Replacement: step 7, image 3 of 3
      • Insert the pointed end of a spudger into a screw hole in the fan shield and lift up to separate it from the fan.

      • The fan shield is held in place with light adhesive.

      • Take care not to dent or crease the heat sink pipes during removal.

      Ask FixBot

      Add Comment

    8. Microsoft Surface Pro 4 Left Speaker Replacement: step 8, image 1 of 1
      Ask FixBot

      Add Comment

    1. Microsoft Surface Pro 4 Left Speaker Replacement, Left Speaker: step 9, image 1 of 2 Microsoft Surface Pro 4 Left Speaker Replacement, Left Speaker: step 9, image 2 of 2
      • Detach the speaker connector from the motherboard.

      Ask FixBot

      Add Comment

    2. Microsoft Surface Pro 4 Left Speaker Replacement: step 10, image 1 of 3 Microsoft Surface Pro 4 Left Speaker Replacement: step 10, image 2 of 3 Microsoft Surface Pro 4 Left Speaker Replacement: step 10, image 3 of 3
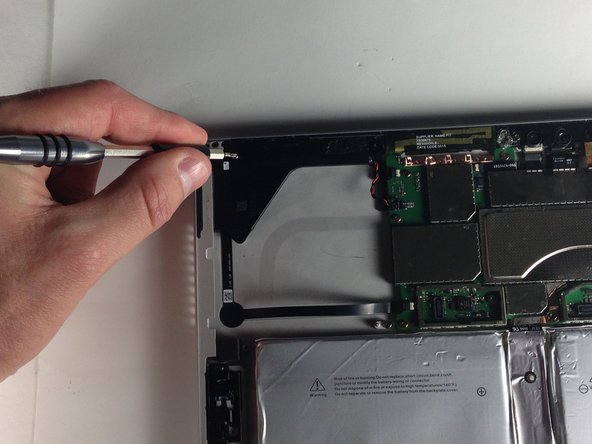
      • Remove screws from the speaker.

      • 2mm Torx T5 screw

      • 3 mm Torx T5 screw

      Ask FixBot

      Add Comment

    3. Microsoft Surface Pro 4 Left Speaker Replacement: step 11, image 1 of 3 Microsoft Surface Pro 4 Left Speaker Replacement: step 11, image 2 of 3 Microsoft Surface Pro 4 Left Speaker Replacement: step 11, image 3 of 3
      • Work the speaker out with your fingers.

      • The speaker is still wedged tightly into the frame and is difficult to remove.

      Ask FixBot

      Add Comment

    4. Microsoft Surface Pro 4 Left Speaker Replacement: step 12, image 1 of 3 Microsoft Surface Pro 4 Left Speaker Replacement: step 12, image 2 of 3 Microsoft Surface Pro 4 Left Speaker Replacement: step 12, image 3 of 3
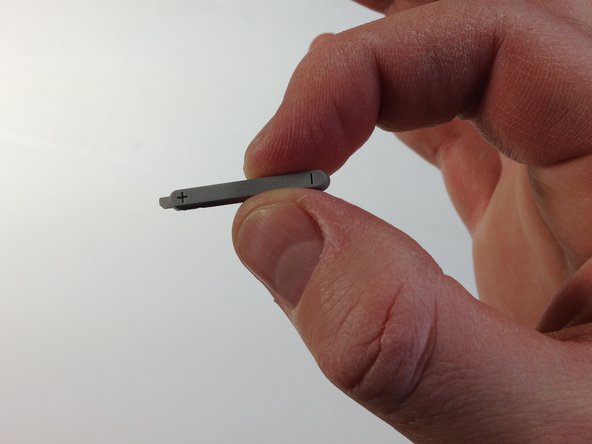
      • Remove the speaker, the volume button and the power button from the Surface Pro 4.

      Ask FixBot

      Add Comment

Conclusion

To reassemble your device, follow these instructions in reverse order.

Cancel: I did not complete this guide.

Andrew Prater

Member since: 02/01/16

5,862 Reputation

4 Guides authored

Team

Metro State, Team 1-3, Carpenter Spring 2016 Member of Metro State, Team 1-3, Carpenter Spring 2016

MSU-CARPENTER-S16S1G3

2 Members

72 Guides authored

0 Guide Comments

Add Comment

View Statistics:

Past 24 Hours: 1

Past 7 Days: 3

Past 30 Days: 9

All Time: 123