Shop the Holiday Gift Guide
Free Shipping on Domestic Orders $75+

iPad Pro 13" Battery Installation

Views: 138

View statistics:

Past 24 Hours:
1
Past 7 Days:
6
Past 30 Days:
19
All Time:
138
Comments: 0

No one has left comments on this guide. Will you be first?

Go to guide comments
Completed: 0

No one has marked this guide "completed." Will you be the first?

Favorites: 0

No one has favorited (and subscribed to) this guide. Will you be the first?

Time Required: No estimate
Difficulty: Moderate
Prerequisite Only

This is a prerequisite-only guide! This guide is part of another procedure and isn’t meant to be used alone.

iPad Pro 13" Battery Installation

What you need

Tools

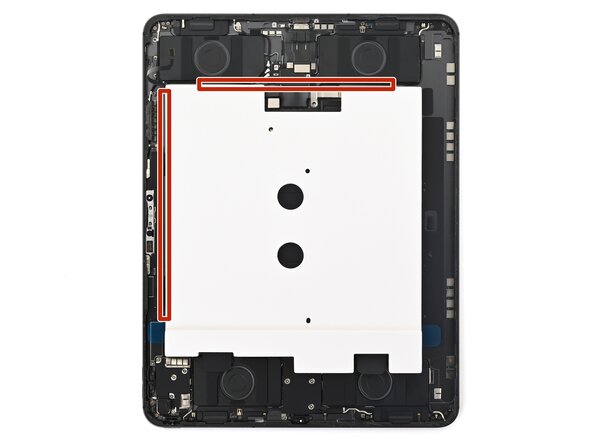
    1. iPad Pro 13" Battery Installation, Clean the iPad frame: step 1, image 1 of 2 iPad Pro 13" Battery Installation, Clean the iPad frame: step 1, image 2 of 2
      Tool used on this step:
      Adhesive Cleanup Kit (Set of 12)
      $7.99
      Buy
      • Use high-concentration isopropyl alcohol (>90%) and a microfiber or lint-free cloth to clean any adhesive residue from the iPad frame.

      • Alternatively, use our adhesive cleanup kit.

      Ask FixBot

      Add Comment

    2. iPad Pro 13" Battery Installation, Reposition the microphone cable: step 2, image 1 of 2 iPad Pro 13" Battery Installation, Reposition the microphone cable: step 2, image 2 of 2
      • Reposition the microphone cable so it's entirely outside of the iPad frame.

      Ask FixBot

      Add Comment

    3. iPad Pro 13" Battery Installation, Prepare the battery: step 3, image 1 of 3 iPad Pro 13" Battery Installation, Prepare the battery: step 3, image 2 of 3 iPad Pro 13" Battery Installation, Prepare the battery: step 3, image 3 of 3
      • Your new battery should come with adhesive pre-applied. It might also come with a protective casing attached to it, as pictured. In this step, make sure you're only removing the film covering the battery adhesive.

      • Peel the clear film off of the battery adhesive.

      Ask FixBot

      Add Comment

    4. iPad Pro 13" Battery Installation, Place the battery: step 4, image 1 of 3 iPad Pro 13" Battery Installation, Place the battery: step 4, image 2 of 3 iPad Pro 13" Battery Installation, Place the battery: step 4, image 3 of 3
      • The battery adhesive is very sticky! Be careful as you align the battery in its recess—once it sticks, you won't be able to realign it.

      • Align the battery over the iPad, making sure the battery connector is over its socket. The battery should be aligned against the front camera and the speakers closest to the USB-C port.

      • Lower the battery into the iPad frame.

      Ask FixBot

      Add Comment

    5. iPad Pro 13" Battery Installation, Connect the battery: step 5, image 1 of 2 iPad Pro 13" Battery Installation, Connect the battery: step 5, image 2 of 2
      • Use the flat end of a spudger or your finger to connect the battery press connector.

      Ask FixBot

      Add Comment

    6. iPad Pro 13" Battery Installation, Install the BMS cover: step 6, image 1 of 1
      • Use a JCIS or JIS 00 screwdriver to install the 1.6 mm‑long screw securing the battery management system cover.

      Ask FixBot

      Add Comment

    7. iPad Pro 13" Battery Installation, Press the adhesive: step 7, image 1 of 1
      • Place a few heavy objects on the protective battery cover. Distribute the weight evenly across the battery.

      • Be sure that nothing is pressing directly on the battery management system.

      • Leave the items on for an hour to help the adhesive bond to the iPad.

      Ask FixBot

      Add Comment

    8. iPad Pro 13" Battery Installation, Remove the protective cover: step 8, image 1 of 3 iPad Pro 13" Battery Installation, Remove the protective cover: step 8, image 2 of 3 iPad Pro 13" Battery Installation, Remove the protective cover: step 8, image 3 of 3
      • Use a pair of tweezers or your fingers to grip one of the black pull tabs between the protective cover and the battery.

      • Slowly pull the adhesive out from under the protective cover, keeping it as flat as possible.

      • Repeat this procedure for the other adhesive strip.

      Ask FixBot

      Add Comment

    9. iPad Pro 13" Battery Installation: step 9, image 1 of 3 iPad Pro 13" Battery Installation: step 9, image 2 of 3 iPad Pro 13" Battery Installation: step 9, image 3 of 3
      • Use your fingers to lift and remove the protective cover.

      Ask FixBot

      Add Comment

    10. iPad Pro 13" Battery Installation, Remove the battery film: step 10, image 1 of 3 iPad Pro 13" Battery Installation, Remove the battery film: step 10, image 2 of 3 iPad Pro 13" Battery Installation, Remove the battery film: step 10, image 3 of 3
      • Peel the blue film off of each battery cell to remove it.

      Ask FixBot

      Add Comment

    11. iPad Pro 13" Battery Installation, Place the microphone cable: step 11, image 1 of 2 iPad Pro 13" Battery Installation, Place the microphone cable: step 11, image 2 of 2
      • Use your fingers to place the microphone cable across the battery and press it into place.

      Ask FixBot

      Add Comment

    12. iPad Pro 13" Battery Installation, Connect the microphone: step 12, image 1 of 2 iPad Pro 13" Battery Installation, Connect the microphone: step 12, image 2 of 2
      • Use the flat end of a spudger or your finger to connect the microphone press connector.

      Ask FixBot

      Add Comment

Finish Line

Cancel: I did not complete this guide.

Author

with

Nick Schultz

Member since: 03/24/24

70,853 Reputation

363 Guides authored

0 Guide Comments

Add Comment

View Statistics:

Past 24 Hours: 1

Past 7 Days: 6

Past 30 Days: 19

All Time: 138