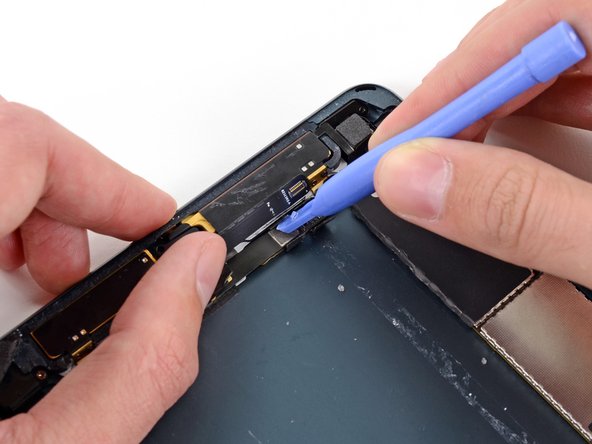
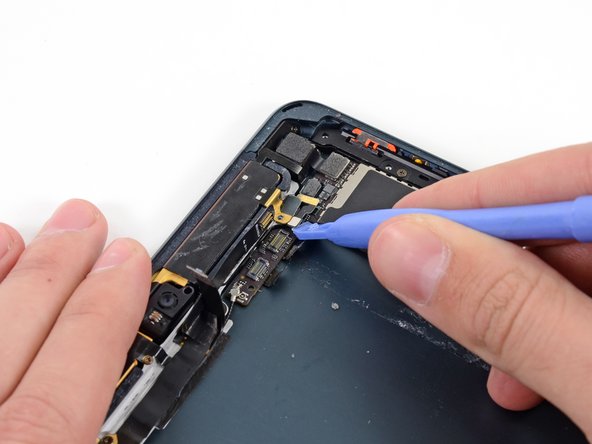
iPad Mini CDMA Logic Board Assembly Replacement

Prerequisite Only
This guide is only intended to be used as a prerequisite for other guides. It's incomplete by itself.

What you need

  1. iPad Mini CDMA Logic Board Assembly Replacement, Logic Board Assembly: step 1, image 1 of 2 iPad Mini CDMA Logic Board Assembly Replacement, Logic Board Assembly: step 1, image 2 of 2
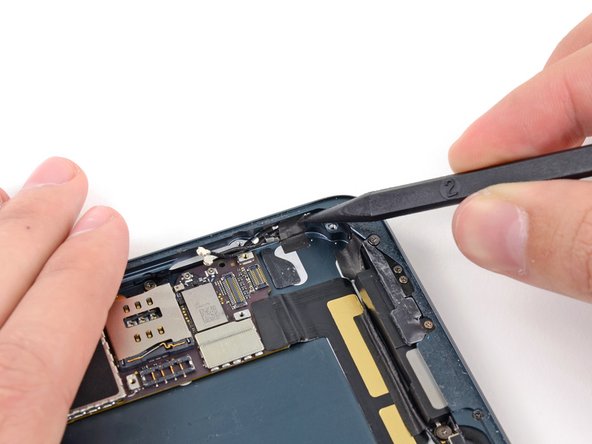
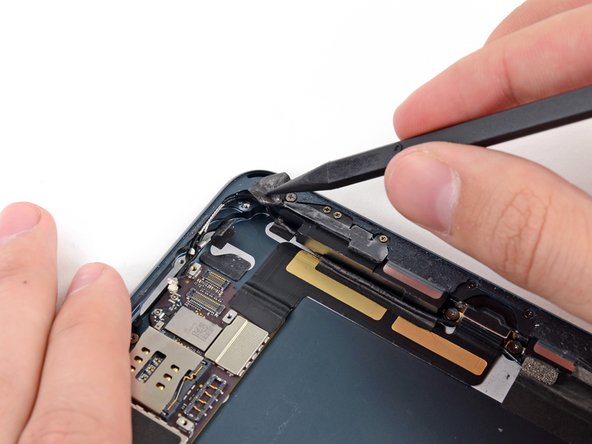
    • Use tweezers to peel up and remove the small piece of tape covering the front-facing camera cable connector.

  2. iPad Mini CDMA Logic Board Assembly Replacement: step 2, image 1 of 2 iPad Mini CDMA Logic Board Assembly Replacement: step 2, image 2 of 2
    • The front-facing camera cable connector is secured with pieces of tape that wrap up around the sides of the cable and are fastened to two small metal plates.

    • Use a plastic opening tool to gently pry the upper metal plate up from the front-facing camera cable connector.

    • Being careful not to break the plate or the tape attached to it, pry it up and fold it away from the front-facing camera cable connector.

  3. iPad Mini CDMA Logic Board Assembly Replacement: step 3, image 1 of 2 iPad Mini CDMA Logic Board Assembly Replacement: step 3, image 2 of 2
    • Gently pry the second (lower) metal plate up from the front-facing camera cable connector.

    • Again, carefully pry the plate up and away from the front-facing camera cable connector.

  4. iPad Mini CDMA Logic Board Assembly Replacement: step 4, image 1 of 2 iPad Mini CDMA Logic Board Assembly Replacement: step 4, image 2 of 2
    • Use a plastic opening tool to pry the front-facing camera cable's connector up from its socket on the logic board.

  5. iPad Mini CDMA Logic Board Assembly Replacement: step 5, image 1 of 2 iPad Mini CDMA Logic Board Assembly Replacement: step 5, image 2 of 2
    • Gently fold the front-facing camera cable up and out of the way of the logic board.

  6. iPad Mini CDMA Logic Board Assembly Replacement: step 6, image 1 of 2 iPad Mini CDMA Logic Board Assembly Replacement: step 6, image 2 of 2
    • Use tweezers to peel up and remove the small piece of tape covering the headphone jack cable connector.

  7. iPad Mini CDMA Logic Board Assembly Replacement: step 7, image 1 of 2 iPad Mini CDMA Logic Board Assembly Replacement: step 7, image 2 of 2
    • Use a plastic opening tool to gently pry the lower metal plate up from the headphone jack cable connector.

    • Being careful not to break the plate or the tape attached to it, pry it up and fold it away from the headphone jack cable connector.

  8. iPad Mini CDMA Logic Board Assembly Replacement: step 8, image 1 of 2 iPad Mini CDMA Logic Board Assembly Replacement: step 8, image 2 of 2
    • Pry the second (top) metal plate up from the front-facing camera cable connector.

    • Again, carefully pry the plate up and away from the headphone jack cable connector.

  9. iPad Mini CDMA Logic Board Assembly Replacement: step 9, image 1 of 2 iPad Mini CDMA Logic Board Assembly Replacement: step 9, image 2 of 2
    • Use a plastic opening tool to pry the headphone jack cable's connector up out of its socket on the logic board.

  10. iPad Mini CDMA Logic Board Assembly Replacement: step 10, image 1 of 2 iPad Mini CDMA Logic Board Assembly Replacement: step 10, image 2 of 2
    • Gently bend the headphone jack cable back, away from the logic board.

  11. iPad Mini CDMA Logic Board Assembly Replacement: step 11, image 1 of 2 iPad Mini CDMA Logic Board Assembly Replacement: step 11, image 2 of 2
    • Use a plastic opening tool to pry the top left antenna cable up from its socket on the logic board.

  12. iPad Mini CDMA Logic Board Assembly Replacement: step 12, image 1 of 1
    • Remove the following three screws securing the top right antenna to the rear case:

    • Two 1.3 mm #00 Phillips screws from the side of the antenna's socket.

    • One 1.8 mm #00 Phillips screw.

  13. iPad Mini CDMA Logic Board Assembly Replacement: step 13, image 1 of 3 iPad Mini CDMA Logic Board Assembly Replacement: step 13, image 2 of 3 iPad Mini CDMA Logic Board Assembly Replacement: step 13, image 3 of 3
    • Disconnect the top right antenna's coaxial cable from the logic board with a plastic opening tool.

    • Gently bend the cable and screw tab up out of the way of the logic board.

  14. iPad Mini CDMA Logic Board Assembly Replacement: step 14, image 1 of 2 iPad Mini CDMA Logic Board Assembly Replacement: step 14, image 2 of 2
    • Use a plastic opening tool to pry the rear-facing camera cable up from its socket on the logic board.

  15. iPad Mini CDMA Logic Board Assembly Replacement: step 15, image 1 of 2 iPad Mini CDMA Logic Board Assembly Replacement: step 15, image 2 of 2
    • Pry the top right antenna's ribbon cable up from its socket on the logic board with a plastic opening tool.

  16. iPad Mini CDMA Logic Board Assembly Replacement: step 16, image 1 of 2 iPad Mini CDMA Logic Board Assembly Replacement: step 16, image 2 of 2
    • Use tweezers to peel up and remove the small piece of tape covering the button ribbon cable ZIF connector.

  17. iPad Mini CDMA Logic Board Assembly Replacement: step 17, image 1 of 2 iPad Mini CDMA Logic Board Assembly Replacement: step 17, image 2 of 2
    • Use the tip of a spudger to lift up the tab on the button ribbon cable ZIF connector.

  18. iPad Mini CDMA Logic Board Assembly Replacement: step 18, image 1 of 2 iPad Mini CDMA Logic Board Assembly Replacement: step 18, image 2 of 2
    • Use tweezers to pull the button ribbon cable straight out of its ZIF socket on the logic board.

  19. iPad Mini CDMA Logic Board Assembly Replacement: step 19, image 1 of 3 iPad Mini CDMA Logic Board Assembly Replacement: step 19, image 2 of 3 iPad Mini CDMA Logic Board Assembly Replacement: step 19, image 3 of 3
    • Gently peel back the wide piece of tape covering the top of the right speaker.

  20. iPad Mini CDMA Logic Board Assembly Replacement: step 20, image 1 of 3 iPad Mini CDMA Logic Board Assembly Replacement: step 20, image 2 of 3 iPad Mini CDMA Logic Board Assembly Replacement: step 20, image 3 of 3
    • Continue peeling the tape, and remove it from the iPad.

  21. iPad Mini CDMA Logic Board Assembly Replacement: step 21, image 1 of 3 iPad Mini CDMA Logic Board Assembly Replacement: step 21, image 2 of 3 iPad Mini CDMA Logic Board Assembly Replacement: step 21, image 3 of 3
    • Use the flat end of a spudger to disconnect the two bottom antenna cable connectors from their sockets on the logic board.

  22. iPad Mini CDMA Logic Board Assembly Replacement: step 22, image 1 of 2 iPad Mini CDMA Logic Board Assembly Replacement: step 22, image 2 of 2
    • Use the tip of a spudger to peel back the small piece of tape covering both antenna cables on the bottom right side of the iPad.

    • Leave the lower part of the tape stuck to the back of the rear case to aid in reassembly.

  23. iPad Mini CDMA Logic Board Assembly Replacement: step 23, image 1 of 2 iPad Mini CDMA Logic Board Assembly Replacement: step 23, image 2 of 2
    • With the tip of a spudger, peel up the larger piece of tape covering both antenna cables near the bottom of the rear case.

    • Do not try to remove this piece of tape; it is wrapped around the top antenna cable.

  24. iPad Mini CDMA Logic Board Assembly Replacement: step 24, image 1 of 3 iPad Mini CDMA Logic Board Assembly Replacement: step 24, image 2 of 3 iPad Mini CDMA Logic Board Assembly Replacement: step 24, image 3 of 3
    • Use the tip of a spudger to pry the small metal retaining clip off the left antenna cable, then de-route the cable from the clip.

  25. iPad Mini CDMA Logic Board Assembly Replacement: step 25, image 1 of 2 iPad Mini CDMA Logic Board Assembly Replacement: step 25, image 2 of 2
    • De-route the antenna cable from the corner of the iPad.

  26. iPad Mini CDMA Logic Board Assembly Replacement: step 26, image 1 of 2 iPad Mini CDMA Logic Board Assembly Replacement: step 26, image 2 of 2
    • Use the tip of a spudger to remove the small piece of tape securing the antenna cable in the bottom right corner of the iPad.

  27. iPad Mini CDMA Logic Board Assembly Replacement: step 27, image 1 of 1
    • Peel the cable back from the corner of the iPad.

  28. iPad Mini CDMA Logic Board Assembly Replacement: step 28, image 1 of 3 iPad Mini CDMA Logic Board Assembly Replacement: step 28, image 2 of 3 iPad Mini CDMA Logic Board Assembly Replacement: step 28, image 3 of 3
    • Use the tip of a spudger to pry the antenna cable tape up from the rear case of the iPad.

    • Gently pull the antenna cable out of the way as you work along the piece of tape, to keep it from resealing.

  29. iPad Mini CDMA Logic Board Assembly Replacement: step 29, image 1 of 2 iPad Mini CDMA Logic Board Assembly Replacement: step 29, image 2 of 2
    • Pull the antenna cable from the slot behind the Lightning connector.

Conclusion

To reassemble your device, follow these instructions in reverse order.

0 Comments

Add Comment

View Statistics:

Past 24 Hours: 0

Past 7 Days: 0

Past 30 Days: 0

All Time: 219