Free Shipping on Domestic Orders $75+

iPad Mini CDMA Battery Connector Replacement

Prerequisite Only
This is a prerequisite-only guide! This guide is part of another procedure and isn’t meant to be used alone.

What you need

    1. iPad Mini CDMA Battery Connector Replacement, Battery Connector: step 1, image 1 of 1
      • Remove the three 1.3 mm Phillips #00 screws securing the connector shield to the logic board.

      • Be sure to not substitute these three screws with any other screws, specifically the screws securing the LCD shield plate to the rear case of the iPad. Any slightly longer screws may strip the screw holes and result in irreparable damage to the logic board.

      Ask FixBot

      Add Comment

    2. iPad Mini CDMA Battery Connector Replacement: step 2, image 1 of 1
      Tool used on this step:
      Tweezers
      $4.99
      Buy
      • Use a pair of tweezers to grasp and remove the connector shield from the iPad.

      Ask FixBot

      Add Comment

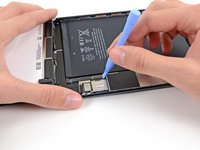
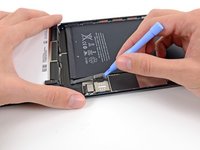
    3. iPad Mini CDMA Battery Connector Replacement: step 3, image 1 of 2 iPad Mini CDMA Battery Connector Replacement: step 3, image 2 of 2
      • Use a plastic opening tool to gently pry the battery connector up from its socket on the logic board.

      • Be very careful to only pry up on the battery connector and not on the socket itself. If you pry up on the logic board socket, you may break the connector entirely.

      Ask FixBot

      Add Comment

Conclusion

To reassemble your device, follow these instructions in reverse order.

Cancel: I did not complete this guide.

Andrew Optimus Goldheart

Member since: 10/17/09

515,884 Reputation

406 Guides authored

Team

iFixit Member of iFixit

Staff

122 Members

72,401 Guides authored

0 Guide Comments

Add Comment

View Statistics:

Past 24 Hours: 1

Past 7 Days: 3

Past 30 Days: 26

All Time: 966