Free Shipping on Domestic Orders $75+

iPad 6 Wi-Fi Front Panel Assembly Replacement

Prerequisite Only
This is a prerequisite-only guide! This guide is part of another procedure and isn’t meant to be used alone.

What you need

    1. iPad 6 Wi-Fi Front Panel Assembly Replacement, Front Panel Assembly: step 1, image 1 of 2 iPad 6 Wi-Fi Front Panel Assembly Replacement, Front Panel Assembly: step 1, image 2 of 2
      • Remove any tape covering the home button ribbon cable connector.

      Ask FixBot

      Add Comment

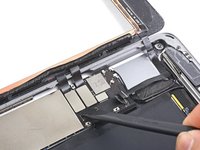
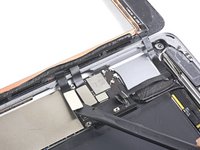
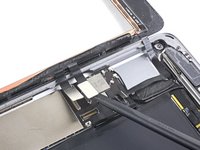
    2. iPad 6 Wi-Fi Front Panel Assembly Replacement: step 2, image 1 of 3 iPad 6 Wi-Fi Front Panel Assembly Replacement: step 2, image 2 of 3 iPad 6 Wi-Fi Front Panel Assembly Replacement: step 2, image 3 of 3
      • Use the flat end of a spudger to flip the tab on the home button ribbon cable ZIF connector upward.

      • Carefully pull the home button ribbon cable straight out of the ZIF connector.

      Ask FixBot

      Add Comment

    3. iPad 6 Wi-Fi Front Panel Assembly Replacement: step 3, image 1 of 3 iPad 6 Wi-Fi Front Panel Assembly Replacement: step 3, image 2 of 3 iPad 6 Wi-Fi Front Panel Assembly Replacement: step 3, image 3 of 3
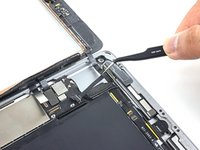
      • Use a the flat end of a spudger or a fingernail to carefully pop the two digitizer cable connectors straight up from their sockets.

      • To avoid damaging your iPad, pry only on the connectors themselves, not on the socket on the logic board.

      • During reassembly, make sure that these connectors are completely seated in their sockets, or you may encounter display issues.

      Ask FixBot

      Add Comment

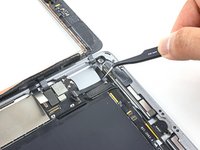
    4. iPad 6 Wi-Fi Front Panel Assembly Replacement: step 4, image 1 of 2 iPad 6 Wi-Fi Front Panel Assembly Replacement: step 4, image 2 of 2
      • Carefully peel the home button ribbon cable up off of the adhesive holding it to the rear case.

      Ask FixBot

      Add Comment

    5. iPad 6 Wi-Fi Front Panel Assembly Replacement: step 5, image 1 of 2 iPad 6 Wi-Fi Front Panel Assembly Replacement: step 5, image 2 of 2
      Tool used on this step:
      Polyimide Tape
      $9.95
      Buy
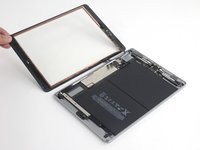
      • Remove the front panel assembly.

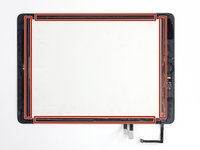
      • If you experience "ghost" or "phantom" touch input issues with your new display, this can be resolved by adding a layer of very thin insulating tape, such as Kapton (polyimide) tape, to the highlighted areas on the back of the panel. iFixit panels come with the proper insulation, and should not require the addition of any tape.

      • Without the proper insulation, these areas of the digitizer can ground out against other components, causing touch input malfunction.

      • The insulation is not visible to the naked eye, and is different from the foam dust barrier strips found on many iPads.

      Ask FixBot

      Add Comment

Conclusion

To reassemble your device, follow these instructions in reverse order.

Cancel: I did not complete this guide.

One other person completed this guide.

Sam Goldheart

Member since: 10/18/12

478,415 Reputation

538 Guides authored

Team

iFixit Member of iFixit

Staff

122 Members

72,401 Guides authored

0 Guide Comments

Add Comment

View Statistics:

Past 24 Hours: 1

Past 7 Days: 3

Past 30 Days: 21

All Time: 507