Installing iPad 3G Display Assembly

Prerequisite Only
This guide is only intended to be used as a prerequisite for other guides. It's incomplete by itself.

What you need

  1. Installing iPad 3G Display Assembly, Display Assembly: step 1, image 1 of 2 Installing iPad 3G Display Assembly, Display Assembly: step 1, image 2 of 2
    • The iPad shown in the photos may look slightly different from your iPad, but the procedure is the same.

    • Insert a metal spudger between the right edge of the display assembly and the rear panel assembly.

    • Rotate the spudger away from you to release the tabs along the top edge of the display.

  2. Installing iPad 3G Display Assembly: step 2, image 1 of 2 Installing iPad 3G Display Assembly: step 2, image 2 of 2
    • Insert a second metal spudger between the top edge of the display assembly and the rear panel assembly to keep the tabs from snapping back into place.

    • Pry the display assembly away from the rear panel.

  3. Installing iPad 3G Display Assembly: step 3, image 1 of 2 Installing iPad 3G Display Assembly: step 3, image 2 of 2
    • Continue prying the display assembly away from the rear panel along the bottom and left edges of the iPad.

  4. Installing iPad 3G Display Assembly: step 4, image 1 of 1
    • Lift the display assembly away from the rear panel assembly by its right edge.

    • Do not excessively lift the display assembly off the rest of the iPad, as a fragile antenna cable with very little slack still connects the two components.

  5. Installing iPad 3G Display Assembly: step 5, image 1 of 1
    • Use the flat end of a spudger to pry the antenna connector closest to the bottom of the iPad up off its socket on the communications board.

  6. Installing iPad 3G Display Assembly: step 6, image 1 of 1
    • In the following steps, you will disconnect the three cables attaching the display assembly to the logic board. The cables are for the following components:

    • Digitizer

    • Ambient Light Sensor

    • Display Data Cable

  7. Installing iPad 3G Display Assembly: step 7, image 1 of 3 Installing iPad 3G Display Assembly: step 7, image 2 of 3 Installing iPad 3G Display Assembly: step 7, image 3 of 3
    • Use the edge of an iPod opening tool to flip up the retaining flaps holding the digitizer ribbon cables in their sockets on the logic board.

    • Be sure you are flipping up the retaining flap, not the socket itself.

    • Pull the digitizer ribbon cables straight out of their sockets.

  8. Installing iPad 3G Display Assembly: step 8, image 1 of 1
    • Use an iPod opening tool to remove the ambient light sensor connector from its socket by gently prying upward.

  9. Installing iPad 3G Display Assembly: step 9, image 1 of 2 Installing iPad 3G Display Assembly: step 9, image 2 of 2
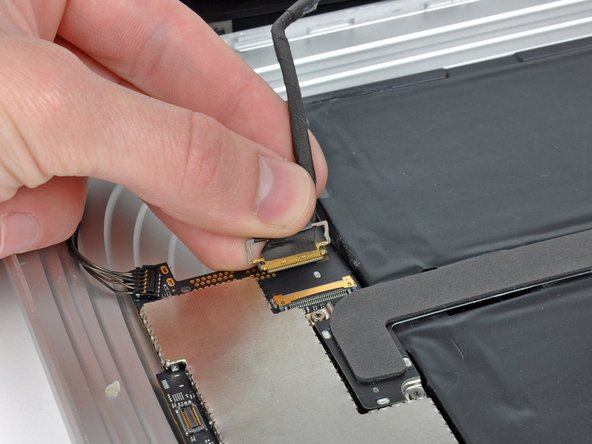
    • Disconnect the display data cable from the main board by flipping up the metal retainer by its black plastic pull tab.

    • Pull the cable connector away from its socket.

    • Pull the connector parallel to the face of the logic board.

  10. Installing iPad 3G Display Assembly: step 10, image 1 of 1
    • Remove the display assembly from the rear panel assembly.

View Statistics:

Past 24 Hours: 0

Past 7 Days: 0

Past 30 Days: 13

All Time: 1,366