Free Shipping on Domestic Orders $75+

iPad 10 Display Removal

Prerequisite Only
This is a prerequisite-only guide! This guide is part of another procedure and isn’t meant to be used alone.

What you need

    1. iPad 10 Display Removal, Cracked glass preparation: step 1, image 1 of 1
      • If the iPad has a cracked digitizer, follow this step.

      • Wear safety glasses to protect your eyes from any glass shaken free during the repair.

      • Apply strips of packing tape to the cracked glass until the whole digitizer is covered—this will help keep the glass contained and allow the suction cup to stick to it.

      • Make sure there's a single strip (not overlapping) of tape across the bottom edge, big enough for a suction cup to fit on.

      • Only cover the glass itself—don't stick any tape to the frame.

      Ask FixBot

      Add Comment

    2. iPad 10 Display Removal, Heat the right edge of the digitizer glass: step 2, image 1 of 1
      • Use a hair dryer or heat gun to heat the right edge of the iPad until it’s slightly too hot to touch. This softens the adhesive securing the digitizer glass.

      • Improper use of a heat gun can destroy the display and/or battery—review this guide for instructions. To prevent damage, keep your heat source moving rather than focused on one spot.

      • For tips on using a hair dryer to soften adhesive, check out this guide.

      Ask FixBot

      Add Comment

    3. iPad 10 Display Removal, Insert the opening wheel: step 3, image 1 of 3 iPad 10 Display Removal, Insert the opening wheel: step 3, image 2 of 3 iPad 10 Display Removal, Insert the opening wheel: step 3, image 3 of 3
      • Apply a suction handle above the USB‑C port with the open part of the handle facing away from the edge.

      • Pull up on the suction handle with firm, constant pressure to create a slight gap under the glass.

      • Insert an opening wheel into the gap.

      • The adhesive holding the glass in place is very strong. If you're having a hard time, be patient, apply more heat, and try again.

      Ask FixBot

      Add Comment

    4. iPad 10 Display Removal, Slide the opening wheel: step 4, image 1 of 2 iPad 10 Display Removal, Slide the opening wheel: step 4, image 2 of 2
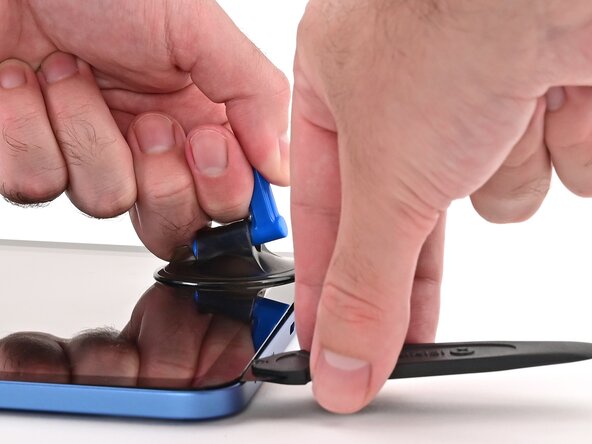
      • Slide the opening wheel back‑and‑forth to separate the adhesive directly above the USB‑C port.

      • Try to get underneath the adhesive strip securing the digitizer, rather than slicing through the thickest part. This will make removal easier.

      • Leave the opening wheel in place to prevent the adhesive from resealing.

      Ask FixBot

      Add Comment

    5. iPad 10 Display Removal, Remove the suction cup: step 5, image 1 of 2 iPad 10 Display Removal, Remove the suction cup: step 5, image 2 of 2
      • Pull up on the suction handle tab and remove it.

      Ask FixBot

      Add Comment

    6. iPad 10 Display Removal, Reheat the right edge: step 6, image 1 of 1
      • This iPad cools very quickly. To get the digitizer off, work in sections of about 3 inches at a time before reheating.

      • Use a hair dryer or heat gun to soften the adhesive securing the right edge of the glass.

      Ask FixBot

      Add Comment

    7. iPad 10 Display Removal, Separate the right edge adhesive: step 7, image 1 of 2 iPad 10 Display Removal, Separate the right edge adhesive: step 7, image 2 of 2
      • Be patient while separating the screen adhesive. If you begin to feel more resistance, stop and apply more heat.

      • Apply the suction handle to the right of the USB‑C port and lift the glass to create a gap.

      • Slide the opening wheel beneath the glass you're lifting to separate the adhesive.

      Ask FixBot

      Add Comment

    8. iPad 10 Display Removal: step 8, image 1 of 3 iPad 10 Display Removal: step 8, image 2 of 3 iPad 10 Display Removal: step 8, image 3 of 3
      • Repeat this heating and separating process to separate the remaining adhesive along the right edge of the iPad.

      Ask FixBot

      Add Comment

    9. iPad 10 Display Removal, Insert a plastic card: step 9, image 1 of 3 iPad 10 Display Removal, Insert a plastic card: step 9, image 2 of 3 iPad 10 Display Removal, Insert a plastic card: step 9, image 3 of 3
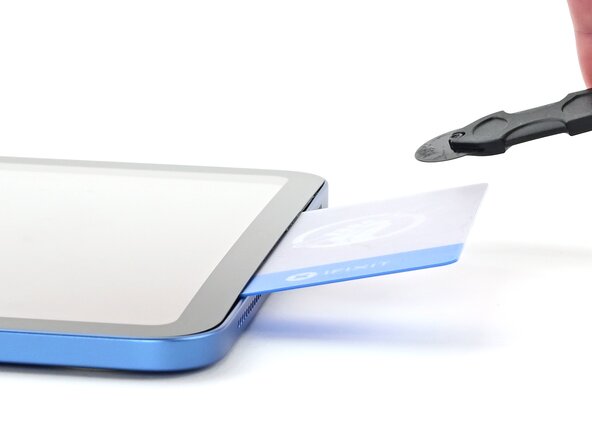
      • Insert a plastic card underneath the right edge of the glass to keep the adhesive separated.

      • Remove the opening wheel.

      Ask FixBot

      Add Comment

    10. iPad 10 Display Removal, Separate the bottom edge adhesive: step 10, image 1 of 3 iPad 10 Display Removal, Separate the bottom edge adhesive: step 10, image 2 of 3 iPad 10 Display Removal, Separate the bottom edge adhesive: step 10, image 3 of 3
      • Repeat to separate the adhesive along the bottom edge of the digitizer.

      Ask FixBot

      Add Comment

    11. iPad 10 Display Removal, Separate the left edge adhesive: step 11, image 1 of 3 iPad 10 Display Removal, Separate the left edge adhesive: step 11, image 2 of 3 iPad 10 Display Removal, Separate the left edge adhesive: step 11, image 3 of 3
      • Repeat to separate the adhesive along the left edge of the iPad.

      Ask FixBot

      Add Comment

    12. iPad 10 Display Removal, Separate the top edge adhesive: step 12, image 1 of 3 iPad 10 Display Removal, Separate the top edge adhesive: step 12, image 2 of 3 iPad 10 Display Removal, Separate the top edge adhesive: step 12, image 3 of 3
      • Be very careful with this step. Don't insert the opening wheel deeper than 2 mm along the top edge to avoid damaging the digitizer cables, but don't use it at an angle.

      • Repeat the heating and adhesive separation process to separate the adhesive along the top edge.

      • Remove the plastic cards.

      Ask FixBot

      Add Comment

    13. iPad 10 Display Removal, Lift the digitizer: step 13, image 1 of 3 iPad 10 Display Removal, Lift the digitizer: step 13, image 2 of 3 iPad 10 Display Removal, Lift the digitizer: step 13, image 3 of 3
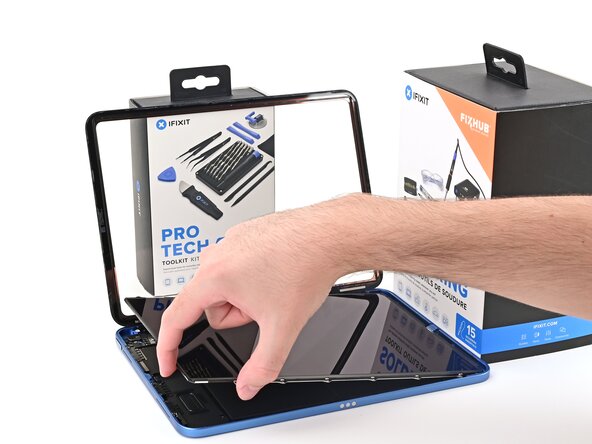
      • The digitizer is still connected to the iPad with three ribbon cables. Don't try to fully remove it yet.

      • Try not to touch the back side of the digitizer or the surface of the display with your fingers—any fingerprints can be tough to clean off.

      • Lift the digitizer by its bottom edge and swing it open until it's perpendicular to the iPad.

      • Rest the digitizer on a strong, sturdy object to keep it held up while you remove the display.

      Ask FixBot

      Add Comment

    14. iPad 10 Display Removal, Remove the display screws: step 14, image 1 of 1
      • Use a Torx Plus 2IP screwdriver to remove the ten screws securing the iPad display:

      • Four 3.5 mm‑long screws

      • Six 3.2 mm‑long screws

      • In cellular models, use a JIS 00 screwdriver to remove the additional screws along the right edge.

      Ask FixBot

      Add Comment

    15. iPad 10 Display Removal, Lift the display: step 15, image 1 of 2 iPad 10 Display Removal, Lift the display: step 15, image 2 of 2
      • Insert the flat end of a spudger beneath the display in the center of its left edge.

      • Pry up the display until you can get your fingers beneath it.

      Ask FixBot

      Add Comment

    16. iPad 10 Display Removal: step 16, image 1 of 2 iPad 10 Display Removal: step 16, image 2 of 2
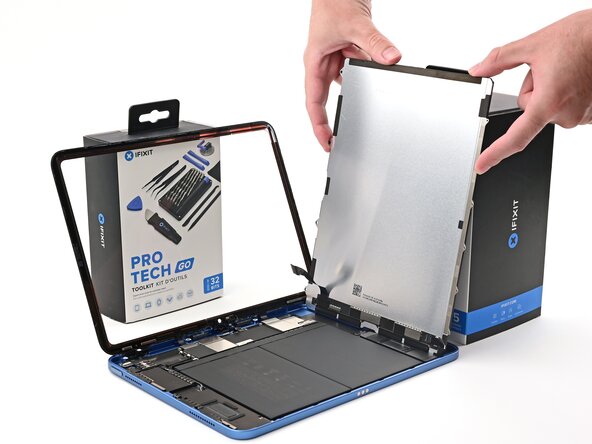
      • Lift the display by its screw posts until it's perpendicular to the iPad. Rest it on a sturdy object.

      Ask FixBot

      Add Comment

    17. iPad 10 Display Removal, Remove the display connector cover: step 17, image 1 of 1
      • Use a JIS 00 screwdriver to remove the two 1.1 mm‑long screws securing the display connector cover.

      Ask FixBot

      Add Comment

    18. iPad 10 Display Removal: step 18, image 1 of 2 iPad 10 Display Removal: step 18, image 2 of 2
      • Use tweezers or your fingers to remove the display connector cover.

      Ask FixBot

      Add Comment

    19. iPad 10 Display Removal, Disconnect the display: step 19, image 1 of 2 iPad 10 Display Removal, Disconnect the display: step 19, image 2 of 2
      • Use the flat end of a spudger to disconnect the display press connector.

      Ask FixBot

      Add Comment

    20. iPad 10 Display Removal, Remove the display: step 20, image 1 of 3 iPad 10 Display Removal, Remove the display: step 20, image 2 of 3 iPad 10 Display Removal, Remove the display: step 20, image 3 of 3
      • The display cable is lightly adhered to the logic board.

      • Peel up the display cable and remove the display.

      Ask FixBot

      Add Comment

Finish Line

Cancel: I did not complete this guide.

Nick Schultz

Member since: 03/24/24

65,446 Reputation

343 Guides authored

0 Guide Comments

Add Comment

View Statistics:

Past 24 Hours: 0

Past 7 Days: 0

Past 30 Days: 11

All Time: 79