Introduction
When the VRAM on my early-2009 24" iMac went bad, I feared I might need to trash the machine. Some sources suggested the video card was soldered to the logic board but that may only be true of the base-model iMac. The ones with the nVidia and ATI upgrades are repairable/upgradable as illustrated in this guide.
This guide will illustrate disconnecting all cables from the logic board, removing all retaining screws from the logic board, removing the logic board, and replacing the video card.
What you need
-
 Ask FixBot
-
-
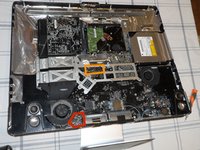
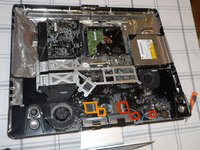
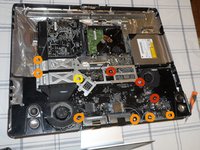
Once you've removed the LCD display from the device you can see what you're in for.
-
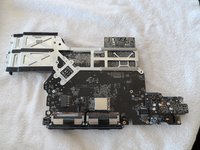
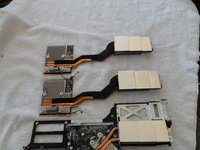
The logic board is outlined here in red. We have to remove it completely since the video card is installed on the backside. Before we do that, we have to carefully separate 17 connectors.
-
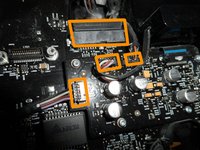
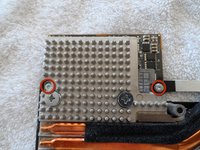
You can see parts of the graphics card highlighted in orange. The GPU is on the right and the dedicated heat fins are on the left, located just "downwind" of the CPU heat fins.
-
AFTER we disconnect all the wires, you need to also remove the right speaker enclosure since it covers the corner of the logic board. It's retained with one obvious screw.
-
-
-
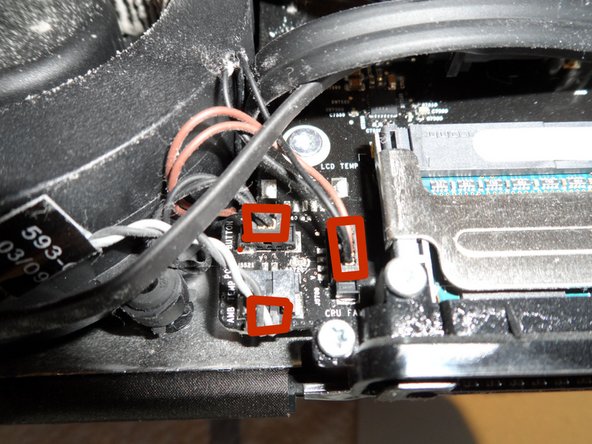
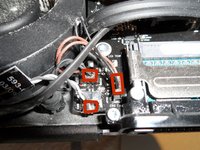
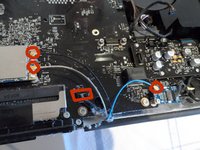
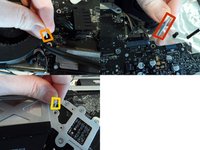
This position on the logic board has three closely-spaced connectors for the power button, ambient temp sensor, and the CPU fan. Unplug them.
-
Disconnect these three connectors for the HD temp sensor, optical drive temp sensor, and hard drive fan.
-
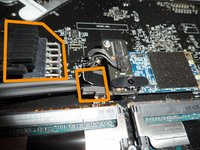
Each one of these three connectors has a different number of pins so you can't mix them up when reconnecting. Thanks, Apple!
-
-
-
Disconnect the plug for the optical drive fan.
-
You have four plugs to disconnect at this location: SATA bus, microphone, and the left and right speaker cables.
-
-
-
-
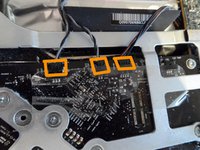
Almost there! Time to really go wireless by disconnecting the three WiFi and bluetooth antennas. These are tiny snaps so pull gently upward. Also, sneaking in from underneath, you'll find the iSight camera cable. Unplug it. This is one to look out for when you reinstall the logic board.
-
At last you'll disconnect the main power cord and the Hard Drive SATA cable. I photographed the top one already disconnected; be sure to squeeze the edge tabs to release the clamp hooks. The HDD SATA connector has a convenient pull tab.
-
-
-
Wires done. Now to get unscrewed. There are ten T-10 torx screws holding the logic board to the case in three different sizes:
-
Long ones (2.5mm x 24mm)
-
Short ones (2.5mm x 7mm)
-
A short one with a fine thread (2.5mm x 7mm)
-
-
-
If you haven't done so already, remove the speaker assembly on the right by loosening a single T-10 (2.5mm x 14mm) screw.
-
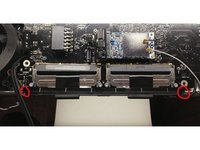
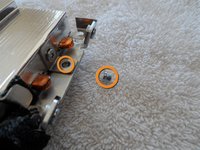
Remove the two T-9 (2mm x 7mm) screws from the bottom right and left corners of the RAM slots that secure the black plastic bracket to the frame.
-
Now simply lift out the logic board while keeping a careful eye on all those wires you just disconnected. The heatsink fins are attached to the logic board and lift out with it.
-
Note: There is a bit of foil tape on the far right (by the audio ports) that will need to be pulled up from the case as well while you lift out the motherboard.
-
-
-
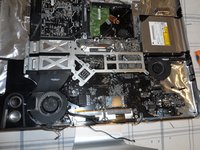
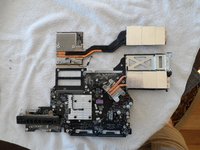
The logic board is moved to my padded work surface.
-
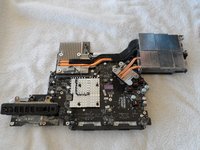
Flipping the board over you'll find all the back-panel connectors and some nifty copper heat piping for the CPU and GPU.
-
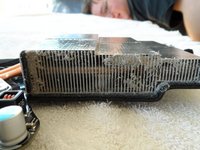
Those heat pipes flow to fins above the main blower. This is what 4 years of dust accumulation looks like. Is this the reason my VRAM died?
-
-
-
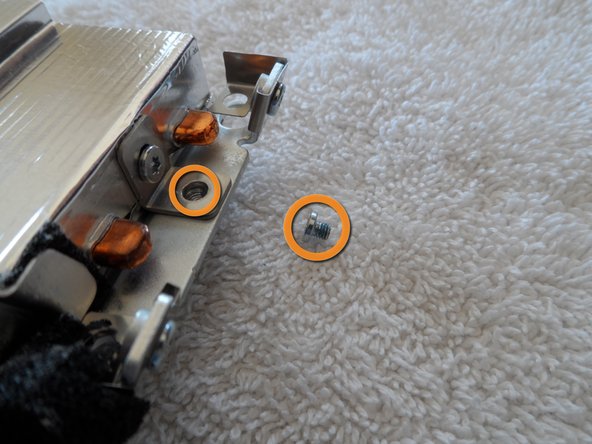
The graphics card is retained by two T-9 (2mm x 5mm) torx screws on the GPU board...
-
a third T-9 (2mm x 4mm) screw on the end of the heat sink...
-
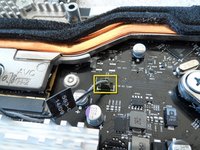
and the ever-present thermal sensor connector.
-
Remove/disconnect them all.
-
-
-
You've done it! The graphics card simply tilts up 45 degrees and slides up out of the MXM connector, heat sink and all. I'm glad I could see just how well engineered this piece of Apple hardware is.
-
In the second photo you can see the replacement graphics card (Apple part #661-5135) I got from Impact Computers in Florida. It's a drop-in replacement. Even the adhesive foam and thermal sensor are already in place. In fact, you better not turn your back or you may forget which is which!
-
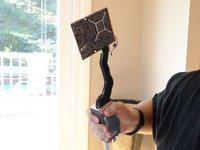
You World of Warcraft players out there might agree my son and I thought the old video card makes a pretty authentic-looking Gnomish 1H axe. Glory to the Alliance! :-)
-


To reassemble your device, follow these instructions in reverse order. This is a good time to vacuum out all that accumulated dust too!
Cancel: I did not complete this guide.
75 other people completed this guide.

37 Guide Comments
Aha! The "Apple part number" from step 11 is a great clue! Searching for these cards by this part number yields many online sellers.
There were three cards that could go in this model:
* NVIDIA GT120 (256Mb): part #661-4991
* NVIDIA GT130 (512Mb): part #661-4990
* ATI Radeon HD 4850 (512Mb): part #661-5135
The ATI card is generally marginally cheaper than the equivalent NVIDIA.
When I bought my iMac new, I remember the ATI card being the top-of-the-line option.
If you're going to try and substitute parts, I would start with the website I bought my video card from (http://www.impactcomputers.com/apple-ima...) and see if the video card(s) for that particular 2011 iMac match any of the part numbers aaaidan shows above.
I picked out one of the 2011 iMacs at random on the website and while the actual card looks the same (size and MXM connector) the heat sink is completely different. But you could try and dismantle the heat sink from the old and new cards and swap them. I would love to know if that works. An AMD Radeon HD6750M upgrade would be sweet :)