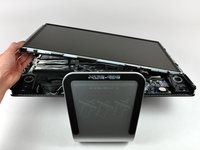
Introduction
Rüste deine Festplatte für mehr Speicherkapazität auf.
What you need
Video Overview
-
-
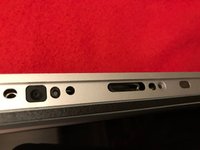
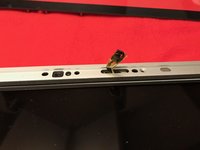
Löse die Kreuzschlitzschraube in der Mitte des Schutzblechs.
-
Entferne das Schutzblech vom iMac.
-
-
Tool used on this step:Heavy-Duty Suction Cups (Pair)$14.95
-
Setze zwei Saugheber auf gegenüberliegende Ecken der Glasscheibe.
-
-
-
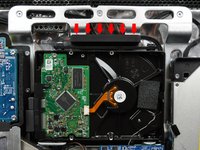
Entferne die folgenden 12 Schrauben, welche die Frontblende am dahinter liegenden Gehäuse befestigen:
-
Acht 13 mm T8 Torx.
-
Vier 25 mm T8 Torx.
-
-
-
Lege deine Hände auf die oberen Ecken der Blende (an der Seite) und hebe die Blende 2-3 cm oben vom Gehäuse ab. Danach kannst du die Blende auch unten aushängen (Die Speichermodule haben verhindert, dass du die Blende zuerst unten abnehmen kannst). Beim Zusammenbau musst du unten anfangen.
-
Zum Entfernen der Blende musst du den Mikrofonstecker ablösen, wenn nötig das Klebeband abziehen.
-
Wenn das Mikrofonkabel angeschlossen bleiben soll, dann lasse es mit dem Logic Board verbunden und lege die Blende auf das Gehäuse drauf, wobei das Mikrofonkabel wie ein Gelenk geformt wird.
-
-
-
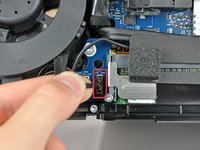
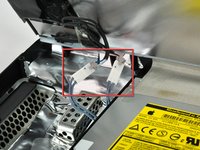
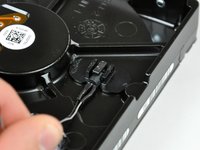
Ziehen Sie den Stecker des LCD-Temperatursensors gerade nach oben aus dem Sockel auf der Hauptplatine.
-
Ziehe dabei falls erforderlich das Kabel des Sensors hinter der Hauptplatine hervor.
-
-
-
-
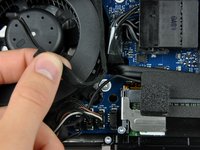
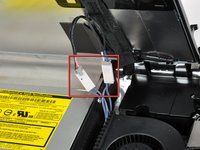
Falls erforderlich entferne das Klebeband, welches das Temperatursensorkabel von Festplatte oder optischem Laufwerk am iMac befestigen.
-
-
-
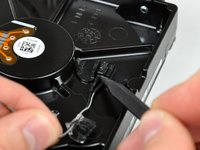
Entferne das Schaumstoff-Klebeband, welches den Temperatursensor der Festplatte abdeckt.
-


Arbeite die Schritte in umgekehrter Reihenfolge ab, um dein Gerät wieder zusammenzubauen.
Cancel: I did not complete this guide.
892 other people completed this guide.
Special thanks to these translators:
100%


These translators are helping us fix the world! Want to contribute?
Start translating ›

81 Guide Comments
Great instructions - used them for my 2134 model. Only difference is on Step 9 - see comments on that step.
Wonderful guide. I used it to replace a dead drive in my wife's 24" iMac. Installed a WD Caviar Black 2 TB. I'm jealous because her system now runs faster than mine ;-P.
Here is another reason to DIY this repair, while Apple's labor fee is reasonable, their warranty policy for repairs is not. If you have a new drive installed at the Apple store, your warranty on the drive is only 90 days. Worse yet, the drives are Apple branded, so you can't go to the hard drive manufacturer if the drive fails on day 91.
The two screws in step 8, page 3 are T7 - not T6. Apart from that, excellent guide!
When first starting with my OS (Snow Leopard) disk all I got was a whitish or gray screen, not even the mouse. So I started freaking out a bit. I couldn't get the key board to stay on so I kept pushing the keyboard power button while holding the option button and then the mouse arrow came up on the screen. After that the apple sign and then the install procedure started, so I was able to breathe again. So about five in the morning I was able to let it do it's thing and get some sleep. The next day I was able to restore from the external hard drive using Time Machine and so far my IMac 20" 7,1 #2133 is running super fast again probably better than when I got it brand new " if that's possible ". With your instructions on I fixit.com and your videos on YouTube it was pretty darn easy, even for someone like me who has never worked on a computer. The most I've done on a computer I installed a new program (Snow Leopard). Thank you, Tom D.