Introduction
Upgrade your hard drive for more storage capacity.
-
Lay the iMac display-side down on a flat surface.
-
Loosen the three Phillips screws securing the rear panel to the iMac.
-
Lift the rear panel slightly near the bottom of the iMac.
-
Pull the rear panel toward yourself and remove it from the iMac.
-
Remove the following three screws:
-
One shouldered 12.4 mm Phillips.
-
Two 7 mm T10 Torx.
-
My model have 3 phillips screws, no torx
-
Lift the hard drive slightly and disconnect the hard drive thermal sensor connector.
-
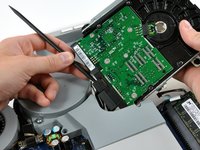
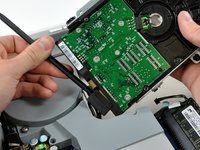
Insert the flat end of a spudger into the gap between the SATA data connector and the hard drive.
-
Twist the spudger to separate the SATA data connector from the hard drive, then disconnect it from the hard drive.
-
Lift the hard drive out of the iMac.
-
Remove the two 15 mm shouldered T10 Torx screws from the hard drive and remove the bracket.
-
Remove the two 6 mm T10 Torx screws from the hard drive and remove the hard drive bracket.
To reassemble your device, follow these instructions in reverse order.
Cancel: I did not complete this guide.
142 other people completed this guide.
Some models (with light sensor) have only the two outboard screws.
Robert Huber - Reply