Introduction
This guide provides step-by-step instructions for replacing the keyboard (buttons) of the iHome iBT230. The buttons allows for the overall control of this device, such as a play/pause/pair button, powering it off, changing the mode, a preset button for the radio, a sleep/clock adjust button, two buttons for setting alarms, answering and ending phone calls, a snooze button, and finally a snooze/dimmer button. By replacing the keyboard plate, it will fix any broken or non-responsive buttons.
What you need
-
-
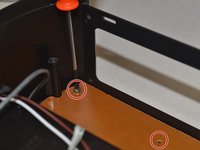
Remove the four 5.5 mm Phillips Head #00 screws from the bottom palate of the iBT230.
 Ask FixBot
-
-
-
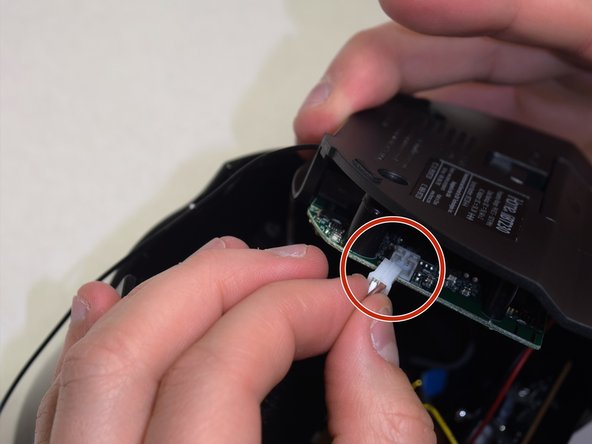
Grip the top of the iBT230 by placing your thumb on the back portion, where the USB port is located. Pull up, and you should notice various different colored wires, connected to the Main Motherboard.
-
-
-
Unplug the connectors from all sides of the iBT230, and unplug the wire connected to the screen.
-
-
-
-
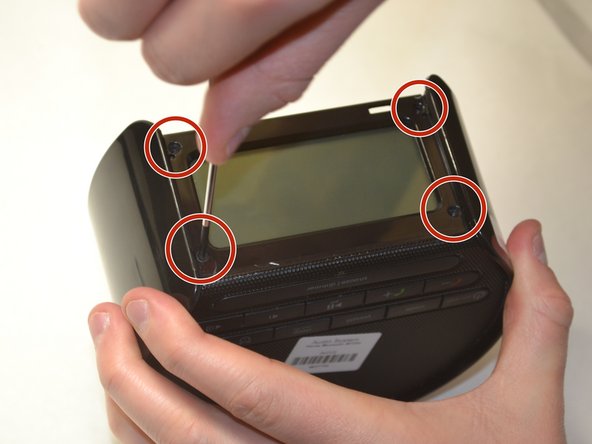
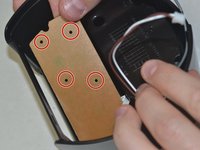
Unscrew the four 5.5 mm Phillips #00 face panel screws from the front screen.
-
-
-
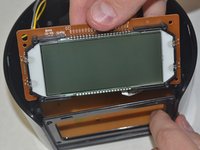
Once the four 5.5 mm Phillips #00 screws come out, slide the screen out vertically.
-
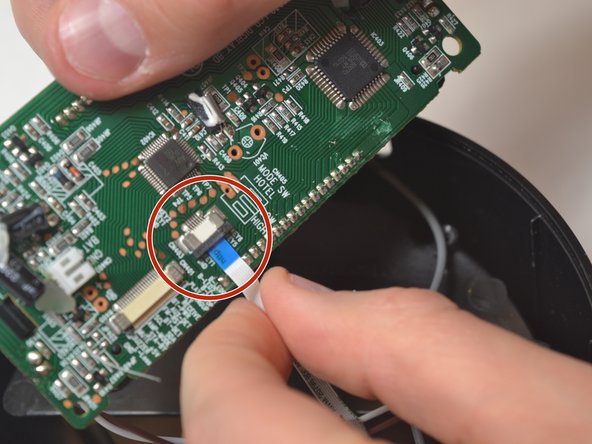
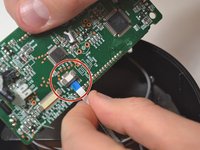
Disconnect the blue tipped ribbon from the back of the screen.
-
-
-
Once the screen is removed, unscrew the six 4.0 mm Phillips #02 screws located on top of the keyboard.
-


To reassemble your device, follow these instructions in reverse order.
Team

UW Tacoma, Team S3-G6, Liner Spring 2017 Member of UW Tacoma, Team S3-G6, Liner Spring 2017
UWT-LINER-S17S3G6
4 Members
3 Guides authored