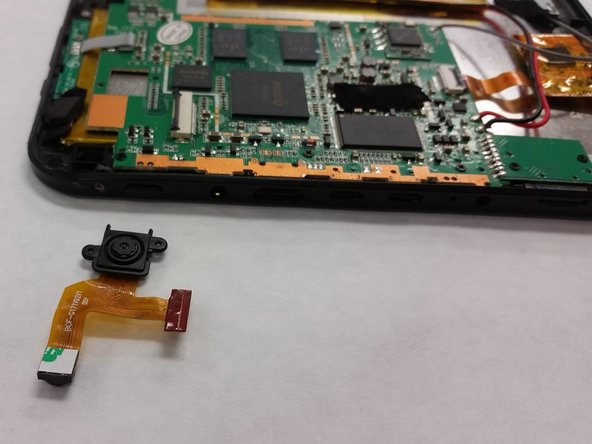
iDea USA CT 1020 Front & Rear Camera Assembly Replacement

What you need

  1. iDea USA CT 1020 Front & Rear Camera Assembly Replacement, Front & Rear Camera Assembly: step 1, image 1 of 1
    • First, power down the tablet to avoid the chance of electrical shock or damaging the machine during repair work

    • Place the tablet on a clean surface with the screen down

  2. iDea USA CT 1020 Front & Rear Camera Assembly Replacement: step 2, image 1 of 2 iDea USA CT 1020 Front & Rear Camera Assembly Replacement: step 2, image 2 of 2
    • Remove the back plastic casing of the tablet by releasing the plastic clips with a plastic opening tool or a spudger.

    • Be cautious and take your time here; the plastic clips are quite fragile.

  3. iDea USA CT 1020 Front & Rear Camera Assembly Replacement: step 3, image 1 of 1
    • Use a plastic opening tool or spudger to lift and release the camera assembly ZIF tab.

    • Gently pull the ribbon cable free.

  4. iDea USA CT 1020 Front & Rear Camera Assembly Replacement: step 4, image 1 of 2 iDea USA CT 1020 Front & Rear Camera Assembly Replacement: step 4, image 2 of 2
    • The camera is held in place by adhesive material on the back of the camera

    • To complete removal, peel the camera off the mother board

Conclusion

To reassemble your device, follow these instructions in reverse order.

One other person completed this guide.

David Lawrence

Member since: 01/22/18

109 Reputation

1 Guide authored

Team

IUPUI, Team S1-G3, Freund Spring 2018 Member of IUPUI, Team S1-G3, Freund Spring 2018

IUPUI-FREUND-S18S1G3

3 Members

4 Guides authored

0 Comments

Add Comment

View Statistics:

Past 24 Hours: 1

Past 7 Days: 1

Past 30 Days: 1

All Time: 98