
Installing iBook G3 14" Clutch Cover

What you need

  1. Installing iBook G3 14" Clutch Cover, Rear Display Bezel: step 1, image 1 of 1
    • Use a 1.5 mm hex screwdriver to remove the two hex screws on either side of the display (four screws total).

    • If you don't have a 1.5 mm hex driver, you can probably get these screws out with a T6 Torx screwdriver. However, if you use a T6 Torx driver you'll be more likely to strip the screws.

  2. Installing iBook G3 14" Clutch Cover: step 2, image 1 of 1
    • Use your thumbs to slightly separate the rear bezel from the front bezel.

    • It is helpful to hold the opposing corner of the display stationary to aid in flexing the rear bezel away from the display.

  3. Installing iBook G3 14" Clutch Cover: step 3, image 1 of 3 Installing iBook G3 14" Clutch Cover: step 3, image 2 of 3 Installing iBook G3 14" Clutch Cover: step 3, image 3 of 3
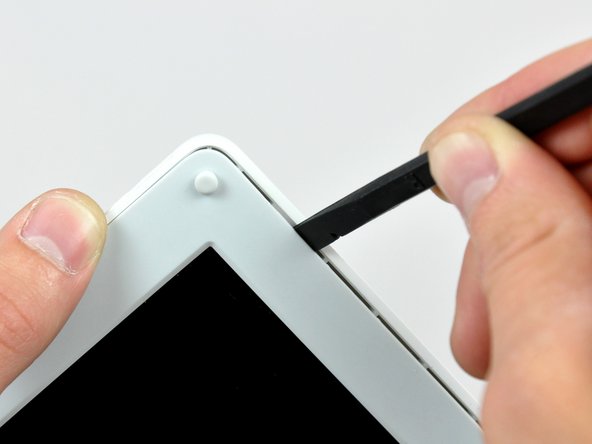
    • Insert the flat end of a spudger into the gap between the front and rear bezels.

    • Rotate your spudger until it is parallel to the front face of the display.

    • Run the spudger around the perimeter of the display to separate the rear bezel from its retaining clips.

  4. Installing iBook G3 14" Clutch Cover: step 4, image 1 of 1
    • Lift the rear bezel off the display.

  5. Installing iBook G3 14" Clutch Cover, LCD Cover: step 5, image 1 of 2 Installing iBook G3 14" Clutch Cover, LCD Cover: step 5, image 2 of 2
    • Remove the pieces of readily removable tape from around the perimeter of the display.

    • Carefully remove the aluminum tape covering the display data cable connection.

  6. Installing iBook G3 14" Clutch Cover: step 6, image 1 of 2 Installing iBook G3 14" Clutch Cover: step 6, image 2 of 2
    • Remove the single screw inserted through the piece of EMI tape near the bottom edge of the display.

    • Use the tip of a spudger to remove the small washer under the screw you just removed.

  7. Installing iBook G3 14" Clutch Cover: step 7, image 1 of 1
    • Peel the aluminum/EMI tape off the cast aluminum frame of the clutch hinges.

    • It is not necessary to peel the tape off the thin steel LCD cover.

  8. Installing iBook G3 14" Clutch Cover: step 8, image 1 of 2 Installing iBook G3 14" Clutch Cover: step 8, image 2 of 2
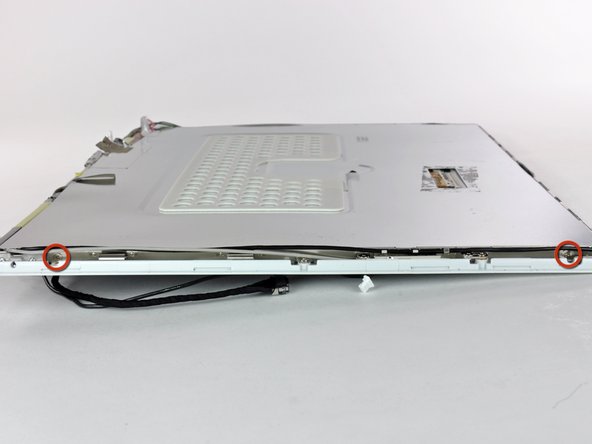
    • Remove the two Phillips screws securing each side of the LCD to the clutch hinge frame (four screws total).

  9. Installing iBook G3 14" Clutch Cover: step 9, image 1 of 1
    • Lift the thin steel LCD cover off the LCD.

  10. Installing iBook G3 14" Clutch Cover, Clutch Cover: step 10, image 1 of 1
    • Remove the second of the two Phillips screws securing the clutch cover to the cast aluminum frame of the clutch hinges.

  11. Installing iBook G3 14" Clutch Cover: step 11, image 1 of 3 Installing iBook G3 14" Clutch Cover: step 11, image 2 of 3 Installing iBook G3 14" Clutch Cover: step 11, image 3 of 3
    • Pull the clutch cover away from the front of the display.

    • Keep track of the two covers that close the ends of the clutch cover. The third picture shows their correct orientation on the clutch cover.

View Statistics:

Past 24 Hours: 0

Past 7 Days: 0

Past 30 Days: 9

All Time: 1,143