Introduction
These instructions will show you how to open bObi Pet and replace the mainboard yourself. Remember to keep all screws and parts removed and organized as they may be needed for reassembly.
Video tutorial also available: https://www.youtube.com/watch?v=cbDMc77J...
What you need
-
-
Before we get started, turn bObi Pet OFF and flip her over onto a flat surface.
-
Next, remove bObi Pet's dustbin. Grip the small tab on the back of the bin, and pull to remove.
 Ask FixBot
-
-
-
Grip the front wheel and pull straight up, using the screwdriver for leverage.
-
The wheel will pop out and you will see two screws beneath it.
-
There is a larger screw set deeper in the wheel compartment. Use the screwdriver to remove it.
-
-
-
Remove the screws on both sides of bObi Pet’s dustbin. Then, remove the corner pieces that were held down by the screws.
-
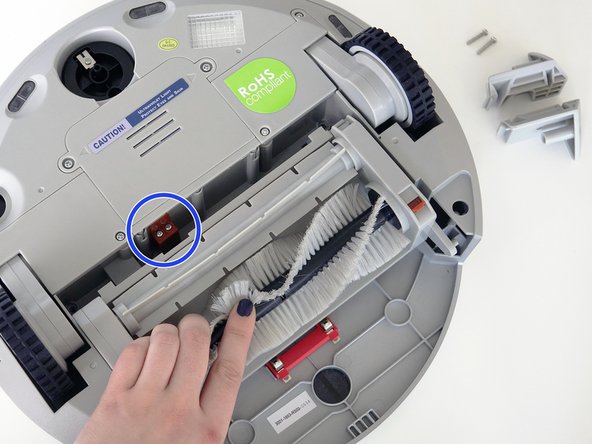
Grip the brush compartment and pull down to reveal two screws on a red fastener.
-
Remove them with the screwdriver.
-
-
-
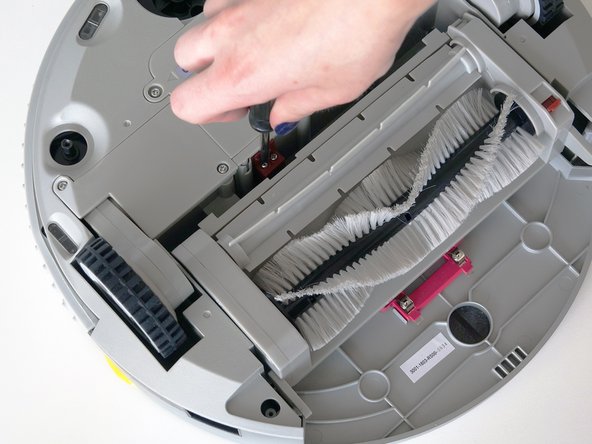
Pull the brush compartment up until the fastener is freed from bObi Pet. Then, detach the brush compartment's circuit plug and set it aside.
-
Remove the 4 screws located beneath the brush compartment.
-
-
-
-
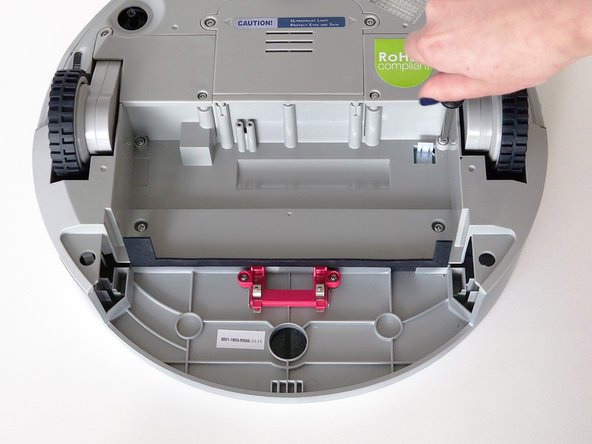
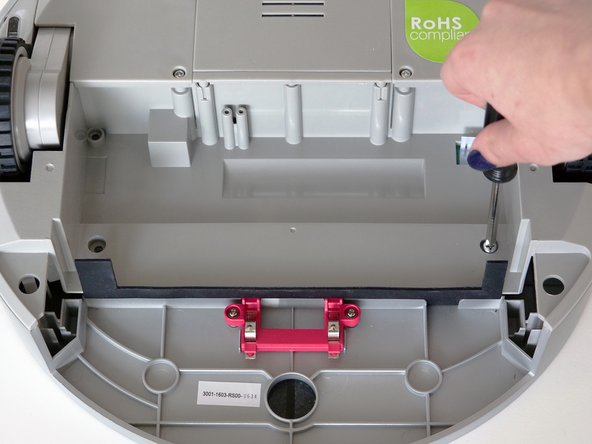
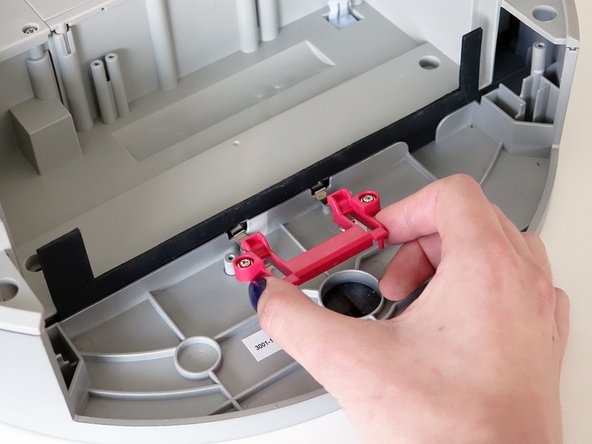
Remove the 2 screws on the dustbin’s red fastener.
-
Remove the fastener and set it aside for reassembly.
-
The cover is no longer secured, so carefully flip bObi Pet onto her wheels.
-
-
-
Lift the cover to reveal the main board underneath.
-
Remove the two circuit plugs connecting the lid to the mainboard.
-
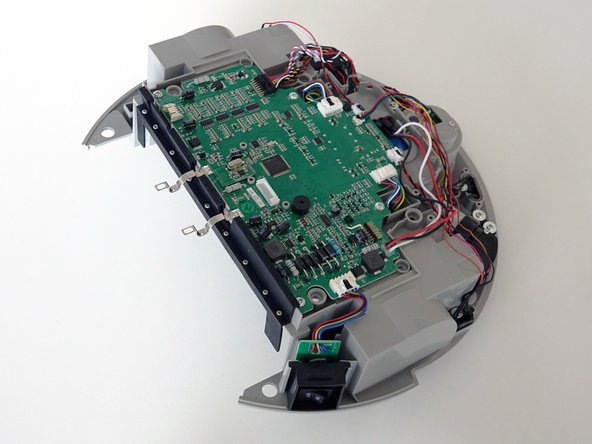
bObi Pet's cover is entirely separated, and you may now access any of her internal parts for replacement.
-
-
-
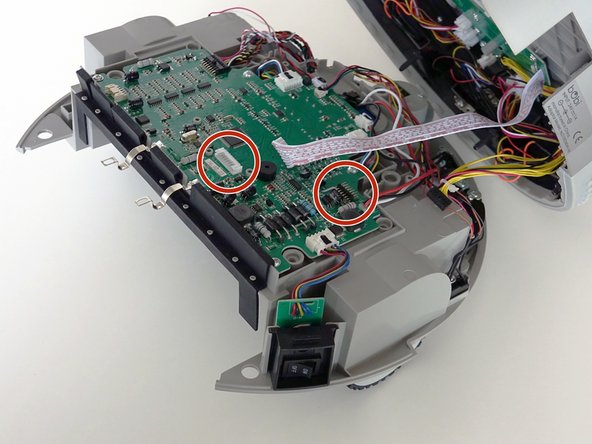
To remove the old mainboard, disconnect the 7 circuit plugs on its surface.
-
There are 5 at the front of bObi Pet, near the front wheel.
-
Plus one black circuit plug near bObi Pet's left wheel.
-
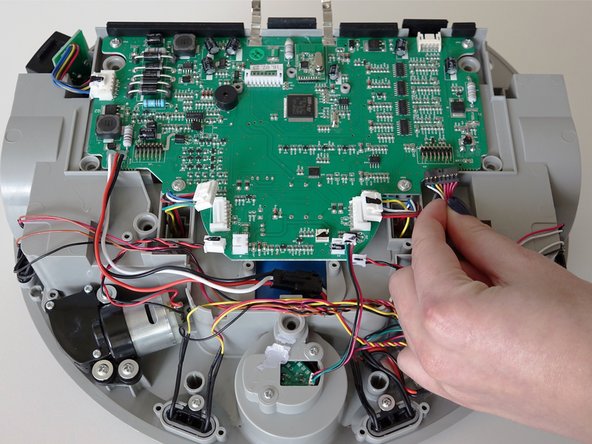
Unplug the power switch near bObi Pet's back.
-
Finally, disconnect the battery, located on top of the main board
-
-
-
Next, remove the 4 screws holding the mainboard down. Keep these closeby for the next step.
-
-
-
Lift the black rubber flaps off the base of the mainboard.
-
Then, lift the old mainboard up. If there is glue securing any of the wires to bObi Pet, you may scrape it off with your screwdriver.
-
-
-
Do not remove the small red screw posts close to the dustbin.
-
Line up the new mainboard with the screw posts inside bObi Pet and gently push the mainboard down so it sits flat and 3 screw posts fit through the holes in the middle.
-
Replace the rubber flaps along the back of bObi Pet's mainboard.
-
-
-
Once the rubber strip is back in place, reinstall the 4 screws you removed earlier.
-
Now that the main board is secured to bObi Pet, reconnect the battery above the mainboard.
-
-
-
Reattach all the circuit plugs correctly. There are five at the top, one black circuit plug on Bobi Pet’s left, and the circuit plug for the power switch on Bobi Pet’s right.
-
Tuck any protruding wires into the crevices around the mainboard so the lid can easily sit on top.
-
Once the mainboard’s circuits are reconnected correctly, you’re ready to start closing bObi Pet. See this guide for assistance: Assemble bObi Pet Post-Repair
-


For a simple reassembly guide, see: Assemble bObi Pet Post-Repair