Introduction
Use this guide to replace the screen on the Zeki Droid TBDC1093B.
Follow these instructions to disassemble the Zeki Droid and gain access to the broken screen. To prevent injury, I recommend following this guide to reinforce the broken glass.
What you need
-
-
Remove the back casing by slowly popping each tab out with a plastic opening tool.
 Ask FixBot
-
-
Tool used on this step:Tweezers$4.99
-
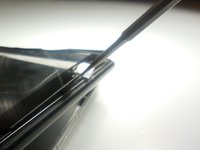
Remove the tapes one by one from the connecting wires with tweezers.
-
-
-
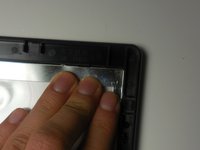
Remove the black clips from both sides of the casing with a plastic opening tool.
-
-
-
-
Detach the motherboard from the framing by removing the four screws using a Phillips #000 screwdriver.
-
-
Tool used on this step:Tweezers$4.99
-
Lift the camera and flash components from their fittings using tweezers.
-


To reassemble your device, follow these instructions in reverse order.
Team

Colorado Springs, Team 2-6, Panko Spring 2015 Member of Colorado Springs, Team 2-6, Panko Spring 2015
UCCS-PANKO-S15S2G6
3 Members
10 Guides authored