Free Shipping on Domestic Orders $75+

Zeepad 7.0 Screen Replacement

What you need

    1. Zeepad 7.0 Screen Replacement, Screen: step 1, image 1 of 2 Zeepad 7.0 Screen Replacement, Screen: step 1, image 2 of 2
      • Power off the device and keep it unplugged.

      • Open the case using a plastic opening tool around the edges. Slightly pull the cover off.

      • Do not completely remove back casing because there is a speaker attached to the back.

      Ask FixBot

      Add Comment

    2. Zeepad 7.0 Screen Replacement: step 2, image 1 of 1
      • Using the Phillips Head 0 bit, carefully unscrew the three 3.5mm screws holding the motherboard in place on to the back of the screen.

      Ask FixBot

      Add Comment

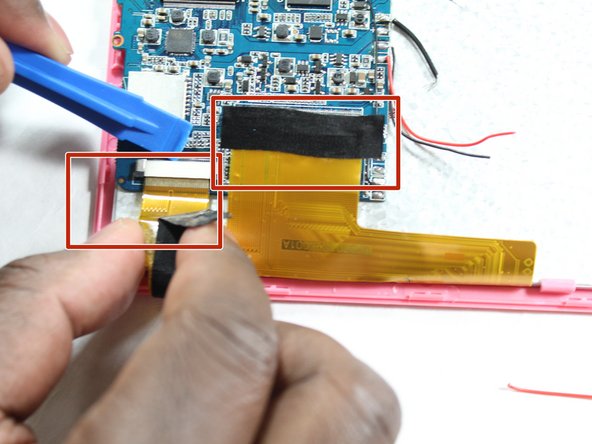
    3. Zeepad 7.0 Screen Replacement: step 3, image 1 of 2 Zeepad 7.0 Screen Replacement: step 3, image 2 of 2
      • Disconnect the two ribbon cables between the screen and the motherboard.

      • Be careful not to rip out the ribbon cables or you can harm the ports.

      Ask FixBot

      Add Comment

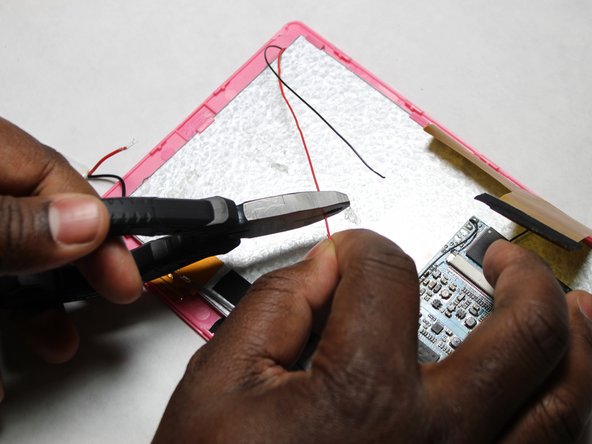
    4. Zeepad 7.0 Screen Replacement: step 4, image 1 of 1
      • Cut the power cables connecting between the screen and the motherboard. There should be a red and black cable each.

      Ask FixBot

      Add Comment

    5. Zeepad 7.0 Screen Replacement: step 5, image 1 of 2 Zeepad 7.0 Screen Replacement: step 5, image 2 of 2
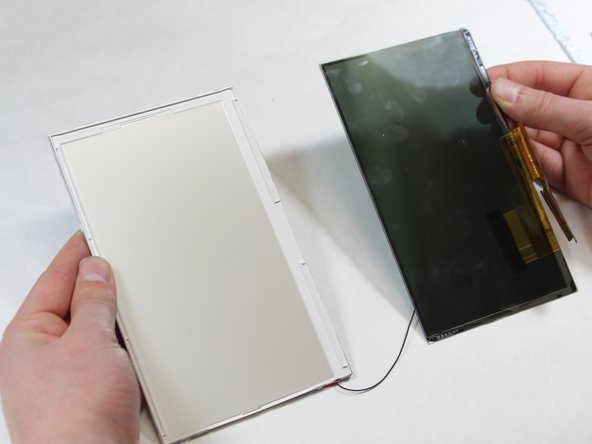
      • Separate the front screen protector from the lcd screen. There are clamps holding the screen in place.

      Ask FixBot

      Add Comment

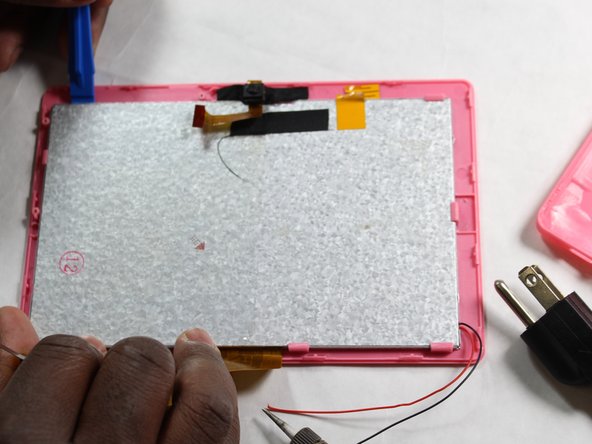
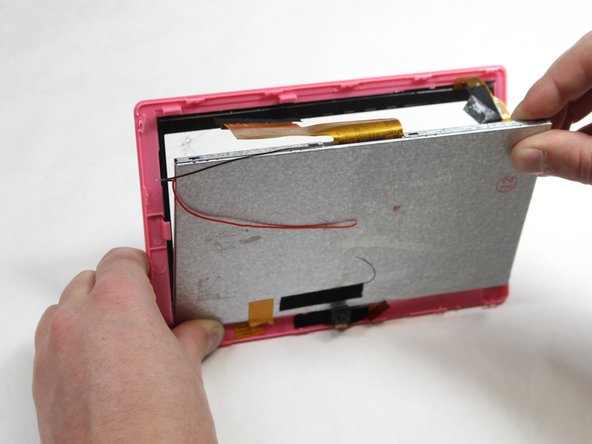
    6. Zeepad 7.0 Screen Replacement: step 6, image 1 of 3 Zeepad 7.0 Screen Replacement: step 6, image 2 of 3 Zeepad 7.0 Screen Replacement: step 6, image 3 of 3
      • Separate the LCD screen from the metal protecting case with the metal spudger.

      Ask FixBot

      Add Comment

    7. Zeepad 7.0 Screen Replacement: step 7, image 1 of 3 Zeepad 7.0 Screen Replacement: step 7, image 2 of 3 Zeepad 7.0 Screen Replacement: step 7, image 3 of 3
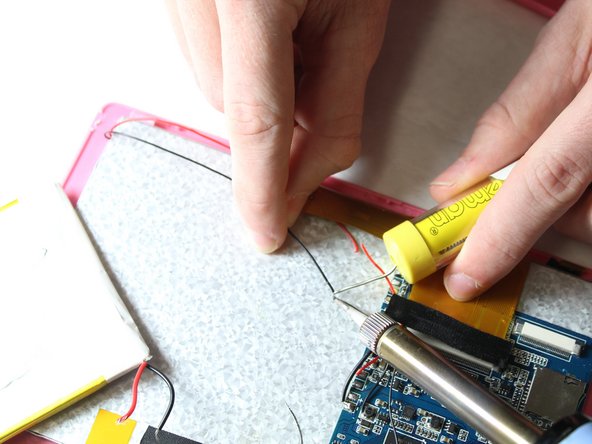
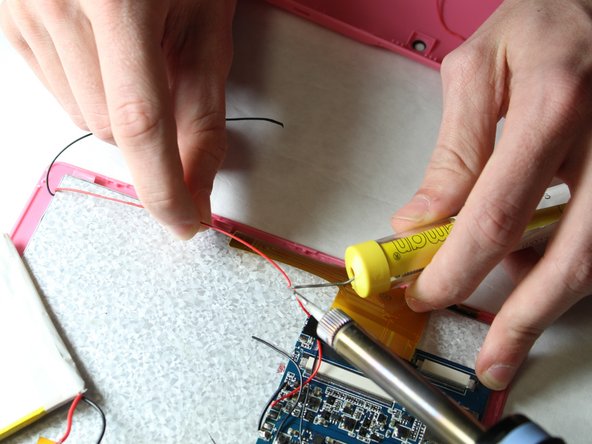
      • After creating space to work, warm up a soldering iron.

      • Apply heat onto the solder over the corresponding cut wires to the new screen wires.

      • How To Solder and Desolder Connections

      • The soldering iron will be extremely hot. Keep out of direct contact to other wires, the motherboard, and especially the battery.

      • Keep out of reach of children.

      Ask FixBot

      Add Comment

Conclusion

To reassemble your device, follow these instructions in order.

Cancel: I did not complete this guide.

One other person completed this guide.

Harry Winter

Member since: 03/26/18

157 Reputation

1 Guide authored

Team

IUPUI, Team S2-G1, Harley Spring 2018 Member of IUPUI, Team S2-G1, Harley Spring 2018

IUPUI-HARLEY-S18S2G1

3 Members

24 Guides authored

2 Guide Comments

where do you buy the screen?

Zuzzi Z Amend - Reply Share

i need a battery an a screen? is their a place on this page where to get them?

Zuzzi Z Amend - Reply Share

Add Comment

View Statistics:

Past 24 Hours: 3

Past 7 Days: 17

Past 30 Days: 50

All Time: 981