Introduction
In light of the Yoto Mini recall and a recent SD FAIL message, I decided to open ours up and replace the card myself. (I doubt Yoto will have replacement units anytime soon)
It’s a fairly simple process, but unfortunately you do need to break 4 tabs on the screen to access the SD card. This is likely why the unit is not user-repairable, and does not fall under Yoto’s “Right to Repair” documentation. They only provide instructions for the full sized Yoto Gen 2 here. Thankfully the screen goes back in place without the little tabs – I’m not worried about it falling apart once reassembled.
My player had a 16GB Sandisk card. I used a 64GB Lexar card from Amazon. You’ll also need a small Philips screwdriver (P00) and some sort of small flathead to pry (I used 2.5mm). Both come in the lovely iFixit Mako driver kit.
What you need
-
-
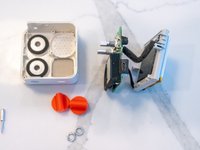
Use a very thin flat head screwdriver to pry out the two orange knobs on the front. They require a bit of force to remove. Then use a pair of pliers to grab the nuts and unscrew them. Set them aside with their washers and knobs somewhere safe.
-
-
-
Peel off the silicon feet – they’re just sticky. Unscrew the 2 Phillips head screws from under the feet pads and put them somewhere safe. These have flush/flat heads.
-
-
-
Use a very thin flat head screwdriver to gently pry open all around the edge. You might have to do some scary feeling tugging to get the top part. Be as gentle as you can but it came apart after some careful maneuvering to get the latches undone with the screwdriver as a lever.
-
-
-
-
Now you will see the battery pack. Maybe this is replaceable to fix the recall issue? No idea, that’s another project. There are two screws, one on each side. These are raised Phillips head. Unscrew them and put them somewhere safe, preferably labeled so you remember which goes where.
-
-
-
There are 4 more screws under the pack that willneed to be removed. Be careful with the battery so you don’t damage it. You may want to unplug it from its little socket. Mine was glued on so I completed the remaining steps with it still attached to the board.
-
-
-
The SD card slot is underneath the screen. The screen unit itself unfortunately it held on with 4 small plastic bits that go through the board. I had to cut off the tiny bits that went through – use an exacto knife or your small flathead screwdriver. Once those 4 bits were removed, the screen and holder easily came off.
-
-
-
Underneath, the SD card is in a hinged case. Use a fingernail to gently push the top of the casing back to unlock, then lift. Remove the SD card and replace in the same orientation, making sure the notches match up. Close and slide the hinge top forward to lock it.
-
-
-
Replace the screen. and put it all back together in the opposite order. Be aware that the screen holder will no longer be completely attached since you broke the 4 little tabs. Be careful reassembling so that it lines up correctly with the front panel. Same for the speaker.
-
-
-
Screw it back together. Replace the battery pack. Slide the back together, replace the feet screws, washers nuts and knobs, and silicon feet. You may have to finish with a factory reset – I didn’t have to.
-
-
-
Of note: The files on the previous SD card do not have extensions, but are nested in folders per-card and are playable as MP3 if you add “.mp3” to the filenames. It’s an interesting way to get to the files themselves if you’re inclined.
-


To reassemble your device, follow these instructions in reverse order.
Cancel: I did not complete this guide.
6 other people completed this guide.

4 Guide Comments
Exactly the guide ive been looking for thank you!. Havnt taken ours apart just yet to replace the SD card but do you think there is any room in there to wedge an AirTag? child keeps taking clipped on airtags off so looking for more options to track it down in the house 🤣
I think the charging port is dead on ours. Think I can replace it?