Introduction
You will need
Screwdriver
Drill with 3/8 bit
Exacto Knife
JST 2.0 USB
What you need
-
-
Disassemble according to the official YOTO SD guide.. Then disconnect "POGO" and pop out magnetic base
 Ask FixBot
-
-
-
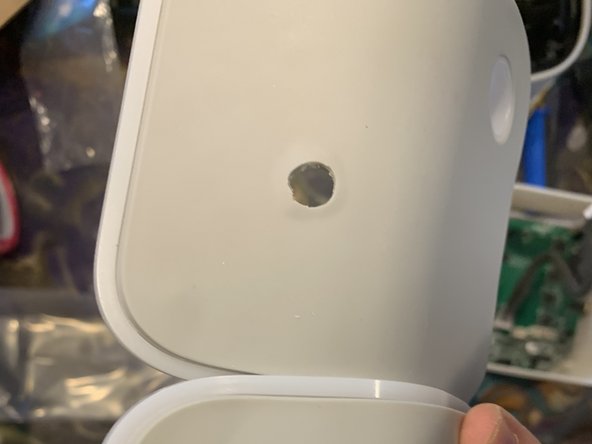
Drill a 3/8 inch hole in the back of your Yoto, to the slight left above the battery door. Devices that have dots on the back, the second hole from left makes a perfect pilot hole.
-
-
-
-
Clean up hole on the back with exacto or file. The hard plastic may need some cleaning depending on your USB size.
-
-
-
Install USB-C by putting the USB through your hole and tightening the nut. Make sure your USB faces the way you want it to.
-
-
-
Begin to reassemble the Yoto, leaving the old circle charger off. Reconnect any items disconnected during SD servicing. Without adding any screws get the battery, speakers (unibody or with additional divider) and the LED back in place. Snake the USB wires and plug into POGO. Do not plug the old power into anything but replace it in the bottom.
-
-
-
Screw everything back together! It's done. Enjoy your USB G2
-


This requires no soldering. You can do it!
Cancel: I did not complete this guide.
2 other people completed this guide.

2 Guide Comments
Love it, but I don’t see a picture of the finished product.
I have done this and followed all the instructions, when I plug the usb in to a powered cable the yoto switches off. Is this what it is supposed to do? If not, any suggestions? Thanks!