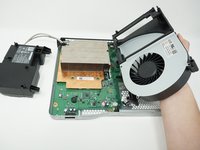
Xbox One X Project Scorpio Edition Fan Replacement

What you need

  1. Xbox One X Project Scorpio Edition Fan Replacement, Outer Case: step 1, image 1 of 2 Xbox One X Project Scorpio Edition Fan Replacement, Outer Case: step 1, image 2 of 2
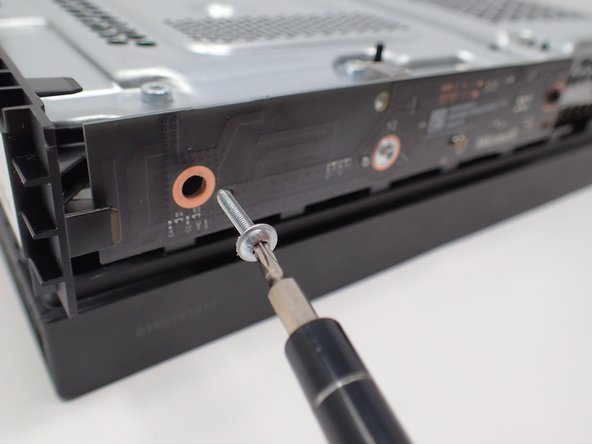
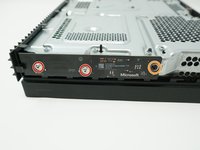
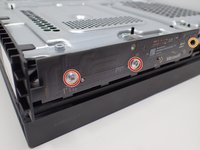
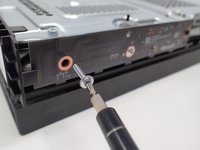
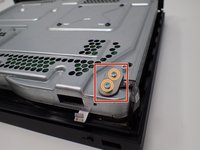
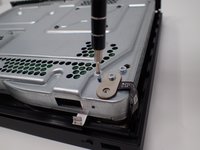
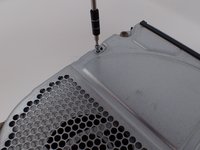
    • Use a T9 Torx screwdriver to remove the 13mm screw which is under and to the left of the power input.

  2. Xbox One X Project Scorpio Edition Fan Replacement: step 2, image 1 of 3 Xbox One X Project Scorpio Edition Fan Replacement: step 2, image 2 of 3 Xbox One X Project Scorpio Edition Fan Replacement: step 2, image 3 of 3
    • Using precision tweezers, remove the screw tab located on opposite side of the box.

    • Use a T9 Torx screwdriver to remove the 13mm screw revealed underneath the tab.

  3. Xbox One X Project Scorpio Edition Fan Replacement: step 3, image 1 of 3 Xbox One X Project Scorpio Edition Fan Replacement: step 3, image 2 of 3 Xbox One X Project Scorpio Edition Fan Replacement: step 3, image 3 of 3
    • Orient the case so that the front of the Xbox (the side with the power button) is facing you.

    • Remove the top of the case by sliding the case towards you.

  4. Xbox One X Project Scorpio Edition Fan Replacement: step 4, image 1 of 3 Xbox One X Project Scorpio Edition Fan Replacement: step 4, image 2 of 3 Xbox One X Project Scorpio Edition Fan Replacement: step 4, image 3 of 3
    • Using a T9 Torx screwdriver, remove the two 15mm silver screws that are holding a circuit board/panel to the side of the interior metal casing.

    • Using the same screwdriver, remove the 9mm black screw located farther to the right on the same circuit board/panel.

  5. Xbox One X Project Scorpio Edition Fan Replacement: step 5, image 1 of 2 Xbox One X Project Scorpio Edition Fan Replacement: step 5, image 2 of 2
    • Remove the unscrewed panel from the side of the device by pulling it toward you.

    • Be mindful of the connector, as it is fragile.

  6. Xbox One X Project Scorpio Edition Fan Replacement: step 6, image 1 of 2 Xbox One X Project Scorpio Edition Fan Replacement: step 6, image 2 of 2
    • Pull the upper edge of the white clip down, and then remove the white connector from the dislocated panel using precision tweezers.

    • Do not force the connector out, as it is fragile. Wiggling may be necessary.

  7. Xbox One X Project Scorpio Edition Fan Replacement: step 7, image 1 of 3 Xbox One X Project Scorpio Edition Fan Replacement: step 7, image 2 of 3 Xbox One X Project Scorpio Edition Fan Replacement: step 7, image 3 of 3
    • On the top of the device in the corner directly above the white connector, there is an oval plate held in place by two screws.

    • Remove both of these 7mm screws with a Torx T9 screwdriver.

    • Lift the detached plate off to the side.

    • The plate is still connected to the device.

  8. Xbox One X Project Scorpio Edition Fan Replacement: step 8, image 1 of 2 Xbox One X Project Scorpio Edition Fan Replacement: step 8, image 2 of 2
    • Use a Torx T9 screwdriver to remove the six 47mm long screws, which attach the bottom side of the outer case.

  9. Xbox One X Project Scorpio Edition Fan Replacement: step 9, image 1 of 3 Xbox One X Project Scorpio Edition Fan Replacement: step 9, image 2 of 3 Xbox One X Project Scorpio Edition Fan Replacement: step 9, image 3 of 3
    • Turn the Xbox over, so that the bottom of the case is on top.

    • Lift the bottom of the case off of the Xbox by pulling it up and toward you.

  10. Xbox One X Project Scorpio Edition Fan Replacement, BD-ROM Drive: step 10, image 1 of 1
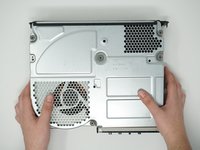
    • Flip over the device again, so that the top is facing upwards.

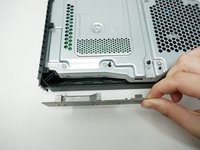
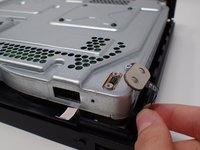
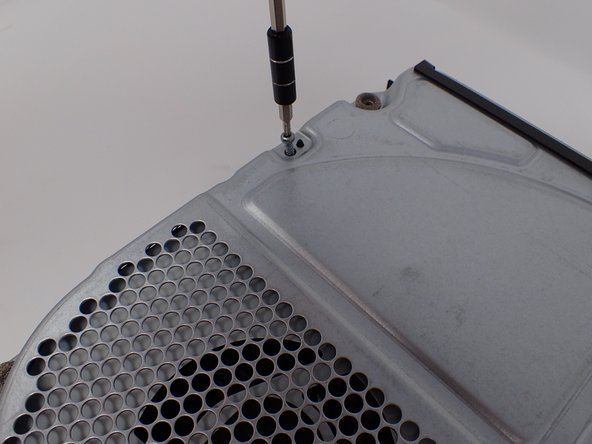
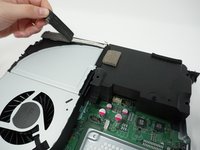
    • Remove the 4 smaller 11mm screws in the lower left corner on the metal casing using a Torx T9 screwdriver.

  11. Xbox One X Project Scorpio Edition Fan Replacement: step 11, image 1 of 2 Xbox One X Project Scorpio Edition Fan Replacement: step 11, image 2 of 2
    • Flip over the device again, so that the bottom is facing upwards.

    • Using a Torx T10 screwdriver, remove the two screws located on opposite sides of the metal casing. One is near the fan vent, and the other is near the power supply vent.

    • The left screw is 11mm and the right screw is 7.5 mm.

  12. Xbox One X Project Scorpio Edition Fan Replacement: step 12, image 1 of 3 Xbox One X Project Scorpio Edition Fan Replacement: step 12, image 2 of 3 Xbox One X Project Scorpio Edition Fan Replacement: step 12, image 3 of 3
    • Remove the metal casing by pulling it upward, revealing the interior components of the device.

  13. Xbox One X Project Scorpio Edition Fan Replacement: step 13, image 1 of 3 Xbox One X Project Scorpio Edition Fan Replacement: step 13, image 2 of 3 Xbox One X Project Scorpio Edition Fan Replacement: step 13, image 3 of 3
    • Lift and rotate the BD drive to reveal the wires that connect it to the motherboard.

  14. Xbox One X Project Scorpio Edition Fan Replacement: step 14, image 1 of 3 Xbox One X Project Scorpio Edition Fan Replacement: step 14, image 2 of 3 Xbox One X Project Scorpio Edition Fan Replacement: step 14, image 3 of 3
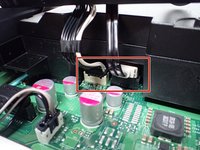
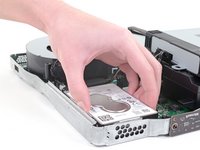
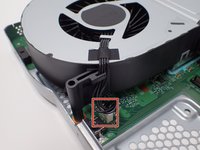
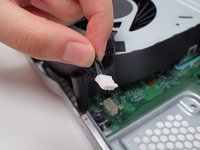
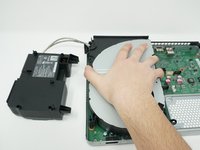
    • Using your fingers, gently unplug the two sets of wires connecting the drive to the motherboard.

    • Alternatively, you can disconnect the wires from the drive-side sockets. This is much easier if you have not removed the power supply.

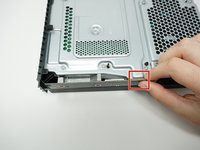
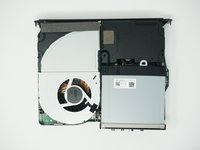
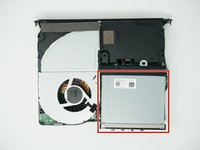
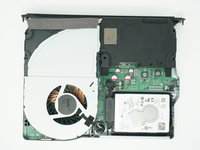
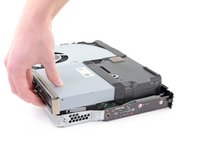
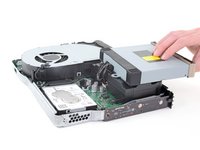
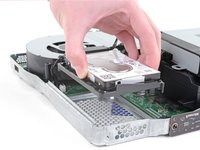
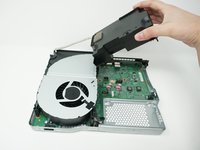
    • The BD drive should now be completely detached from the rest of the device, and it can be set aside.

  15. Xbox One X Project Scorpio Edition Fan Replacement, Remove the screws holding the hard drive to the case: step 15, image 1 of 1
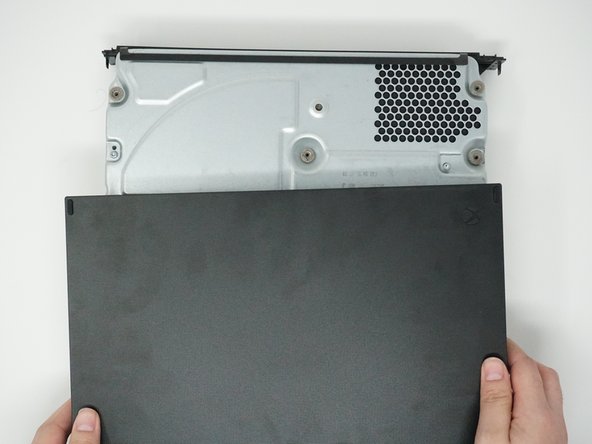
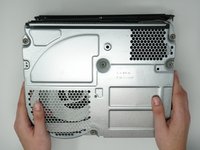
    • Flip the console over.

    • The disc drive is only attached to the motherboard by two cable connectors. Hold the disc drive when flipping the console over to avoid damaging it.

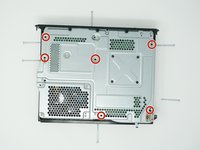
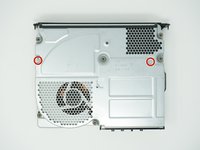
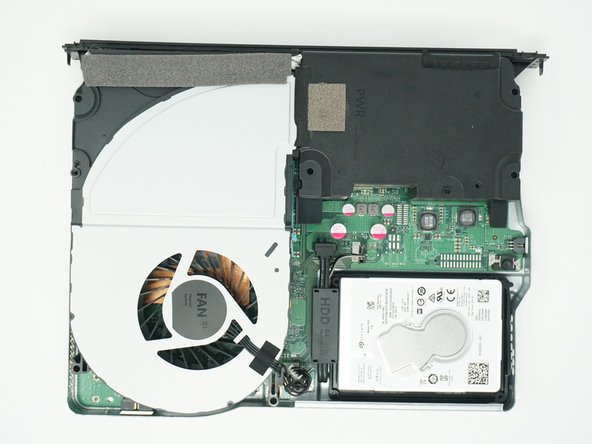
    • Use a T10 Torx screwdriver to remove the four 11.4 mm screws securing the hard drive to the upper metal case.

  16. Xbox One X Project Scorpio Edition Fan Replacement, Move the disc drive: step 16, image 1 of 3 Xbox One X Project Scorpio Edition Fan Replacement, Move the disc drive: step 16, image 2 of 3 Xbox One X Project Scorpio Edition Fan Replacement, Move the disc drive: step 16, image 3 of 3
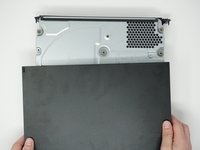
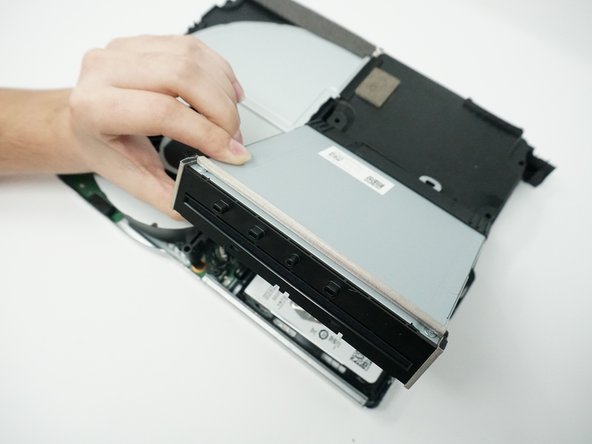
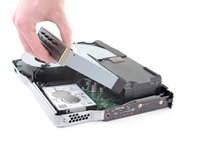
    • Flip the console back over, keeping in mind the disc drive is loose.

    • Lift the disc drive up so that its metal tab is unhooked from the power supply.

    • Flip the disc drive over and place it on the power supply. The disc drive should end up facing the opposite direction it started in.

    • The disc drive is plugged into the motherboard. Avoid pulling and bending the cables more than necessary to prevent damage.

  17. Xbox One X Project Scorpio Edition Fan Replacement, Unplug the bundled cable connector: step 17, image 1 of 2 Xbox One X Project Scorpio Edition Fan Replacement, Unplug the bundled cable connector: step 17, image 2 of 2
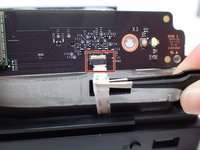
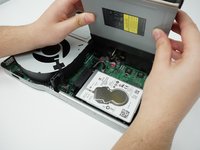
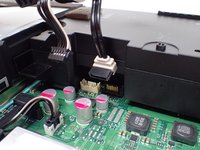
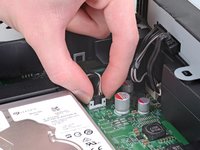
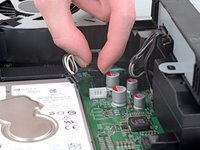
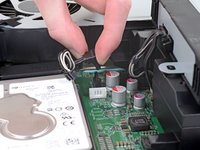
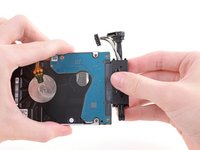
    • Unplug the bundled cable connector connecting the hard drive to the motherboard by pulling directly upward.

  18. Xbox One X Project Scorpio Edition Fan Replacement, Unplug the SATA cable: step 18, image 1 of 2 Xbox One X Project Scorpio Edition Fan Replacement, Unplug the SATA cable: step 18, image 2 of 2
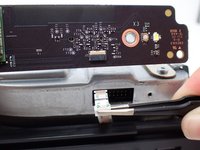
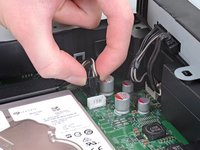
    • Unplug the SATA cable connecting the hard drive to the motherboard by pulling directly upward.

  19. Xbox One X Project Scorpio Edition Fan Replacement, Remove the hard drive: step 19, image 1 of 2 Xbox One X Project Scorpio Edition Fan Replacement, Remove the hard drive: step 19, image 2 of 2
    • Lift the hard drive assembly up out of the upper metal case.

    • When moving the hard drive, hold it by the sides to prevent damage.

  20. Xbox One X Project Scorpio Edition Fan Replacement, Remove the mounting bracket: step 20, image 1 of 1
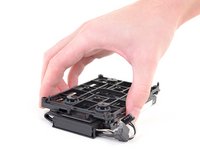
    • Flip the hard drive over so that the plastic mounting bracket is facing upward.

    • Use a T10 Torx screwdriver to remove the four 8.6 mm screws attaching the hard drive to the mounting bracket.

  21. Xbox One X Project Scorpio Edition Fan Replacement: step 21, image 1 of 2 Xbox One X Project Scorpio Edition Fan Replacement: step 21, image 2 of 2
    • Lift the mounting bracket off the hard drive.

  22. Xbox One X Project Scorpio Edition Fan Replacement, Unplug the hard drive connector: step 22, image 1 of 2 Xbox One X Project Scorpio Edition Fan Replacement, Unplug the hard drive connector: step 22, image 2 of 2
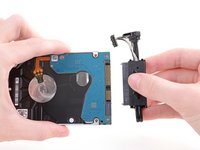
    • Unplug the hard drive connector from the hard drive by pulling parallel to the length of the drive.

  23. Xbox One X Project Scorpio Edition Fan Replacement, Fan: step 23, image 1 of 2 Xbox One X Project Scorpio Edition Fan Replacement, Fan: step 23, image 2 of 2
    • Disconnect the plastic wire connector from the motherboard.

  24. Xbox One X Project Scorpio Edition Fan Replacement: step 24, image 1 of 2 Xbox One X Project Scorpio Edition Fan Replacement: step 24, image 2 of 2
    • Remove the piece of foam by gently peeling it off the cooling system.

    • After the foam has been removed, its adhesive may not work as well.

  25. Xbox One X Project Scorpio Edition Fan Replacement: step 25, image 1 of 2 Xbox One X Project Scorpio Edition Fan Replacement: step 25, image 2 of 2
    • Remove the power supply by lifting it off the motherboard, while leaving its cord attached.

    • Set the power supply outside of the case so that the cord is no longer over the cooling system.

  26. Xbox One X Project Scorpio Edition Fan Replacement: step 26, image 1 of 2 Xbox One X Project Scorpio Edition Fan Replacement: step 26, image 2 of 2
    • Remove the cooling system by lifting it vertically off of the motherboard.

Conclusion

To reassemble your device, follow these instructions in reverse order.

2 other people completed this guide.

Ashley Masuda

Member since: 01/24/18

2,757 Reputation

7 Guides authored

Team

Cal Poly, Team S2-G6, Livingston Winter 2018 Member of Cal Poly, Team S2-G6, Livingston Winter 2018

CPSU-LIVINGSTON-W18S2G6

4 Members

23 Guides authored

2 Comments

Is there anywhere I can purchase the fan part? or will any fan work as a replacement?

crayzskullkid - Reply

I dont see the need to remove the mounting bracket for the HDD. Once the power supply is removed, you can easily unplug the fan and remove that as well. Many of the OEM replacement fans seem to come in the proper storage casing for easy plug-in-and-go.

Ivan Mischenko - Reply

Add Comment

View Statistics:

Past 24 Hours: 2

Past 7 Days: 6

Past 30 Days: 49

All Time: 9,342