
Xbox One S All Digital Edition IR Blaster Replacement

What you need

  1. Xbox One S All Digital Edition IR Blaster Replacement, Plastic Enclosure: step 1, image 1 of 3 Xbox One S All Digital Edition IR Blaster Replacement, Plastic Enclosure: step 1, image 2 of 3 Xbox One S All Digital Edition IR Blaster Replacement, Plastic Enclosure: step 1, image 3 of 3
    • Position the iFixit Opening Tool's riveted edge in between the top and bottom cover of the plastic enclosure.

    • Apply downward pressure on the iFixit Opening Tool until the security clip unlocks.

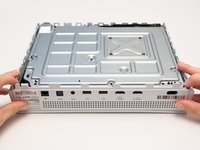
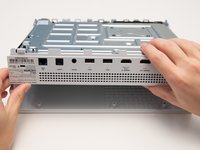
    • Repeat on different points of the plastic enclosure until the bottom cover is removed.

  2. Xbox One S All Digital Edition IR Blaster Replacement: step 2, image 1 of 2 Xbox One S All Digital Edition IR Blaster Replacement: step 2, image 2 of 2
    • Remove the six 50 mm green screws (labeled F1-F6) from the metal chassis using a Torx 10 screwdriver.

    • These screws hold the top cover of the plastic enclosure to the chassis.

  3. Xbox One S All Digital Edition IR Blaster Replacement: step 3, image 1 of 2 Xbox One S All Digital Edition IR Blaster Replacement: step 3, image 2 of 2
    • Apply pressure to peel off the sides of the casing.

    • Separate the metal chassis from the top cover, lifting the back of the chassis up and away from the top cover.

    • The plastic back panel is meant to stay attached to the metal chassis.

  4. Xbox One S All Digital Edition IR Blaster Replacement: step 4, image 1 of 1
    • Flip the metal enclosure so that the fan cover is on top.

  5. Xbox One S All Digital Edition IR Blaster Replacement, IR Blaster: step 5, image 1 of 2 Xbox One S All Digital Edition IR Blaster Replacement, IR Blaster: step 5, image 2 of 2
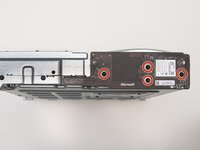
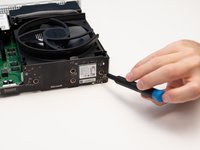
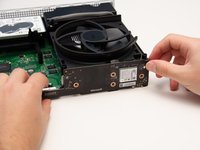
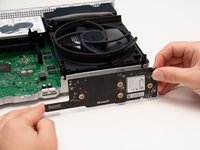
    • Remove the four 15mm screws attaching the IR Blaster to the metal chassis with the Torx T8 Security screwdriver.

  6. Xbox One S All Digital Edition IR Blaster Replacement: step 6, image 1 of 2 Xbox One S All Digital Edition IR Blaster Replacement: step 6, image 2 of 2
    • Carefully remove the IR Blaster from the metal chassis.

    • The connector is very fragile. Make sure you pull the board away from the case and not sideways.

Conclusion

To reassemble your device, follow these instructions in reverse order.

2 other people completed this guide.

Jules Hajjar

Member since: 10/10/19

1,531 Reputation

8 Guides authored

Team

Cal Poly, Team S12-G6, Regan Fall 2019 Member of Cal Poly, Team S12-G6, Regan Fall 2019

CPSU-REGAN-F19S12G6

4 Members

26 Guides authored

0 Comments

Add Comment

View Statistics:

Past 24 Hours: 1

Past 7 Days: 13

Past 30 Days: 32

All Time: 1,709