Free Shipping on Domestic Orders $75+

Xbox 360 S Hard Drive Bracket Replacement

What you need

  1. Xbox 360 S Hard Drive Bracket Replacement, Top Panel: step 1, image 1 of 1
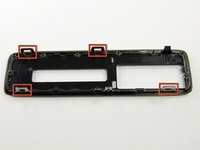
    • In the following steps, you will remove the top vent, secured to the top panel by the thirteen clips shown.

    • Take care when removing the fan vent not to break any of the plastic clips.

    Ask FixBot
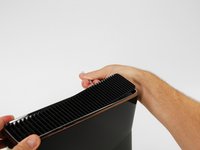
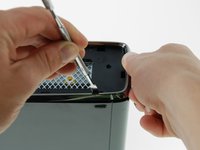
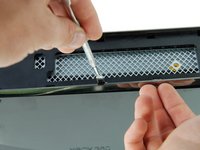
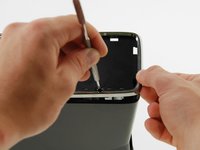
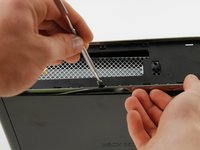
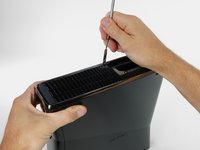
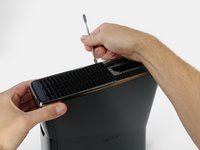
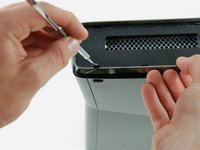
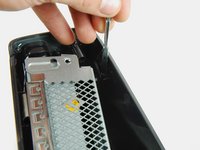
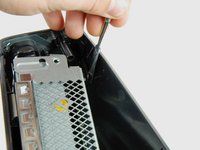
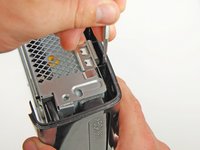
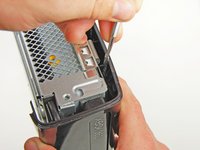
  2. Xbox 360 S Hard Drive Bracket Replacement: step 2, image 1 of 2 Xbox 360 S Hard Drive Bracket Replacement: step 2, image 2 of 2
    • Orient the console so that the words "XBOX 360" on the sides are right-side up, and the faceplate is facing to the left.

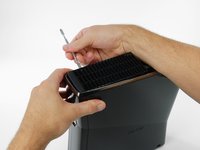
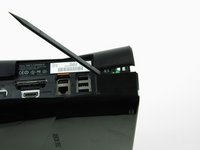
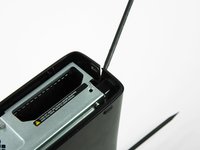
    • Insert a metal spudger between the top vent and the top bezel near the rear of the Xbox.

    • Rotate the spudger away from the console, prying the edge of the fan vent up until the two plastic clips come free.

    • Be sure to rotate the spudger far enough so that the plastic clips clear the silver rim of the top bezel.

    Ask FixBot
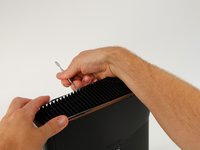
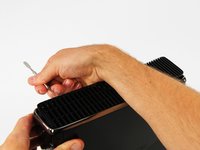
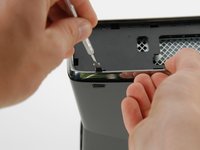
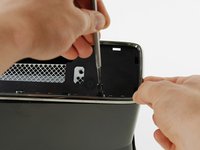
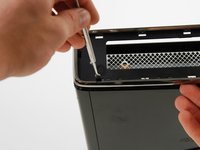
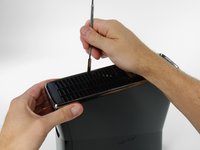
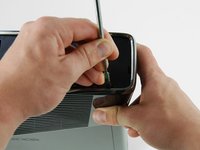
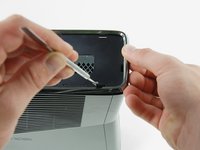
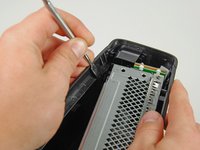
  3. Xbox 360 S Hard Drive Bracket Replacement: step 3, image 1 of 3 Xbox 360 S Hard Drive Bracket Replacement: step 3, image 2 of 3 Xbox 360 S Hard Drive Bracket Replacement: step 3, image 3 of 3
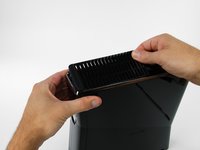
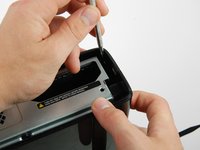
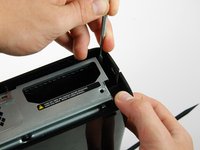
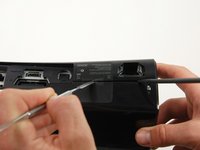
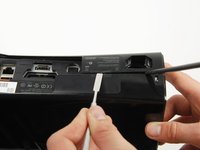
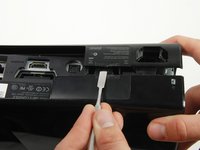
    • Insert a metal spudger between the fan vent and top bezel along the left side of the console.

    • In the same manner described above, begin prying the left side of the top vent away from the top bezel.

    • Continue prying along the left side of the device, freeing all the clips on that side.

    Ask FixBot
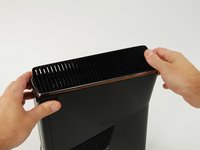
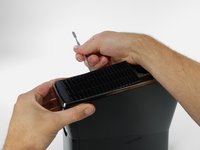
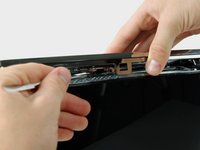
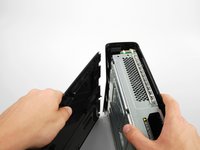
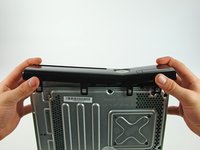
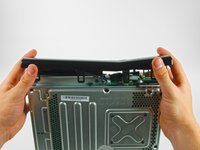
  4. Xbox 360 S Hard Drive Bracket Replacement: step 4, image 1 of 2 Xbox 360 S Hard Drive Bracket Replacement: step 4, image 2 of 2
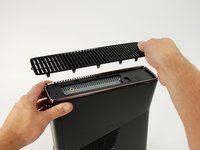
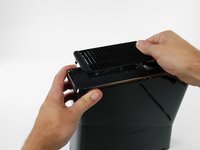
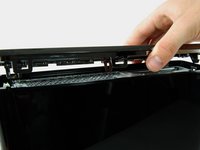
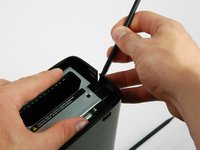
    • Lift the fan vent up from the freed left side to disengage the clips along the right side.

    • Remove the entire fan vent.

    Ask FixBot
  5. Xbox 360 S Hard Drive Bracket Replacement: step 5, image 1 of 2 Xbox 360 S Hard Drive Bracket Replacement: step 5, image 2 of 2
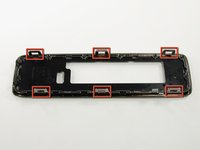
    • In the following steps, you will be releasing the six clips highlighted in red.

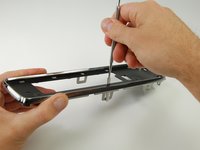
    • Each clip can be undone by inserting a metal spudger underneath the bottom edge of the clip. Once underneath the bottom edge, simply prying away from the console will free the clip.

    Ask FixBot
  6. Xbox 360 S Hard Drive Bracket Replacement: step 6, image 1 of 2 Xbox 360 S Hard Drive Bracket Replacement: step 6, image 2 of 2
    • Orient the console so that the left case is facing toward you and the faceplate is facing toward the right.

    • Insert a metal spudger through the front-most slit on the left edge of the top bezel and between the bottom edge of the clip and the left case, as described above.

    • Simultaneously rotate the spudger away from the console and pull up on the top bezel to free the clip.

    • You will hear a "pop" signifying that the clip cleared its catch.

    Ask FixBot
  7. Xbox 360 S Hard Drive Bracket Replacement: step 7, image 1 of 2 Xbox 360 S Hard Drive Bracket Replacement: step 7, image 2 of 2
    • Using the same method described above, free the two remaining clips along the left edge of the top bezel.

    Ask FixBot
  8. Xbox 360 S Hard Drive Bracket Replacement: step 8, image 1 of 1
    • Grab the entire top panel with your hands, lift up the entire left edge high enough to rest the separated clips on top of the left case.

    • You may have to go back with a spudger and undo any clips that have re-attached.

    • The top panel will not come free of the console yet.

    Ask FixBot
  9. Xbox 360 S Hard Drive Bracket Replacement: step 9, image 1 of 2 Xbox 360 S Hard Drive Bracket Replacement: step 9, image 2 of 2
    • Rotate the console so that the rear of the Xbox 360 S is facing to the right, and the right case is facing you.

    • Insert a metal spudger through the rear-most slit on the right edge of the top bezel and between the bottom edge of the clip and the right case.

    • While lifting up on the top bezel with your fingers, rotate the spudger away from the console to free the clip.

    Ask FixBot
  10. Xbox 360 S Hard Drive Bracket Replacement: step 10, image 1 of 2 Xbox 360 S Hard Drive Bracket Replacement: step 10, image 2 of 2
    • In the same manner as described in the previous steps, release the middle and front clips along the right edge of the top panel.

    Ask FixBot
  11. Xbox 360 S Hard Drive Bracket Replacement: step 11, image 1 of 1
    • Lift the top panel off the device.

    • You may have to go back with a spudger and undo any clips that have re-attached to the console.

    Ask FixBot
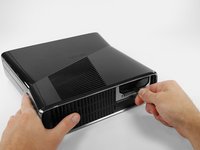
  12. Xbox 360 S Hard Drive Bracket Replacement, Hard Drive: step 12, image 1 of 3 Xbox 360 S Hard Drive Bracket Replacement, Hard Drive: step 12, image 2 of 3 Xbox 360 S Hard Drive Bracket Replacement, Hard Drive: step 12, image 3 of 3
    • Orient the Xbox 360 S so that the bottom of the console is facing toward you.

    • Push the latch holding down the hard drive cover to the left.

    • Pull the hard drive cover away from the console.

    Ask FixBot
  13. Xbox 360 S Hard Drive Bracket Replacement: step 13, image 1 of 3 Xbox 360 S Hard Drive Bracket Replacement: step 13, image 2 of 3 Xbox 360 S Hard Drive Bracket Replacement: step 13, image 3 of 3
    • Firmly grasp the fabric tab labeled with the size of the hard drive (e.g. "250 GB") attached to the hard drive.

    • Pull the hard drive straight out of the console.

    • The fabric tab is attached to a catch further inside the hard drive housing. It will take some force to pull the hard drive out.

    Ask FixBot
  14. Xbox 360 S Hard Drive Bracket Replacement, Bottom Panel: step 14, image 1 of 1
    • In the following steps, you will remove the bottom vent.

    • It is attached to the bottom panel by the seven clips shown.

    Ask FixBot
  15. Xbox 360 S Hard Drive Bracket Replacement: step 15, image 1 of 2 Xbox 360 S Hard Drive Bracket Replacement: step 15, image 2 of 2
    • Orient the Xbox 360 S so that the hard drive port is facing up and the faceplate is facing to the left.

    • Insert a metal spudger between the black bottom vent and the silver rim of the bottom bezel, in the rear right corner of the vent.

    • Rotate the spudger away from the console, prying the vent up from the bottom bezel.

    • Be sure to rotate the spudger far enough so that the clips on the vent are lifted past the silver rim of the bottom bezel.

    Ask FixBot
  16. Xbox 360 S Hard Drive Bracket Replacement: step 16, image 1 of 3 Xbox 360 S Hard Drive Bracket Replacement: step 16, image 2 of 3 Xbox 360 S Hard Drive Bracket Replacement: step 16, image 3 of 3
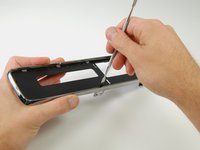
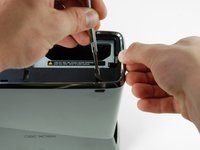
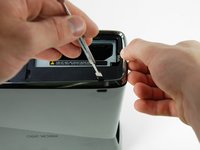
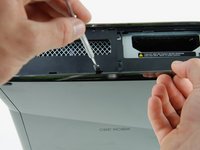
    • In the same manner as described above, pry the two remaining clips on the bottom right edge.

    • All of the clips along both the right and front edge should now be free. If other clips have come undone as well, that is fine.

    Ask FixBot
  17. Xbox 360 S Hard Drive Bracket Replacement: step 17, image 1 of 2 Xbox 360 S Hard Drive Bracket Replacement: step 17, image 2 of 2
    • Remove the bottom vent by lifting it away from the bottom bezel.

    Ask FixBot
  18. Xbox 360 S Hard Drive Bracket Replacement: step 18, image 1 of 2 Xbox 360 S Hard Drive Bracket Replacement: step 18, image 2 of 2
    • In the following steps, you will remove the bottom bezel, which is attached to the rest of the console by the four clips shown.

    • The clips shown in red can be detached by inserting a metal spudger underneath the bottom edge of the clip. Once underneath the bottom edge, simply prying away from the console will free the clip.

    Ask FixBot
  19. Xbox 360 S Hard Drive Bracket Replacement: step 19, image 1 of 2 Xbox 360 S Hard Drive Bracket Replacement: step 19, image 2 of 2
    • Insert a metal spudger through the slit near the rear left corner of the bottom bezel.

    • Rotate the spudger away from the device while lifting the rear bezel up with the other hand.

    • You may hear a "pop" signifying the clip has cleared its catch.

    Ask FixBot
  20. Xbox 360 S Hard Drive Bracket Replacement: step 20, image 1 of 2 Xbox 360 S Hard Drive Bracket Replacement: step 20, image 2 of 2
    • Insert a metal spudger through the left middle slit of the bottom bezel, and between the bottom edge of the clip and the left case.

    • Simultaneously pull the bottom bezel up and rotate the spudger away from the console to free the clip.

    • In a similar fashion, free the clip at the front of the bottom bezel's left edge.

    • The entire left side of the bottom bezel should now be free.

    Ask FixBot
  21. Xbox 360 S Hard Drive Bracket Replacement: step 21, image 1 of 2 Xbox 360 S Hard Drive Bracket Replacement: step 21, image 2 of 2
    • Turn the console around so that the faceplate is facing to the right and the right case is facing toward you.

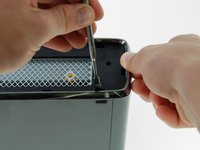
    • Insert the spudger into the rear-most slit on the right edge of the bottom bezel, and wedge it behind the clip by pushing the spudger down while pushing the tip of the spudger against the right case.

    • Simultaneously release the clip and pull the bottom bezel up.

    • This clip is especially hard to remove. Some force will be required to insert the spudger correctly.

    Ask FixBot
  22. Xbox 360 S Hard Drive Bracket Replacement: step 22, image 1 of 1
    • This clip does not have a slit in the bezel to guide you. You can locate the clip by looking under the bezel near the hard drive slot.

    • Insert a spudger between the silver rim and bottom bezel directly above the clip shown.

    • Release the clip while pulling up on the bottom bezel.

    Ask FixBot
  23. Xbox 360 S Hard Drive Bracket Replacement: step 23, image 1 of 2 Xbox 360 S Hard Drive Bracket Replacement: step 23, image 2 of 2
    • This clip is smaller than the others and should not be removed from above like the others.

    • Lift the left edge of the bottom bezel up enough to gain clearance.

    • Insert a metal spudger behind the left edge of the last clip, and push the clip away from the right case.

    Ask FixBot
  24. Xbox 360 S Hard Drive Bracket Replacement, Left Case: step 24, image 1 of 1
    • Opening your Xbox 360 any further will require breaking or removing the warranty sticker on the outer case. Your Microsoft warranty for any components not directly attached to the logic board will likely be voided by removing this seal.

    Ask FixBot
  25. Xbox 360 S Hard Drive Bracket Replacement: step 25, image 1 of 2 Xbox 360 S Hard Drive Bracket Replacement: step 25, image 2 of 2
    • Orient the console right-side up, with the faceplate facing toward you.

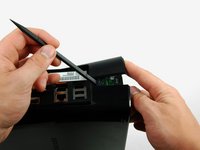
    • Locate the two clips connecting the right and left case along the top edge of the console, behind the Wi-Fi card.

    • While pushing the left and right case away from each other with one hand, pry the clips away from the case with a metal spudger.

    Ask FixBot
  26. Xbox 360 S Hard Drive Bracket Replacement: step 26, image 1 of 2 Xbox 360 S Hard Drive Bracket Replacement: step 26, image 2 of 2
    • Continue to hold the two cases apart to prevent the clips reattaching.

    • Insert a spudger between the right and left cases to hold them separate while you work elsewhere.

    Ask FixBot
  27. Xbox 360 S Hard Drive Bracket Replacement: step 27, image 1 of 2 Xbox 360 S Hard Drive Bracket Replacement: step 27, image 2 of 2
    • Flip the Xbox over so the faceplate is facing left, and the left case is facing toward you.

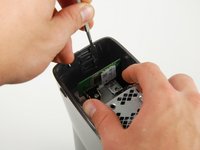
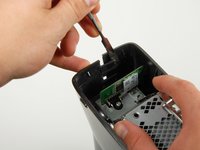
    • While pushing the left and right cases apart with one hand, free one clip located beside the hard drive slot.

    Ask FixBot
  28. Xbox 360 S Hard Drive Bracket Replacement: step 28, image 1 of 2 Xbox 360 S Hard Drive Bracket Replacement: step 28, image 2 of 2
    • Continue to hold the cases apart to prevent the clips from reattaching.

    • Place another spudger between the left and right cases directly below the clip.

    Ask FixBot
  29. Xbox 360 S Hard Drive Bracket Replacement: step 29, image 1 of 3 Xbox 360 S Hard Drive Bracket Replacement: step 29, image 2 of 3 Xbox 360 S Hard Drive Bracket Replacement: step 29, image 3 of 3
    • Insert the flat edge of a metal spudger between the left and right cases where the warranty sticker used to be.

    • Pry the left case upwards to form a gap between the two cases, and slide the spudger in toward the left case.

    • Rotate the spudger upward to release the last clip.

    • The spudgers holding the top and bottom clips apart may be removed.

    Ask FixBot
  30. Xbox 360 S Hard Drive Bracket Replacement: step 30, image 1 of 2 Xbox 360 S Hard Drive Bracket Replacement: step 30, image 2 of 2
    • Release one clip in the front left corner of the top edge securing the left case to the faceplate.

    Ask FixBot
  31. Xbox 360 S Hard Drive Bracket Replacement: step 31, image 1 of 2 Xbox 360 S Hard Drive Bracket Replacement: step 31, image 2 of 2
    • Flip the console over so the bottom is facing upward.

    • Release one clip in the front left corner of the bottom edge securing the left case to the faceplate.

    • Rotate the left case away from the device to release the last two inner clips.

    • Remove the left case.

    Ask FixBot
  32. Xbox 360 S Hard Drive Bracket Replacement, Faceplate: step 32, image 1 of 2 Xbox 360 S Hard Drive Bracket Replacement, Faceplate: step 32, image 2 of 2
    • Orient the console right-side-up, with the faceplate facing forward.

    • Release the clip near the front right corner of the top edge securing the right case to the faceplate.

    Ask FixBot
  33. Xbox 360 S Hard Drive Bracket Replacement: step 33, image 1 of 1
    • Turn the console over, so that the bottom is facing upward, and the faceplate is facing forward.

    • Release the clip in the bottom right corner of the top edge securing the right case to the front case.

    Ask FixBot
  34. Xbox 360 S Hard Drive Bracket Replacement: step 34, image 1 of 2 Xbox 360 S Hard Drive Bracket Replacement: step 34, image 2 of 2
    • Lift the left edge of the faceplate upward to release the last two clips securing the faceplate to the right case.

    • Detach the faceplate from the rest of the device.

    • The faceplate is still attached to the console by a thin ribbon cable. Do not attempt to completely remove the faceplate yet.

    Ask FixBot
  35. Xbox 360 S Hard Drive Bracket Replacement: step 35, image 1 of 3 Xbox 360 S Hard Drive Bracket Replacement: step 35, image 2 of 3 Xbox 360 S Hard Drive Bracket Replacement: step 35, image 3 of 3
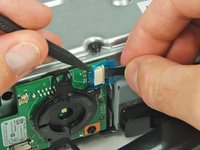
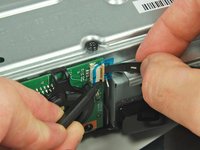
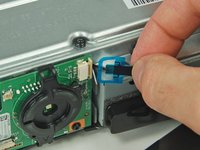
    • Using a spudger or fingernail, lift the clear blue tab away from the connector.

    • Slide the locking tab on the power switch board cable connector toward the top of the console.

    • The locking tab will only move about 2 mm.

    • Pull the power switch cable straight out of the connector.

    • The faceplate is now free of the rest of the console.

    Ask FixBot
  36. Xbox 360 S Hard Drive Bracket Replacement, RF Module: step 36, image 1 of 1
    • Remove the two 5.6 mm T8 Torx screws securing the RF module to the metal case.

    Ask FixBot
  37. Xbox 360 S Hard Drive Bracket Replacement: step 37, image 1 of 2 Xbox 360 S Hard Drive Bracket Replacement: step 37, image 2 of 2
    • The RF module is still connected to the Xbox by a large USB-type connector.

    • Pull the board directly away from the Xbox to remove it.

    Ask FixBot
  38. Xbox 360 S Hard Drive Bracket Replacement, Wi-Fi Board: step 38, image 1 of 3 Xbox 360 S Hard Drive Bracket Replacement, Wi-Fi Board: step 38, image 2 of 3 Xbox 360 S Hard Drive Bracket Replacement, Wi-Fi Board: step 38, image 3 of 3
    • Remove the single T10 Torx screw holding in the wireless card.

    • Pull the Wi-Fi Board out of the console.

    Ask FixBot
  39. Xbox 360 S Hard Drive Bracket Replacement, Right Case: step 39, image 1 of 1
    • Remove the large white sticker from the metal frame to expose a screw.

    • This is a tamper-evident sticker, but don't worry—Microsoft can't legally void your warranty as long as you don't damage anything. Have fun!

    Ask FixBot
  40. Xbox 360 S Hard Drive Bracket Replacement: step 40, image 1 of 1
    • Remove the five 55.5 mm T10 Torx screws securing the right case to the metal frame.

    Ask FixBot
  41. Xbox 360 S Hard Drive Bracket Replacement: step 41, image 1 of 1
    • Turn the Xbox over so the right case is facing up.

    • Lift the right case off by its metal framework.

    Ask FixBot
  42. Xbox 360 S Hard Drive Bracket Replacement, Optical Drive: step 42, image 1 of 2 Xbox 360 S Hard Drive Bracket Replacement, Optical Drive: step 42, image 2 of 2
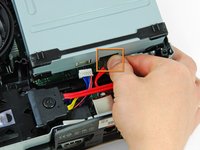
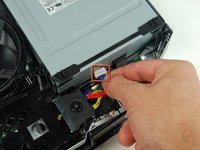
    • Disconnect the optical drive data cable from the back of the optical drive.

    • Disconnect the power cable from the back of the optical drive.

    Ask FixBot
  43. Xbox 360 S Hard Drive Bracket Replacement: step 43, image 1 of 1
    • Lift the optical drive out of the Xbox.

    Ask FixBot
  44. Xbox 360 S Hard Drive Bracket Replacement, Hard Drive Bracket: step 44, image 1 of 1
    • Turn the console over so that the metal case is facing up.

    • Remove the single 11.3 mm gold T10 Torx screw from the hole marked "G."

    Ask FixBot
  45. Xbox 360 S Hard Drive Bracket Replacement: step 45, image 1 of 2 Xbox 360 S Hard Drive Bracket Replacement: step 45, image 2 of 2
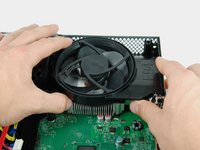
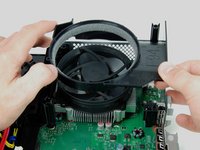
    • Lift the fan duct off the fan.

    • There is a locator peg underneath the fan duct (top right corner of the fan duct as viewed in the pictures). When reinstalling look down the screw hole to aid alignment.

    Ask FixBot
  46. Xbox 360 S Hard Drive Bracket Replacement: step 46, image 1 of 2 Xbox 360 S Hard Drive Bracket Replacement: step 46, image 2 of 2
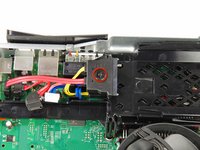
    • Remove the single 9.2 mm T10 Torx screw securing the hard drive cable connector to the plastic bracket.

    • Lift the hard drive cable connector off the hard drive bracket.

    Ask FixBot
  47. Xbox 360 S Hard Drive Bracket Replacement: step 47, image 1 of 1
    • Remove the 11.3 mm T10 Torx screw holding the hard drive bracket to the metal frame, near the DC-In port.

    Ask FixBot
  48. Xbox 360 S Hard Drive Bracket Replacement: step 48, image 1 of 1
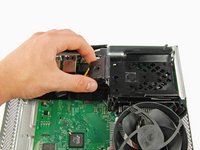
    • Lift the hard drive bracket out of the metal frame.

    Ask FixBot
Conclusion

To reassemble your device, follow these instructions in reverse order.

21 other people completed this guide.

David Hodson

Member since: 04/13/10

156,161 Reputation

127 Guides authored

0 Guide Comments

Add Comment

View Statistics:

Past 24 Hours: 8

Past 7 Days: 44

Past 30 Days: 240

All Time: 54,805