Introduction
In this guide, you are going to remove and replace your malfunctioning Wi-Fi card.
What you need
-
-
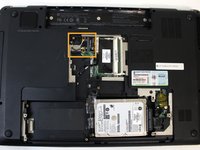
Remove the five Philips #1 screws on the panel located underneath the laptop battery.
-
Lift up the panel.
-
-
-
-
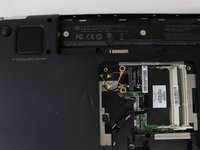
Use a spudger to lift the two antenna connectors from the wireless card.
-
Using a Philips #1 Screwdriver, remove the two screws holding the card in place.
-


Conclusion
To reassemble your device, follow these instructions in reverse order.
Team

UMass Dartmouth, Team S3-G1, Botvin Spring 2017 Member of UMass Dartmouth, Team S3-G1, Botvin Spring 2017
UMASSD-BOTVIN-S17S3G1
3 Members
4 Guides authored