
Wii U GamePad Motherboard Replacement

What you need

  1. Wii U GamePad Motherboard Replacement, Battery: step 1, image 1 of 1
    • Place Gamepad face down and remove the two 4.7 mm screws with a Phillips size #00 screwdriver.

  2. Wii U GamePad Motherboard Replacement: step 2, image 1 of 1
    • Lift and remove the battery plate.

  3. Wii U GamePad Motherboard Replacement: step 3, image 1 of 3 Wii U GamePad Motherboard Replacement: step 3, image 2 of 3 Wii U GamePad Motherboard Replacement: step 3, image 3 of 3
    • With your finger, press down and pull back on the battery connector plug.

    • Remove the battery from the battery case.

  4. Wii U GamePad Motherboard Replacement, Outer Case: step 4, image 1 of 3 Wii U GamePad Motherboard Replacement, Outer Case: step 4, image 2 of 3 Wii U GamePad Motherboard Replacement, Outer Case: step 4, image 3 of 3
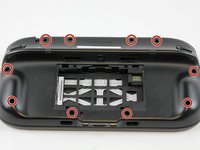
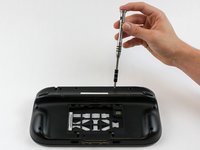
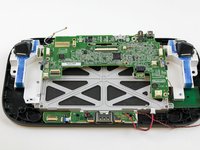
    • Remove 10 9mm screws with Tri-Wing size Y1 screwdriver around the outer case.

    • Lift up on the back of case.
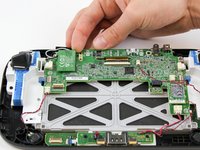
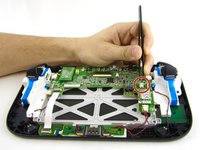
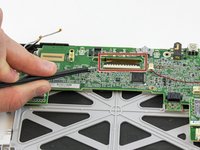
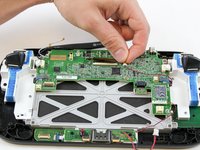
    • Lift gently because the rumble motor in the back of the case is still connected by a cable to the motherboard.

  5. Wii U GamePad Motherboard Replacement: step 5, image 1 of 1
    • Unplug outer case rumble motor connector from the motherboard with your fingers.

  6. Wii U GamePad Motherboard Replacement, WiFi: step 6, image 1 of 3 Wii U GamePad Motherboard Replacement, WiFi: step 6, image 2 of 3 Wii U GamePad Motherboard Replacement, WiFi: step 6, image 3 of 3
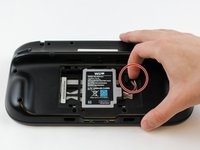
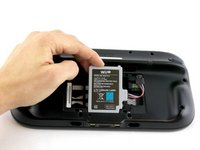
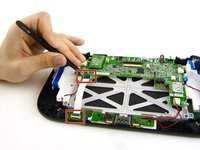
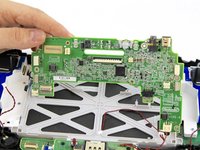
    • Open the top and bottom clasp that connects the white flex cable to the motherboard with the tweezer.

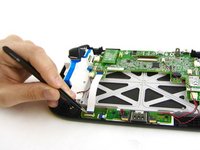
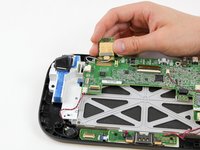
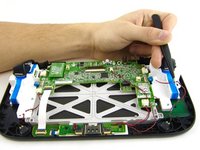
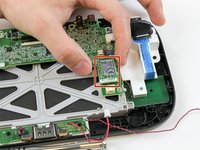
    • Remove the white flex cable with the tweezers.
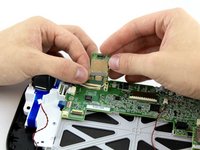
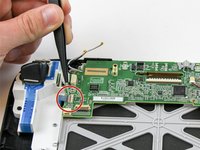
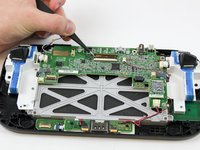
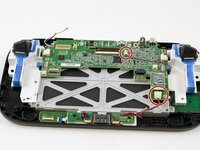
  7. Wii U GamePad Motherboard Replacement: step 7, image 1 of 2 Wii U GamePad Motherboard Replacement: step 7, image 2 of 2
    • With your fingers, lift and remove WiFi board.

    • Remove the board carefully as there are still two wires attached.

  8. Wii U GamePad Motherboard Replacement: step 8, image 1 of 2 Wii U GamePad Motherboard Replacement: step 8, image 2 of 2
    • Disconnect the black and white wires off of the back of the WiFi module.

  9. Wii U GamePad Motherboard Replacement: step 9, image 1 of 1
    • Lift and remove the WiFi module.

  10. Wii U GamePad Motherboard Replacement, Speakers: step 10, image 1 of 2 Wii U GamePad Motherboard Replacement, Speakers: step 10, image 2 of 2
    • With your fingers, unplug the left speaker cable from the motherboard.

  11. Wii U GamePad Motherboard Replacement: step 11, image 1 of 2 Wii U GamePad Motherboard Replacement: step 11, image 2 of 2
    • Remove the right speaker cable that's connected to the motherboard with the tweezers.

  12. Wii U GamePad Motherboard Replacement, Motherboard: step 12, image 1 of 1
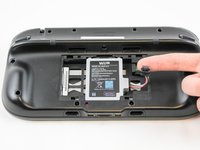
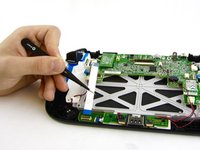
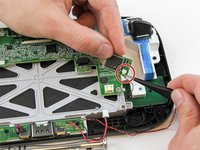
    • Disconnect the analog connector with tweezers.

  13. Wii U GamePad Motherboard Replacement: step 13, image 1 of 2 Wii U GamePad Motherboard Replacement: step 13, image 2 of 2
    • Remove the blue connector using tweezers.

  14. Wii U GamePad Motherboard Replacement: step 14, image 1 of 2 Wii U GamePad Motherboard Replacement: step 14, image 2 of 2
    • Carefully lift the black clasp. It is prone to breaking if only lifted from one point. Remove the brown ribbon by using the tweezers.

    • Unclasp and release the small digitizer ribbon cable to the left of the brown ribbon. Be careful, the clasp breaks easily.

  15. Wii U GamePad Motherboard Replacement: step 15, image 1 of 1
    • Remove the small orange ribbon with the tweezers.

  16. Wii U GamePad Motherboard Replacement: step 16, image 1 of 3 Wii U GamePad Motherboard Replacement: step 16, image 2 of 3 Wii U GamePad Motherboard Replacement: step 16, image 3 of 3
    • Remove these two connectors to the motherboard with your fingers.

  17. Wii U GamePad Motherboard Replacement: step 17, image 1 of 2 Wii U GamePad Motherboard Replacement: step 17, image 2 of 2
    • Remove the NFC communicator.

    • When removing the NFC communicator, be careful with the small connector on the back side.

    • Remove the small connector plug-in on the back.

  18. Wii U GamePad Motherboard Replacement: step 18, image 1 of 3 Wii U GamePad Motherboard Replacement: step 18, image 2 of 3 Wii U GamePad Motherboard Replacement: step 18, image 3 of 3
    • Remove the remaining three 5.1 mm screws using the Phillips size #0 screwdriver.

    • Lift and remove the mother board.

Conclusion

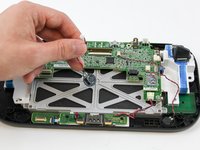
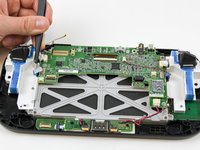
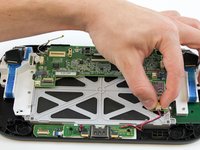
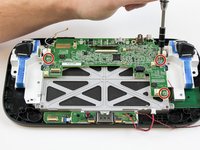
To reassemble your device, follow these instructions in reverse order.

13 other people completed this guide.

Valentina Cerruty

Member since: 02/10/16

3,357 Reputation

7 Guides authored

Team

USF Tampa, Team 1-6, Sullivan Spring 2016 Member of USF Tampa, Team 1-6, Sullivan Spring 2016

USFT-SULLIVAN-S16S1G6

4 Members

40 Guides authored

2 Comments

i need help with the tiny clasp for the touch glass ribbon. the tiny grey clasp snapped off and now the ribbon will not stay in, so i can't use the touch screen, if there a way to secure that tiny ribbon to the contact?

Roxanne - Reply

How can i see what version off motherboard i need to buy to replace it
I got 30X52504 as number on the board

VillainVibe - Reply

Add Comment

View Statistics:

Past 24 Hours: 3

Past 7 Days: 42

Past 30 Days: 179

All Time: 16,058